Pi UpMix
Welcome
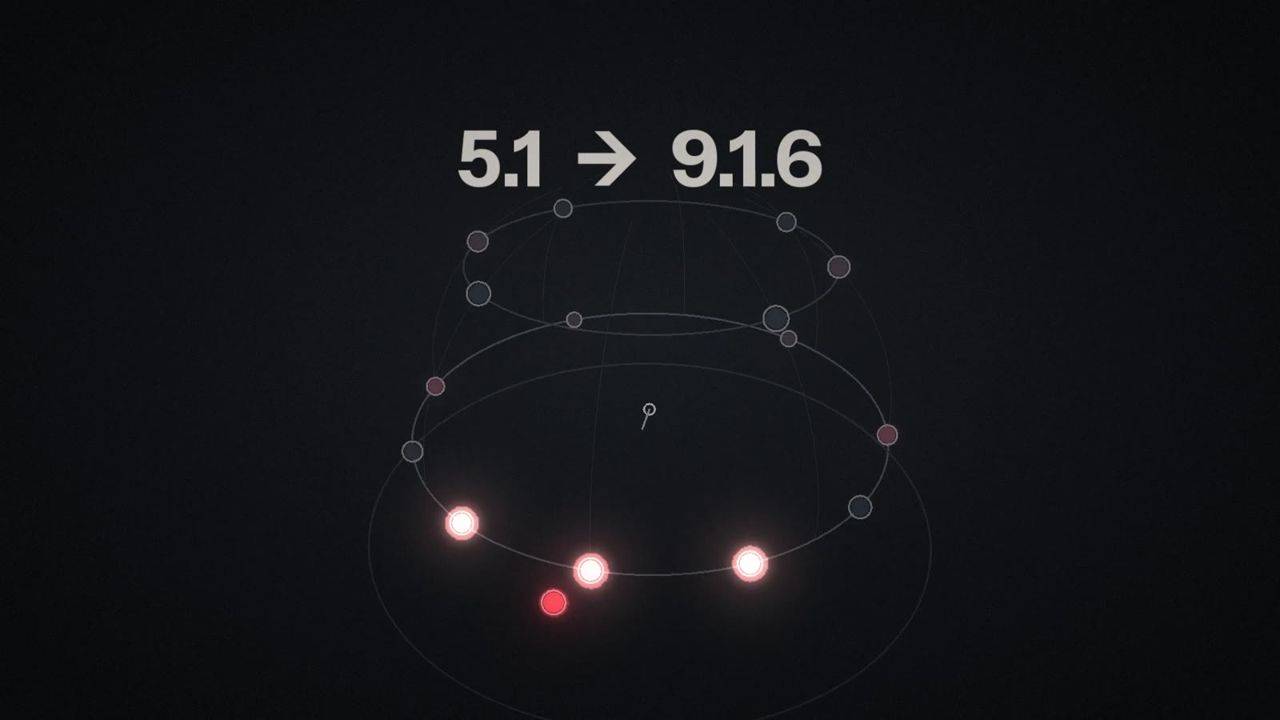
Pi UpMix by Saharty turns stereo (or mono) into surround and immersive sound. It takes a finished stereo mix and spreads it across every speaker in the room, from a simple LCR up to a 16-channel 9.1.6 layout, or renders it to headphones, Lo/Ro, Lt/Rt or Ambisonics. It also works as a format converter: feed it a 5.1 or 7.1.4 bed and it carries every channel to the matching speaker of a bigger or smaller layout.
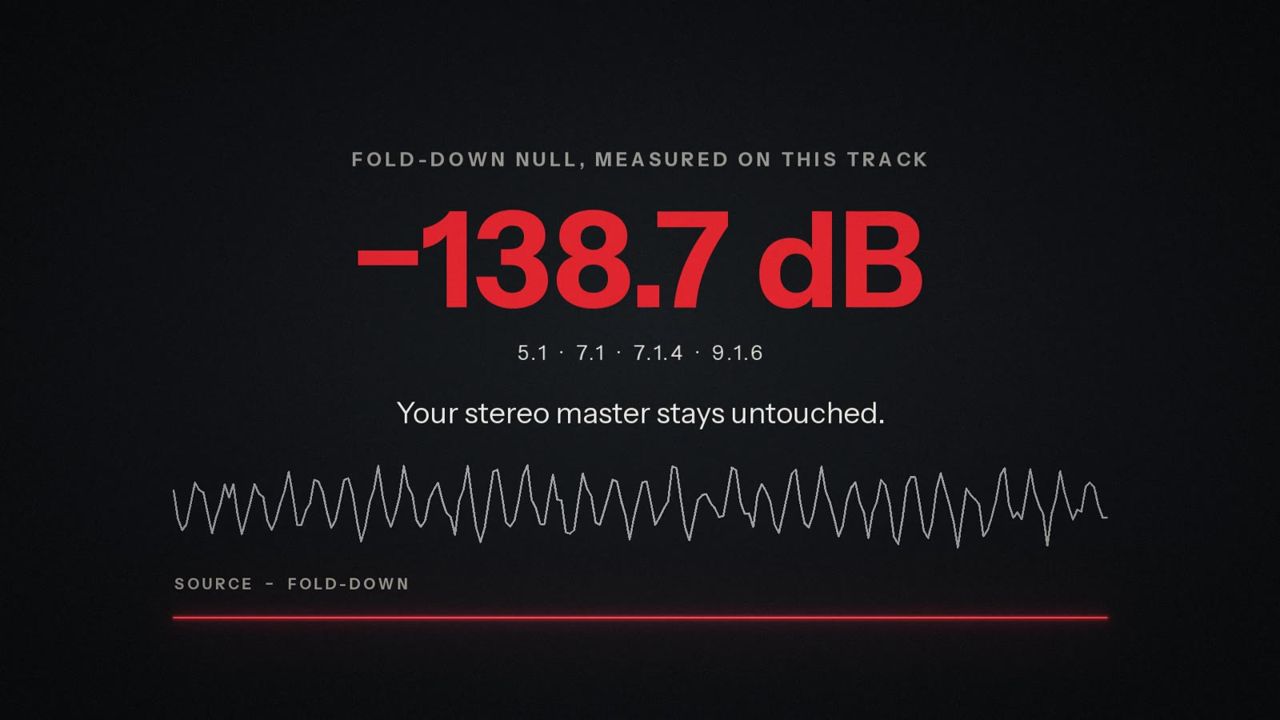
Its signature feature is Downmix lock. With the lock on (the default), the upmix is built so that the standard stereo fold-down of the result gives back your original stereo exactly. There are no phase tricks and no comb filtering: the version most people will hear, the stereo one, stays untouched. On our test material the fold-down null measures about -138 dB on every layout.
Pi UpMix is made for:
- Studio engineers delivering surround and immersive versions of catalogue releases, live recordings, film and broadcast material from stereo masters.
- Live and installation engineers feeding surround and overhead speakers in clubs, theatres and installations from a stereo playback or a console bus, in real time.
- Anyone without an immersive room, who can monitor the full layout on headphones with the built-in binaural renderer.
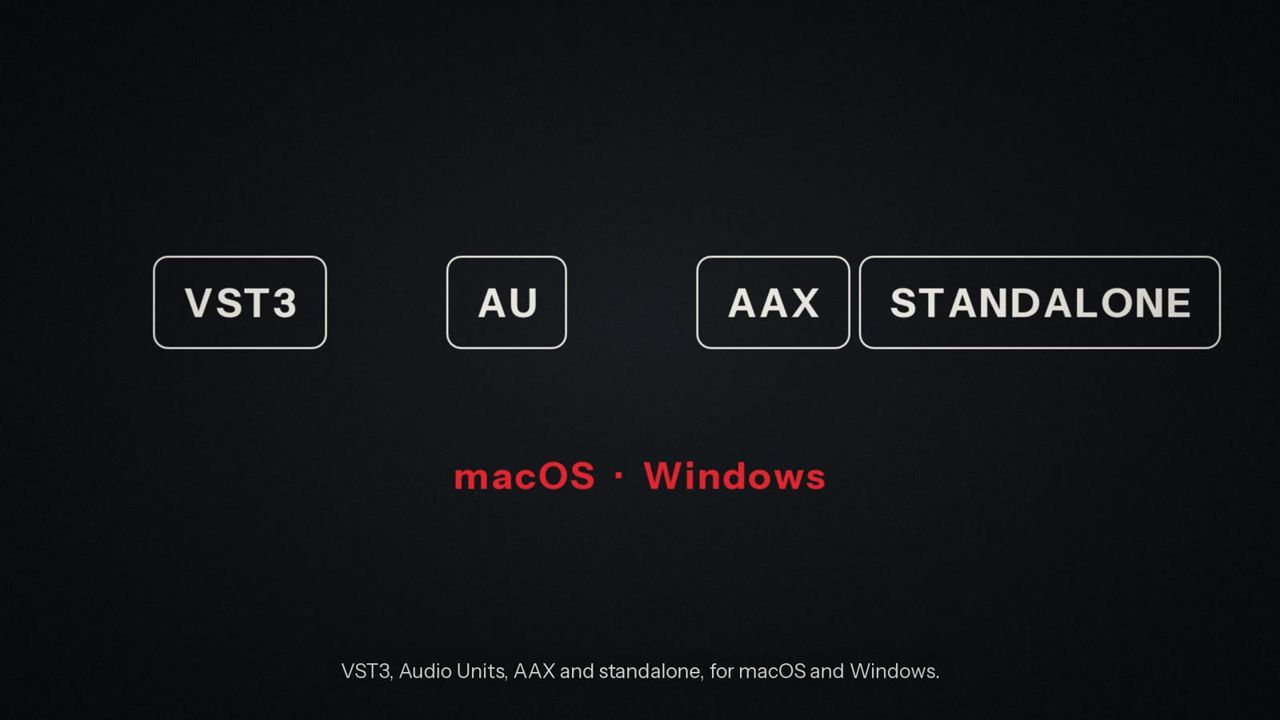
It comes as VST3, Audio Unit (macOS), AAX and a standalone app for macOS and Windows. The standalone app adds an offline file renderer.
What's new in version 1.1
- Stem separation (Stems tab, off by default). When you turn it on, the mix is split into vocal, drums, bass, instruments and ambience, and each part is placed on its own. It is still exact with Downmix lock.
- Stem objects output: the eight stems go to the first eight outputs, and their positions can be sent to an object renderer over ADM-OSC.
- Room regeneration (Space tab, creative mode): measures the decay of the room in your source and regenerates a matching room in the surround and height speakers.
- Fold-down guard: keeps an exact stereo fold-down even in creative mode with delays, diffusion and room.
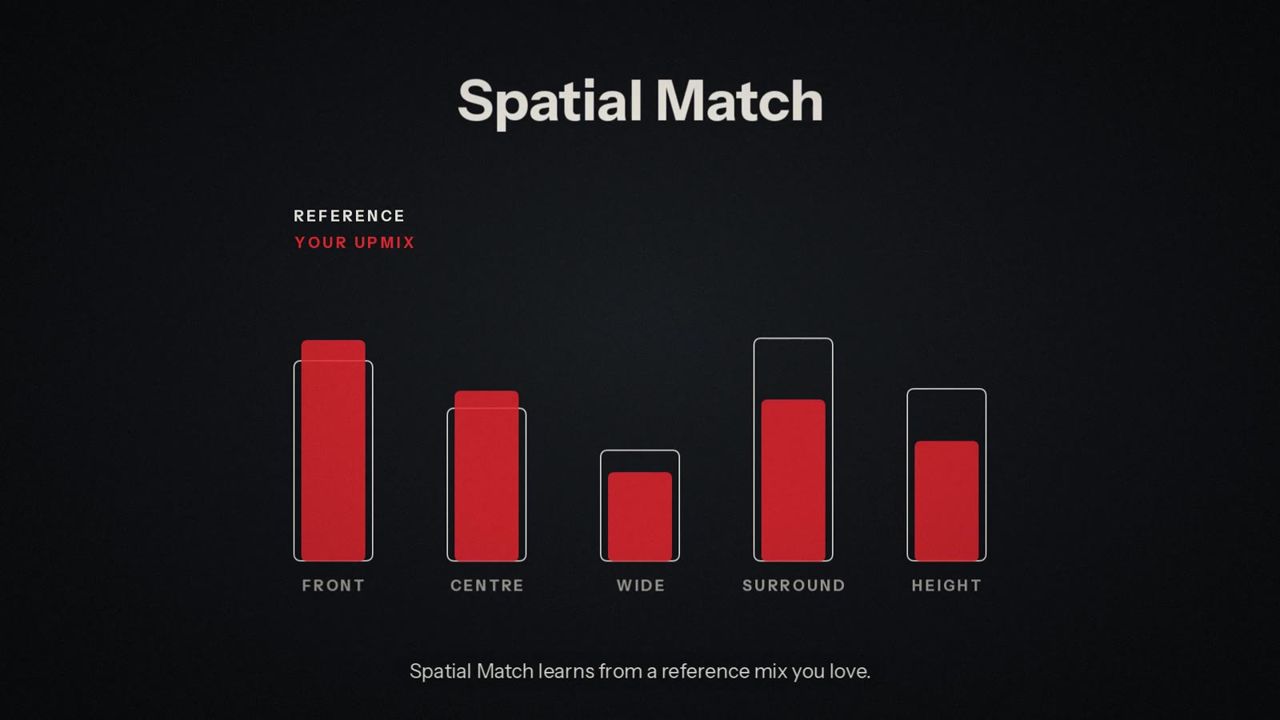
- Spatial Match: learns how a reference surround or immersive mix uses its speakers and moves your upmix towards it, band by band.
- Head tracking for the headphone render, over OSC.
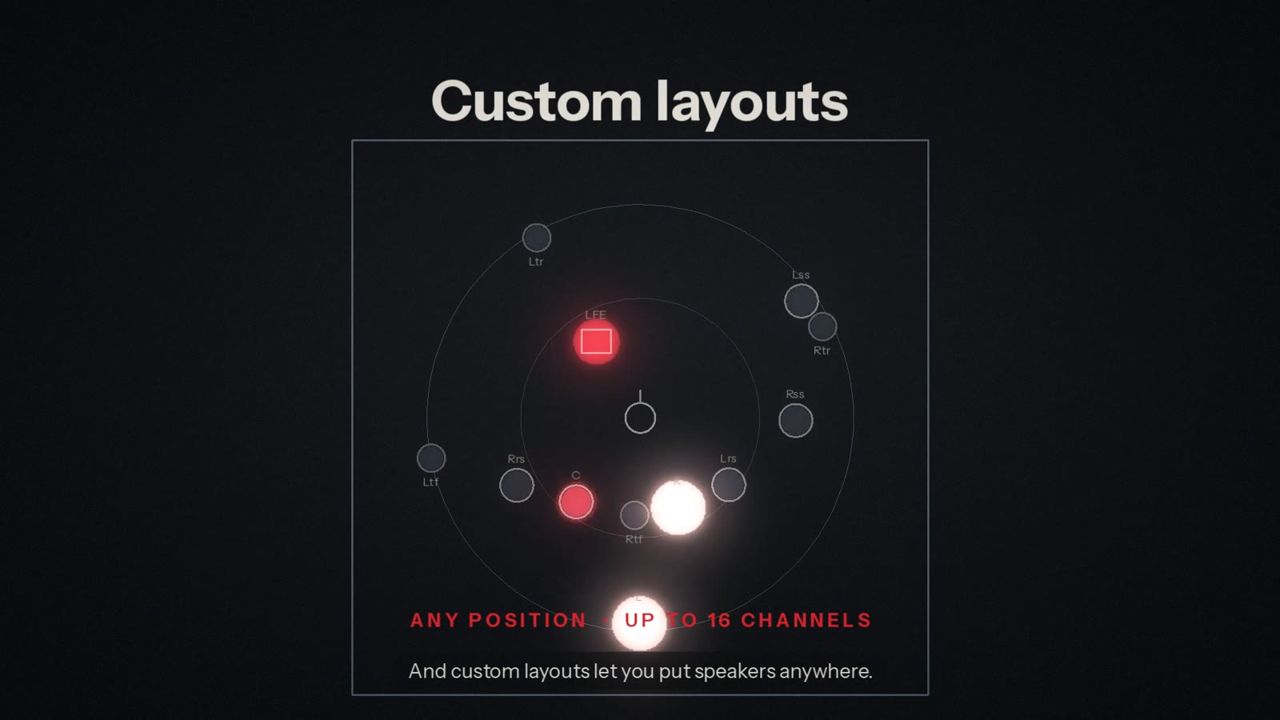
- Custom speaker layouts: type in your own speakers (up to 16).
- Live (5 ms) quality for live sound and broadcast.
Quick start
- Run the installer for your system (macOS .dmg or Windows .exe) and restart your audio software.
- Open Pi UpMix and click Activate... in the header. Enter your licence key and click Activate, or click Start 15-day free trial.
- In your DAW, create a track or bus with the target layout (for example 7.1.4, 12 channels) and put your stereo source on its L and R channels, or use a stereo-in / multichannel-out insert where your host offers one.
- Insert Pi UpMix by Saharty on that track.
- Check the readout under the speaker map: it should say, for example, "Input Stereo, output 7.1.4".
- Press play. The speaker map lights up as each speaker receives sound.
- Choose a starting point from the preset menu, for example Music natural.
- Adjust the Front, Surround and Height rows on the Main tab to taste.
- Leave Downmix lock on and watch the Fold-down match readout: it confirms your stereo is preserved.
- No speakers? Choose Monitor headphones in the monitoring menu to hear the whole layout binaurally on the L and R outputs.
Installation
macOS
- Open the downloaded .dmg.
- Double-click Install Pi UpMix by Saharty.pkg.
- Click Customize if you want to choose the formats (VST3, Audio Unit, AAX, standalone app). By default all are installed.
- Finish the installer and restart your audio software. Look for Pi UpMix by Saharty from the manufacturer Saharty.
The .dmg also contains Uninstall Pi UpMix.command, which removes everything.
Note: If macOS says the installer is from an unidentified developer, right-click the installer, choose Open, then Open again, or allow it in System Settings > Privacy & Security.
Windows
- Run the setup .exe and follow the steps.
- Restart your audio software.
Note: If Windows SmartScreen shows a warning, choose More info, then Run anyway.
Where the files go
| Format | macOS | Windows |
|---|---|---|
| VST3 | /Library/Audio/Plug-Ins/VST3 | C:\Program Files\Common Files\VST3 |
| Audio Unit | /Library/Audio/Plug-Ins/Components | (not available) |
| AAX | /Library/Application Support/Avid/Audio/Plug-Ins | C:\Program Files\Common Files\Avid\Audio\Plug-Ins |
| Standalone app | /Applications | C:\Program Files\Saharty\Pi UpMix |
Everything Pi UpMix needs is inside the installer. Nothing else has to be installed.
First launch
- Plug-in: insert it on a track. The window opens at its default size; drag the bottom-right corner to resize it (from 780 x 495 up to 1560 x 990, aspect ratio fixed). The size is remembered with the session.
- Standalone app: open Pi UpMix by Saharty from Applications (macOS) or the Start menu (Windows). On macOS the app asks for permission to use audio input, since it processes live sound from your interface. Use the app's audio settings to choose your audio device and the input and output channels.
Using it in your DAW
| Host | How to set it up |
|---|---|
| Pro Tools | Insert it on a multichannel track (for example 7.1.4) whose L and R carry the stereo source, or use a mono or stereo to multichannel version where Pro Tools offers one. |
| Logic Pro | In a surround project, insert it on a stereo track and choose the stereo to surround format. |
| Cubase and Nuendo | Route the track or a group to the target layout; the plug-in takes stereo in and multichannel out. |
| Reaper | Set the track to the needed channel count (12 for 7.1.4). Pi UpMix uses the discrete channel orders below. |
| Stereo-only hosts | You get the stereo output: headphones (binaural), Lo/Ro or Lt/Rt (Detail tab, Stereo output). |
Discrete channel orders (Reaper and other hosts that only know a channel count, and the files written by the standalone renderer):
| Channels | Layout | Order |
|---|---|---|
| 3 | LCR | L R C |
| 4 | Quad | L R Ls Rs |
| 5 / 6 | 5.0 / 5.1 | L R C (LFE) Ls Rs |
| 7 / 8 | 7.0 / 7.1 | L R C (LFE) Lss Rss Lrs Rrs |
| 9 / 10 | 7.0.2 / 7.1.2 | 7.x then Ltm Rtm |
| 11 / 12 | 7.0.4 / 7.1.4 | 7.x then Ltf Rtf Ltr Rtr |
| 13 / 14 | 7.0.6 / 7.1.6 | 7.x then Ltf Rtf Ltm Rtm Ltr Rtr |
| 15 / 16 | 9.0.6 / 9.1.6 | L R C (LFE) Lss Rss Lrs Rrs Lw Rw Ltf Rtf Ltm Rtm Ltr Rtr |
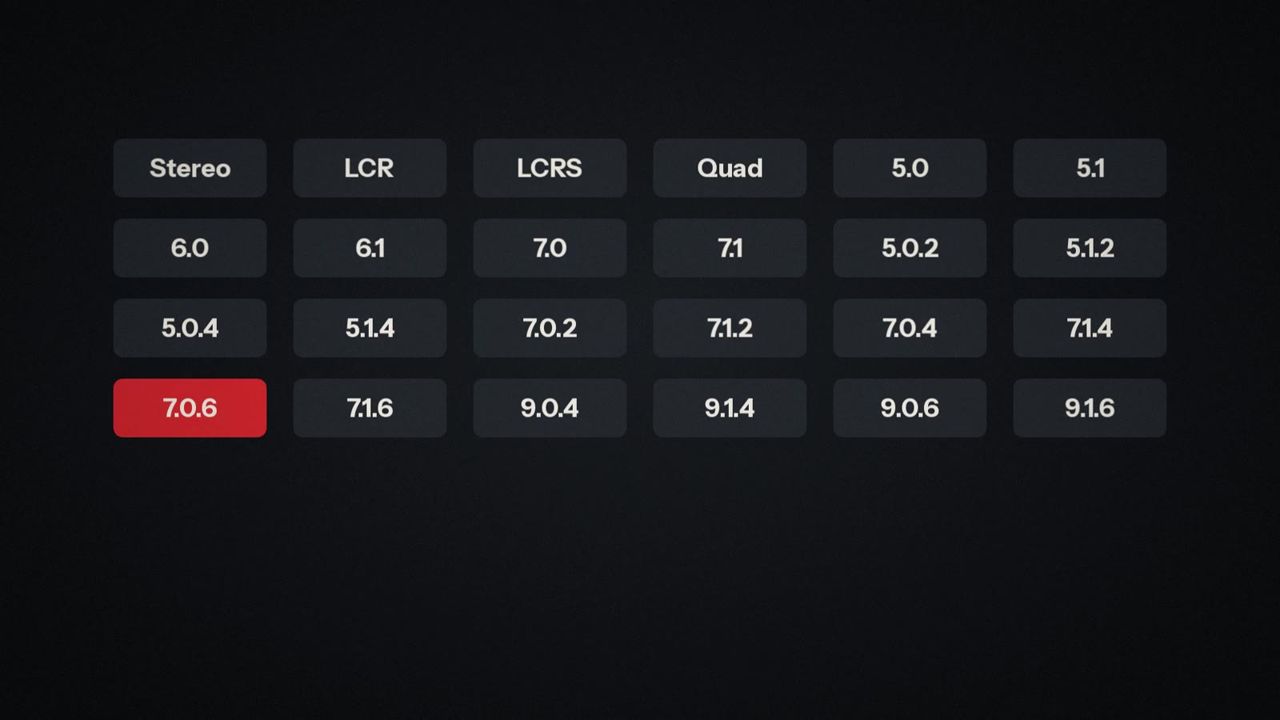
Hosts that name their channels (Pro Tools, Logic Pro, Cubase, Nuendo) can use any of the named layouts: LCR, LCRS, quad, 5.0, 5.1, 6.0, 6.1, 7.0, 7.1, 5.0.2, 5.1.2, 5.0.4, 5.1.4, 7.0.2, 7.1.2, 7.0.4, 7.1.4, 7.0.6, 7.1.6, 9.0.4, 9.1.4, 9.0.6 and 9.1.6, or any other speaker set built from these speakers (up to 16 channels, with L and R present). An Ambisonics bus of order 1 to 3 is also accepted as the output.
Activation & licensing
Pi UpMix is licensed per computer: one licence activates one computer, and you can move it at any time. The VST3, AU, AAX and standalone versions on one computer share the same licence, so you activate only once.
Buying and the free trial
- Buy Pi UpMix at pi-ware.com. Your licence key arrives by email after purchase.
- You can try every feature free for 15 days. No payment details are needed. Start the trial from the licence window (Start 15-day free trial).
- You get free updates.
The licence window
Click the licence button in the header to open the licence window. The button's label tells you the state at a glance:
| Button label | Meaning |
|---|---|
| Activate... (highlighted) | Not activated on this computer, or limited. |
| Trial... | The free trial is running. |
| Notice... | A notice is counting down (see below). |
| Licence... | Activated. Every feature is on. |
When there is something to tell you, a banner also appears across the top of the window; click it to open the licence window.
The licence window shows the current status, This computer: with the computer's name, a Licence key field and these actions:
- Activate: activates the key you typed (format XXXXX-XXXXX-XXXXX-XXXXX).
- Start 15-day free trial: shown while the computer is not activated or on a trial.
- Deactivate this computer: frees this computer so the licence can be used elsewhere.
- Offline activation: shows the offline steps.
- Buy a licence: opens the product's page on pi-ware.com.
How to activate online
- Click Activate... in the header.
- Paste your licence key in the Licence key field.
- Click Activate (or press Return). The status line changes to "Activated ... Every feature is on."
How to activate offline
Use this when the computer running Pi UpMix has no internet connection.
- Type your licence key in the Licence key field first.
- Click Offline activation. A request code appears.
- Click Copy code and take the code to any device with internet access.
- Paste the code at pi-ware.com/activate. You receive a licence file.
- Bring the file back and click Load licence file... to load it (.pilic file).
Moving the licence to a new computer
- From the old computer: open the licence window and click Deactivate this computer, then activate on the new one.
- If you no longer have the old computer: just activate on the new computer. Pi UpMix tells you the licence is active on another computer and asks whether to move it (Move it here). The dialog also shows how many moves you have left this year. The old computer gets a 24-hour notice, then switches to limited features.
- You can also deactivate or reset computers from your account at pi-ware.com/account.
Checks, notices and limited mode
- Pi UpMix checks the licence whenever it finds an internet connection (at launch, then every hour). It keeps working offline with no time limit.
- Nothing is ever limited without at least 24 hours of notice on that computer (for example after the licence was moved, the trial ended or the computer was deactivated from your account). During the notice every feature works and the banner shows the countdown.
- In limited mode (or when not activated) the audio passes through unprocessed, with a short 50 ms crossfade: the input goes to the matching output channels (L to L, R to R, the other speakers silent), with the same latency as the upmix, so your session stays in sync. The window, controls and presets stay available. In the standalone app the render button shows Activate to render.
Licence file location
| System | Path |
|---|---|
| macOS | ~/Library/Application Support/Pi by Saharty/Licences/pi-upmix.pilic |
| Windows | %APPDATA%\Pi by Saharty\Licences\pi-upmix.pilic |
Interface tour
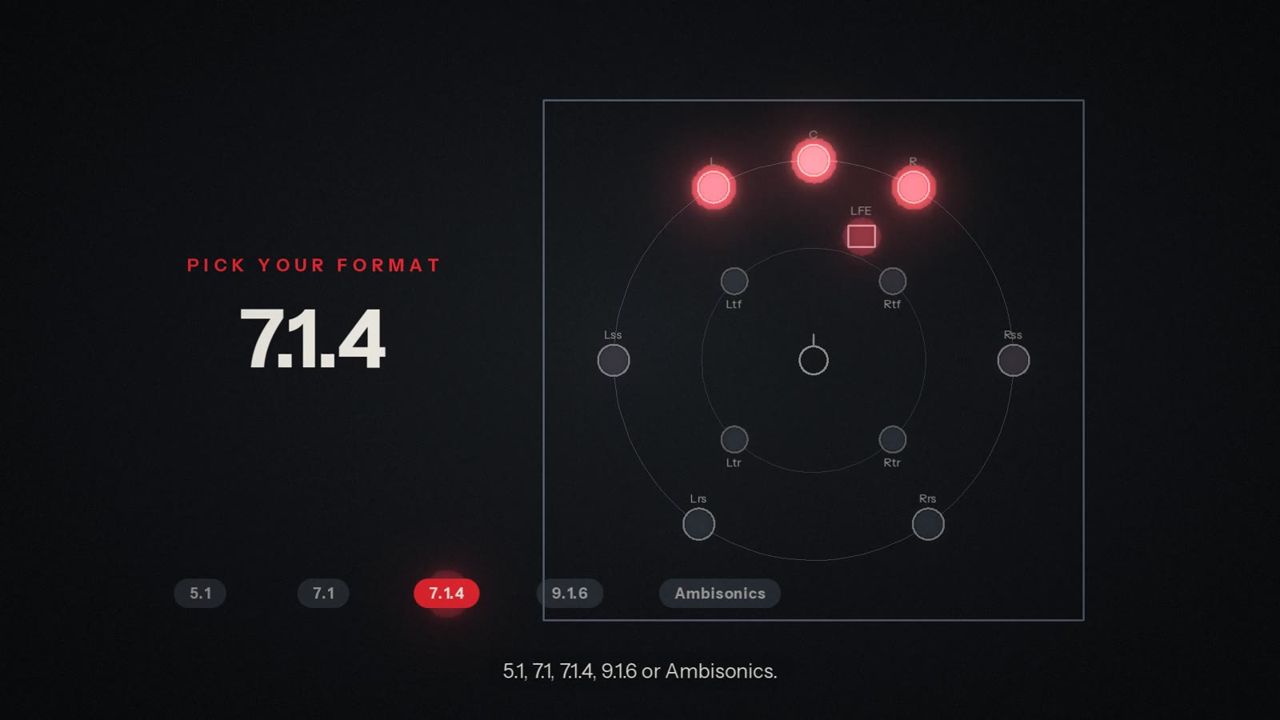
The window has four areas: the header across the top, the speaker map on the left, the tabs with the controls on the right, and the meter strip along the bottom.
Header
| Control | What it does | Range/default |
|---|---|---|
| Licence... | Opens the licence window. Its label changes with the licence state (Activate..., Trial..., Notice...). | – |
| < / > | Previous / next preset (factory presets, then your user presets). | – |
| Preset menu | Lists the Factory presets and, once you have saved some, your User presets. | Default balanced (downmix safe) |
| Save | Saves the current settings as a user preset. | – |
| A / B | Two complete sets of settings for instant comparison. | A |
| Copy | Copies the current settings to the other slot. | – |
| Downmix lock | Exact, phase-free upmix whose stereo fold-down returns the source. Off = creative mode. | On |
| Bypass | Bypasses the processing with the same latency. | Off |
Speaker map and monitoring
The speaker map shows every speaker of the current output, seen from above with the front at the top, and lights each one with its live level.
- Click a speaker to solo it. Click more speakers to add them to the solo.
- Right-click a speaker to mute it.
- Clear solo clears every solo and mute.
Below the map:
| Item | What it shows / does |
|---|---|
| Layout readout | The input and output, for example "Input Stereo, output 7.1.4", "output headphones (binaural)", "output 8 stem objects" or "output custom layout (10 speakers)". |
| Latency readout | The current latency in milliseconds and samples (reported to the host). |
| Fold-down match | How closely the stereo fold-down of the output matches the source: "exact (below -150 dB)", a value in dB, or "no signal". "(creative mode)" is added when Downmix lock is off. |
| Monitoring menu | Monitor speakers (normal), Monitor stereo fold-down or Monitor headphones. The two check modes play on the L and R outputs. Available with speaker outputs. |
| Clear solo | Clears all solos and mutes. |
| Render file... | Standalone app only: opens the offline file renderer. |
Note: Solo, mute and the monitoring menu are checking tools. They are not saved with presets.
Tabs
The controls are on four tabs: Main, Detail, Stems and Space. Controls that only work in creative mode are dimmed while Downmix lock is on. Stem controls are dimmed until stem separation (or the Stem objects output) is on. Hover over any control to see a tooltip.
Turn a knob by dragging; the value appears with its unit. Typing a value is also possible where your host's generic parameter view allows it (frequencies accept "k", for example "1.2k").
Main tab
| Row | Control | What it does | Range/default |
|---|---|---|---|
| Front | Center | How much of the centered image moves to the center speaker. | 0–100 %, 75 % |
| Front | Center width | How wide a pan range is treated as center. | 0–100 %, 50 % |
| Front | Wides | Sends hard-panned front sound to the wide speakers (9.x layouts). | 0–100 %, 35 % |
| Front | Height lift | Lifts part of the front image into the top front speakers. | 0–100 %, 0 % |
| Surround | Amount | How much ambience goes to the surround speakers. | 0–100 %, 60 % |
| Surround | Side to rear | Places the surround ambience between the side and rear speakers. | 0–100 %, 35 % |
| Surround | Delay (creative) | Delays the surround speakers so the front image stays forward. | 0–40 ms, 10 ms |
| Surround | Diffusion (creative) | Decorrelates the surround speakers for a wider, enveloping sound. | 0–100 %, 30 % |
| Height | Amount | How much ambience goes to the height speakers. | 0–100 %, 30 % |
| Height | Front to rear | Places the height ambience between the top front and top rear speakers. | 0–100 %, 40 % |
| Height | Delay (creative) | Delays the height speakers. | 0–30 ms, 6 ms |
| Height | Diffusion (creative) | Decorrelates the height speakers. | 0–100 %, 40 % |
| LFE and output | LFE | Feeds low frequencies to the LFE channel. The main speakers keep their bass. | On/Off, On |
| LFE and output | LFE level | Level of the LFE feed. | -30 to +10 dB, -10 dB |
| LFE and output | LFE cutoff | Upper frequency of the LFE feed. | 40–200 Hz, 80 Hz |
| LFE and output | Output | Output gain for every channel. | -24 to +12 dB, 0 dB |
Detail tab
| Row | Control | What it does | Range/default |
|---|---|---|---|
| Analysis | Sensitivity | Higher values treat more of the signal as ambience. | 0–100 %, 60 % |
| Analysis | Response | How fast the analysis follows the music. | 10–300 ms, 60 ms |
| Analysis | Transient guard | Keeps attacks in the front speakers. | 0–100 %, 50 % |
| Low cuts | Center | Bass below this stays in left and right instead of the center. | 20–500 Hz, 80 Hz |
| Low cuts | Surround | Bass below this stays in the front speakers. | 20 Hz–1 kHz, 100 Hz |
| Low cuts | Height | Frequencies below this stay out of the height speakers. | 20 Hz–4 kHz, 250 Hz |
| Input | Source | Stereo pair (L/R) upmixes L and R. All input channels also carries every other input channel to the matching output speaker. | Stereo pair (L/R) |
| Input | Input mode | Treat the input as Stereo, Mono (L+R), Left only or Right only. | Stereo |
| Input | Width (creative) | Narrows or widens the stereo input before the upmix. | 0–200 %, 100 % |
| Input | Mono spread (creative) | Spreads a mono source into the room. | 0–100 %, 50 % |
| Trims (creative) | Front, Center, Surround, Height, Wide | Level trim for each speaker group. | -12 to +12 dB, 0 dB |
| Output | Stereo output | With a stereo output: Headphones (binaural), Lo/Ro fold-down or Lt/Rt matrix. | Headphones (binaural) |
| Output | Virtual layout | Speaker layout rendered for the stereo and Ambisonics outputs: 5.1, 7.1, 7.1.4 or 9.1.6. | 7.1.4 |
| Output | Quality | Frequency resolution: Low latency, Standard, High quality, Live (5 ms). Higher quality adds latency, which is reported to the host. | Standard |
Stems tab
| Row | Control | What it does | Range/default |
|---|---|---|---|
| Stem separation | Separation | Off (normal upmix) or On (split into vocal, drums, bass, instruments and ambience). | Off (normal upmix) |
| Stem separation | Output | Speakers or Stem objects (the 8 stems on the first 8 outputs). | Speakers |
| Stem separation | Bass split | Below this the bass stem stays in the front speakers. | 40–300 Hz, 120 Hz |
| Vocal | To center | How much of the lead vocal moves into the center speaker. | 0–100 %, 100 % |
| Vocal | Width | How wide a pan range counts as the lead vocal. | 0–100 %, 40 % |
| Vocal | Lift | Raises part of the vocal into the top front speakers. | 0–100 %, 0 % |
| Drums | Position | Angle of the drums on each side (30° is the front speakers, 90° the sides). | 0–150°, 30° |
| Drums | Height | Raises the drums towards the height speakers. | 0–100 %, 0 % |
| Drums | Spread | Spreads the drums over neighbouring speakers. | 0–100 %, 20 % |
| Instruments | Position | Angle of guitars, keys and other instruments on each side. | 0–150°, 60° |
| Instruments | Height | Raises the instruments towards the height speakers. | 0–100 %, 15 % |
| Instruments | Spread | Spreads the instruments over neighbouring speakers. | 0–100 %, 50 % |
| Stem levels (creative) | Vocal, Drums, Bass, Instruments, Ambience | Level of each stem. | -24 to +12 dB, 0 dB |
Space tab
| Row | Control | What it does | Range/default |
|---|---|---|---|
| Room (creative) | Amount | Regenerates a room that matches the source in the surround and height speakers. | 0–100 %, 0 % |
| Room (creative) | Decay | Room decay time. At zero it shows "Match source" and follows the decay measured in the source. | Match source – 8 s, Match source |
| Room (creative) | Damping | How quickly the high frequencies of the room fade. | 0–100 %, 50 % |
| Room (creative) | Size | Size of the regenerated room. | 50–200 %, 100 % |
| Room | Source decay | Readout: the decay time measured from the source. | – |
| Match | Fold-down guard (creative) | Keeps the stereo fold-down exact in creative mode by correcting L and R. | 0–100 %, 0 % |
| Match | Spatial match | Moves the upmix towards the way the learned reference mix uses its speakers. | 0–100 %, 0 % |
| Match | Learn... | Chooses a surround or immersive reference file to learn. | – |
| Match | Reference status | Readout, for example "No reference learned yet" or "Learned Mix.wav". | – |
| Head tracking | Tracking | Turns the headphone render with your head. | On/Off, Off |
| Head tracking | OSC port | UDP port the head tracker sends to. | 1024–65535, 8000 |
| Head tracking | Recenter | Uses the current head direction as the front. | – |
| Head tracking | Tracker | Readout: "Receiving, yaw ..." or "No tracker data". | – |
| Speakers | Custom layout | Renders to your own speaker positions. | Off |
| Speakers | Edit... | Opens the custom speaker editor. | – |
| Speakers | Layout | Readout: number of speakers and whether the layout is active. | – |
| Objects | ADM-OSC | Sends the stem object positions to an object renderer. | Off |
| Objects | Renderer address | IP address of the renderer. | 127.0.0.1 |
| Objects | Port | UDP port of the renderer. | 9000 |
Meter strip
Along the bottom you find the Input meters (L and R), the Correlation readout of the input (+1 is mono, 0 is wide, negative values mean out-of-phase content), and one output meter per channel, labelled with the speaker names of the current layout (for example L, R, C, LFE, Lss ...). With the Stem objects output the meters are labelled Vocal, Drums L, Drums R, Bass, Other L, Other R, Ambience L and Ambience R.
Upmixing stereo to speakers
This is the core workflow: a stereo source into a multichannel speaker layout.
How it works
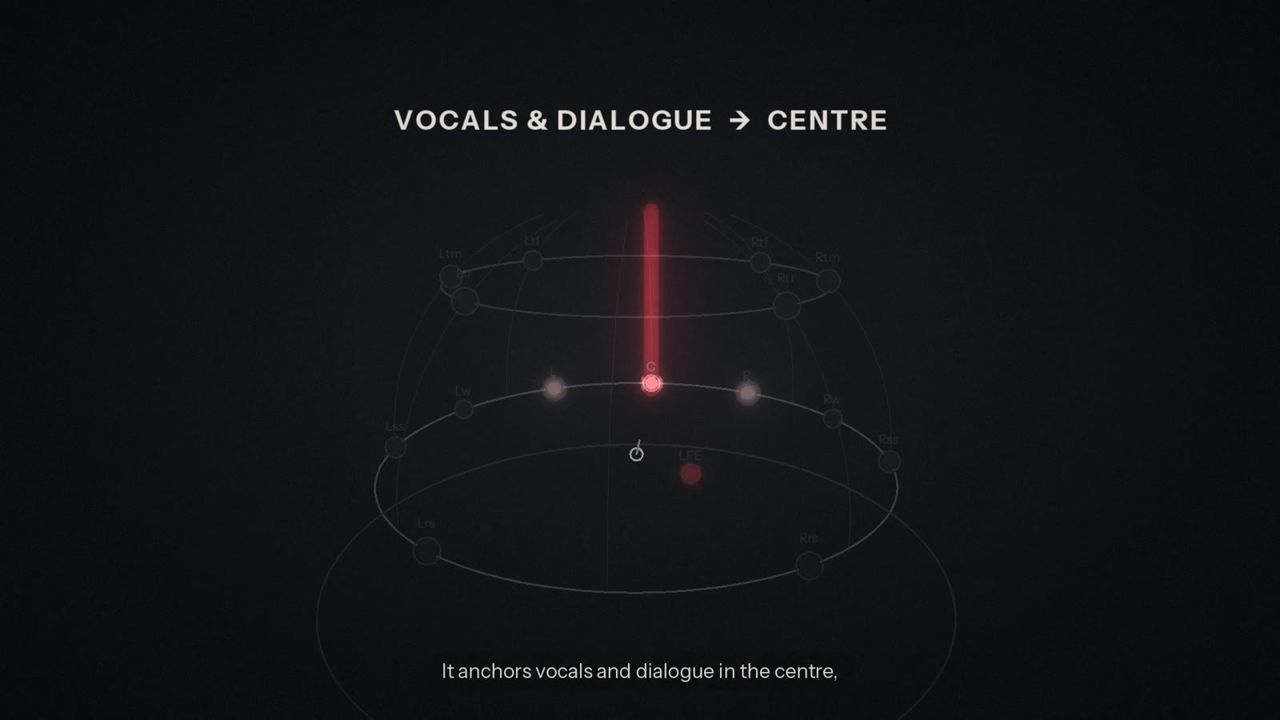
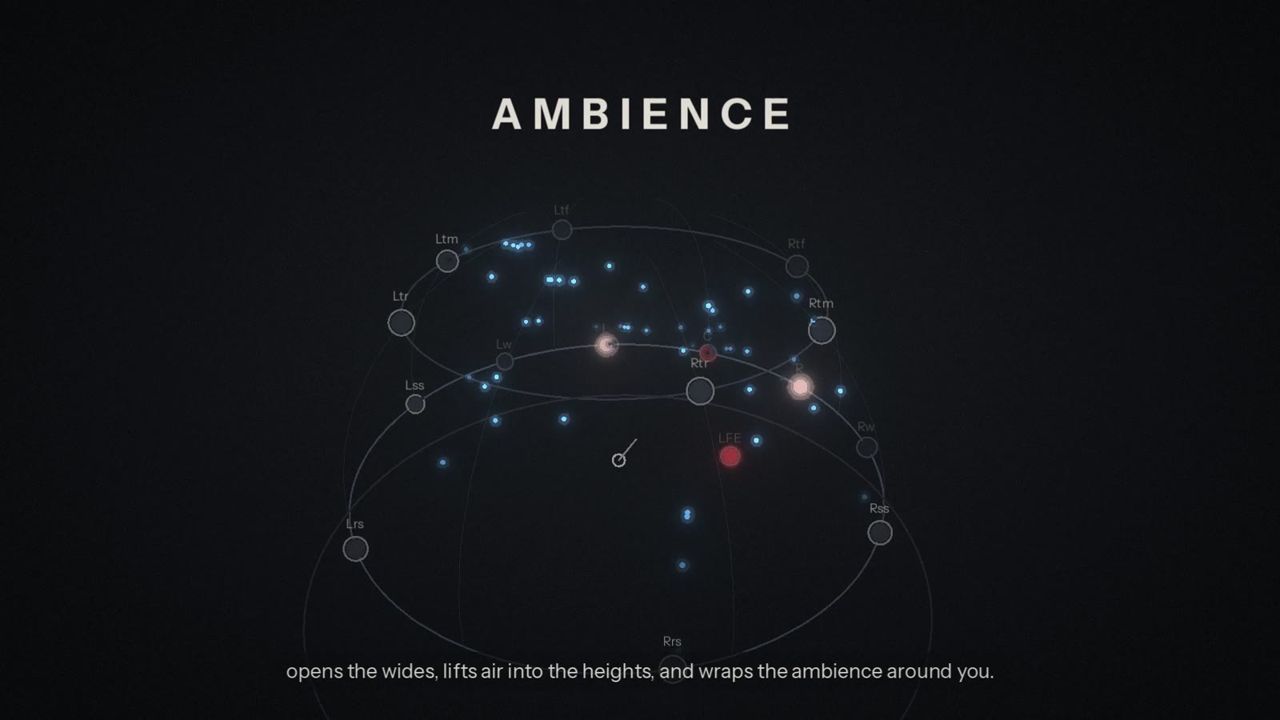
Pi UpMix analyses the stereo signal frequency by frequency. It separates the direct sound (anything panned somewhere between the speakers: vocals, instruments, dialogue) from the ambience (the room, the reverb, the wide and diffuse parts). The direct sound stays in the front, with the centered part anchored in the center speaker; the ambience goes to the surrounds and heights; the lowest frequencies can feed the LFE.
How to set up a basic upmix
- Insert Pi UpMix on a track with your target layout (see Installation).
- Load Default balanced (downmix safe) or Music natural from the preset menu.
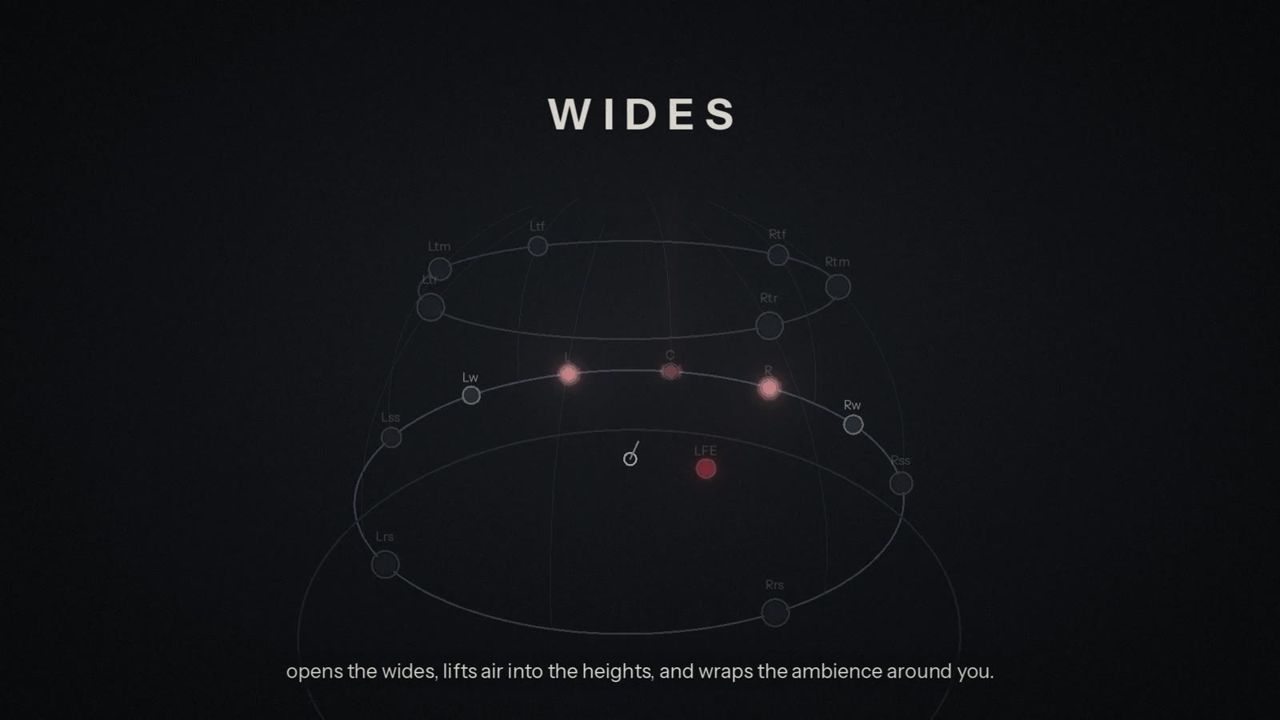
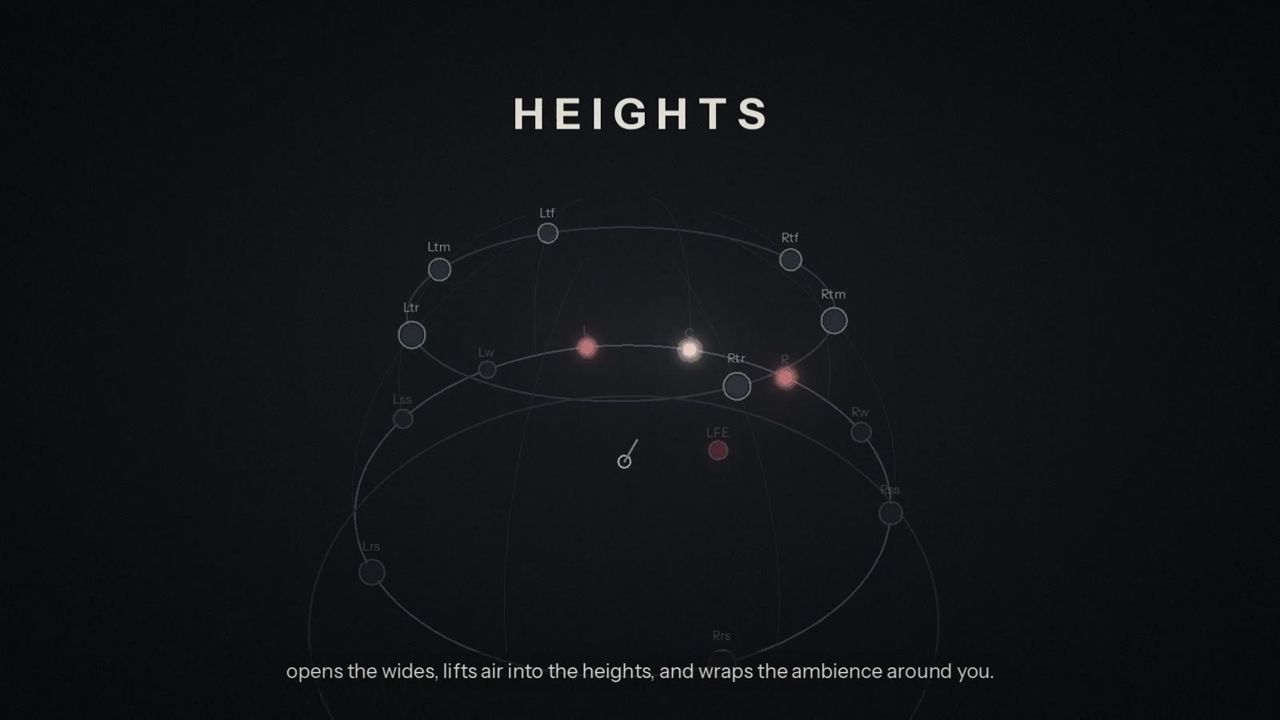
- On the Main tab, set the Front row: - Raise Center to anchor vocals and dialogue more firmly in the center speaker; lower it for a more phantom, stereo-like front. - Reduce Center width if instruments panned slightly off-center are being pulled into the center. - On 9.x layouts, use Wides to send hard-panned sound to the wide speakers. - Use Height lift to raise part of the front image into the top front speakers.
- Set the Surround row: Amount for how much ambience reaches the surrounds, Side to rear to move it from the side towards the rear speakers.
- Set the Height row: Amount for the heights, Front to rear to balance between top front and top rear speakers.
- Check the result with the speaker map and the solo function (click a speaker to hear it alone).
How to fine-tune the analysis
On the Detail tab, the Analysis row controls how the direct sound and ambience are told apart:
- Sensitivity: higher values treat more of the signal as ambience, so more goes to the surrounds and heights. Lower values keep more in front.
- Response: how fast the analysis follows the music. Short times (tens of milliseconds) react quickly to changes; long times (100 ms and more) give a calmer, steadier image, which suits classical and acoustic recordings.
- Transient guard: keeps attacks (drum hits, plucks, consonants) in the front speakers, so they do not smear into the surrounds.
The Low cuts row keeps bass where it belongs: below Center the bass stays in L and R, below Surround it stays in the front speakers, and below Height it stays out of the height speakers.
How to use the LFE
- Make sure LFE is on (Main tab, LFE and output row). The LFE channel only exists in .1 layouts.
- Set LFE cutoff (the upper frequency of the LFE feed) and LFE level.
The LFE is an extra feed: the main speakers keep their bass. With a bass-managed system you may want LFE off, or a low level.
How to upmix a mono source
- On the Detail tab, set Input mode to Mono (L+R), or Left only / Right only to use one side.
- Turn Downmix lock off and use Mono spread (Input row) to spread the mono source into the room.
- Or simply load the Mono to surround factory preset.
A mono input bus (one channel) is also accepted and is treated as a center source.
Downmix lock and creative mode
Downmix lock
With Downmix lock on, every speaker feed is a phase-free combination of the input, chosen so that the standard stereo fold-down returns the input exactly:
L' = L + 0.707 x (C + every left-side speaker), and the same on the right. A centre surround speaker folds at 0.5 into both sides, and the LFE is left out.
The Fold-down match readout under the speaker map shows the result live. With the lock on it reads about -100 dB or lower, and often "exact (below -150 dB)". In other words: when your immersive mix is folded down to stereo by a player, a renderer or a broadcast chain, your original stereo master comes back.
Creative mode
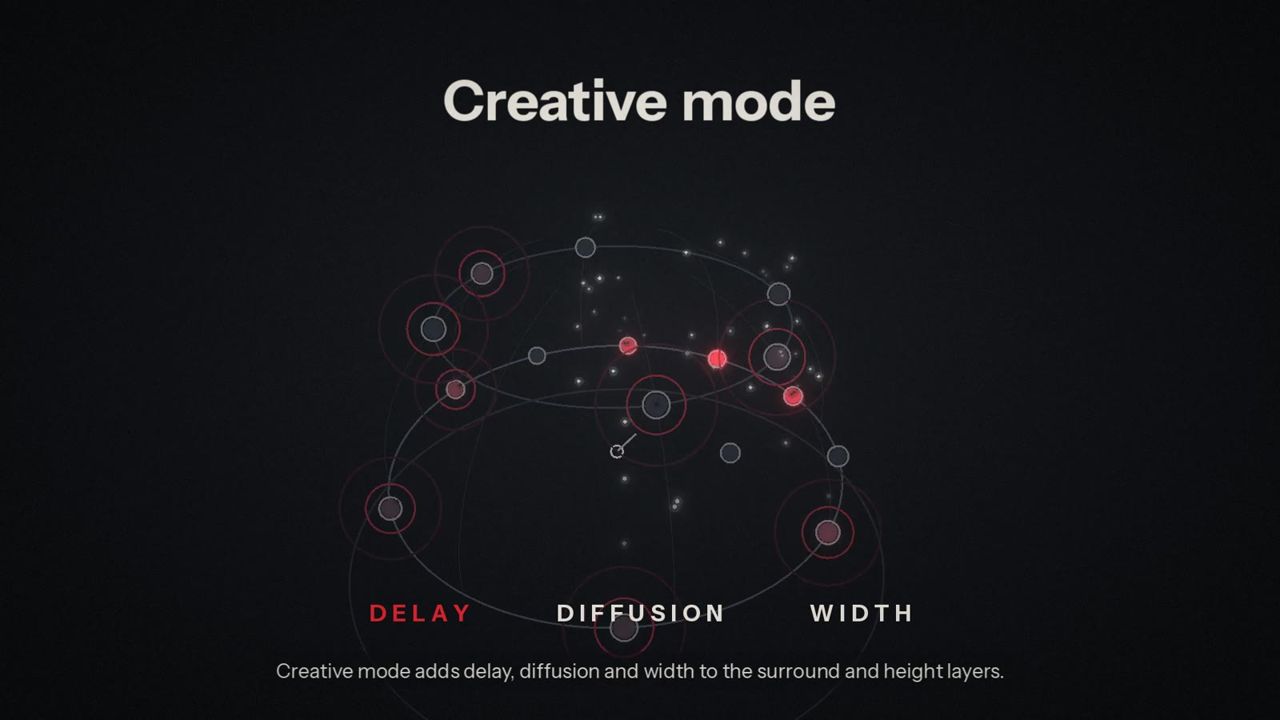
Turn Downmix lock off to enter creative mode. Pi UpMix keeps the overall energy constant, and these controls become available (they are dimmed while the lock is on):
- Surround and height Delay and Diffusion (Main tab)
- Input Width and Mono spread (Detail tab)
- Trims for front, center, surround, height and wide speakers (Detail tab)
- Stem levels (Stems tab)
- Room regeneration and Fold-down guard (Space tab)
Delay pushes the surround or height speakers slightly later so the front image stays forward (precedence). Diffusion decorrelates the speakers for a wider, more enveloping sound.
How to keep the fold-down exact in creative mode
- Turn Downmix lock off and set your delays, diffusion and room.
- On the Space tab, raise Fold-down guard. At 100 % the stereo fold-down stays exact, because L and R are corrected for what the creative processing added.
- Watch the Fold-down match readout ("(creative mode)" is added to it).
Tip: Use creative mode for live rooms, installations and deliberate effects. When the stereo fold-down must stay pristine (catalogue releases, broadcast), keep the lock on, or use Fold-down guard at 100 %.
Stem-aware upmixing
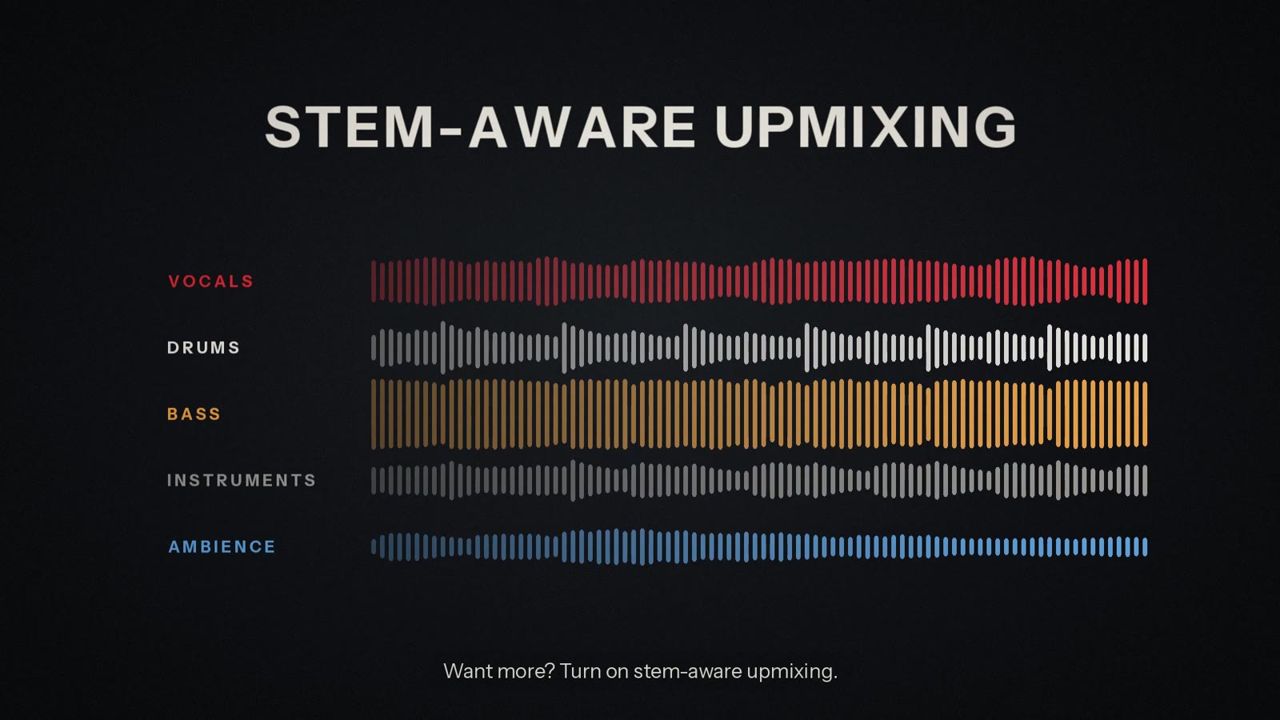
New in version 1.1. Pi UpMix is a normal upmixer until you set Separation to On, choose the Stem objects output, or load one of the Stems presets. Until then the separation does not run and its controls are dimmed.
When it is on, the mix is split into five parts using fast signal processing: vocal, drums, bass, instruments and ambience. Each part is placed on its own:
- The lead vocal goes to the center, with optional lift into the top front speakers.
- Drum hits stay in front instead of leaking into the center or the surrounds.
- The bass stays solid in the front speakers below the Bass split frequency.
- Instruments can be pushed to the sides or up.
- The ambience feeds the surrounds and heights.
Stem-aware upmixing is still exact with Downmix lock (fold-down null about -138 dB).
How to place the stems
- On the Stems tab, set Separation to On (or load Stems: natural (downmix safe)).
- Vocal row: To center sets how much of the lead vocal moves into the center speaker; Width sets how wide a pan range counts as the lead vocal; Lift raises part of it into the top front speakers.
- Drums row: Position is the angle on each side (30° = the front L/R speakers, 90° = the sides, up to 150°). Height raises them towards the heights; Spread spreads them over neighbouring speakers.
- Instruments row: the same three controls for guitars, keys and other instruments.
- Bass split: below this frequency the bass stem stays in the front speakers.
- In creative mode (lock off), balance the parts with the Stem levels row.
Tip: Start with Stems: wide stage for a bigger, more spacious band image, or Stems: creative room to add a regenerated room as well.
Stem objects and ADM-OSC
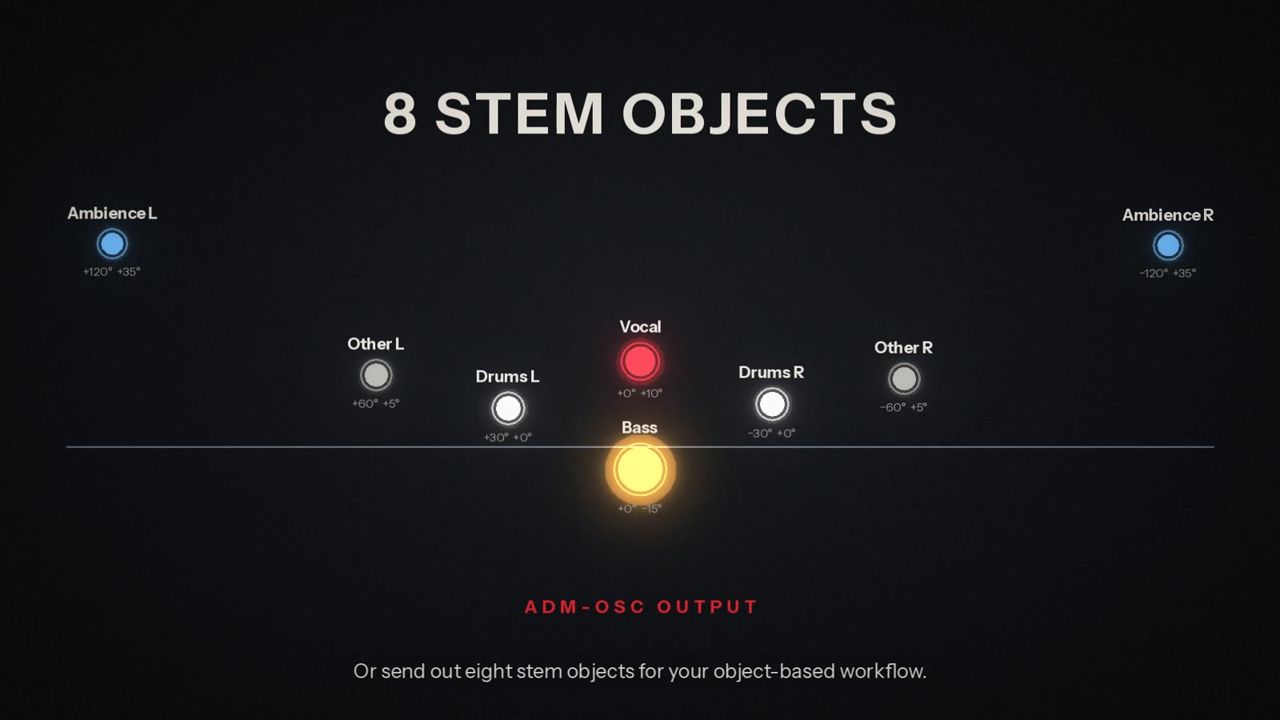
For object-based workflows, Pi UpMix can output the stems as eight separate objects instead of speaker feeds.
How to output stem objects
- Give the track at least 8 output channels.
- On the Stems tab, set Output to Stem objects.
- The first eight outputs now carry: Vocal, Drums L, Drums R, Bass, Other L (instruments left), Other R, Ambience L, Ambience R. The layout readout says "output 8 stem objects" and the meters show these names.
If the track has fewer than 8 channels, Pi UpMix keeps the normal speaker output.
How to send object positions to a renderer
- Go to the Space tab, Objects row.
- Enter the Renderer address (IP address; 127.0.0.1 for the same computer) and Port (default 9000). Press Return or click elsewhere to apply.
- Click ADM-OSC so it reads On.
While the Stem objects output is active, Pi UpMix sends each object's position ten times a second using the ADM-OSC messages /adm/obj/n/aed (azimuth, elevation, distance 1.0) and /adm/obj/n/w (width), where n is 1 to 8 in the order above. The positions follow your Stems tab settings:
| Object | Azimuth | Elevation | Width |
|---|---|---|---|
| 1 Vocal | 0° | 30° x Lift | 0.1 |
| 2 / 3 Drums L / R | + / - drums Position | 60° x drums Height | drums Spread |
| 4 Bass | 0° | 0° | 0.2 |
| 5 / 6 Other L / R | + / - instruments Position | 60° x instruments Height | instruments Spread |
| 7 / 8 Ambience L / R | + / - (90° + 60° x surround Side to rear) | 45° x height Amount | 0.6 |
Positive azimuth is to the left. Map the eight output channels to the renderer's objects 1 to 8.
Format conversion and downmix
Pi UpMix can also convert between multichannel formats.
How to convert a multichannel bed
- Set the track's input to the source format (for example 5.1) and the output to the target (for example 7.1.4). In Pro Tools, the AAX version supports this when input and output are the same multichannel format and the source sits on the matching channels; otherwise use a host that offers different input and output formats.
- On the Detail tab, set Source to All input channels.
- L and R are upmixed as usual, and every other input channel (C, LFE, surrounds, heights ...) is carried to the matching output speaker.
This works both ways: 5.1 to 7.1.4, or 7.1.4 to 5.1. It is also exact with Downmix lock.
Stereo, headphone and Ambisonics outputs
Stereo outputs
When the output is stereo (2 channels), the Stereo output menu on the Detail tab chooses what you get:
- Headphones (binaural): a binaural render of the full virtual layout, for listening on headphones.
- Lo/Ro fold-down: a standard left-only/right-only fold-down.
- Lt/Rt matrix: a matrix-encoded stereo.
Virtual layout chooses the speaker layout that is rendered: 5.1, 7.1, 7.1.4 (default) or 9.1.6.
Headphone monitoring of a speaker output
You do not need a stereo track to check your work on headphones. With any speaker output, choose Monitor headphones in the monitoring menu under the speaker map. The binaural render plays on the L and R outputs. Monitor stereo fold-down lets you hear exactly what a stereo fold-down of your upmix will sound like. Switch back to Monitor speakers before you print.
How to use head tracking
- On the Space tab, Head tracking row, set the OSC port (default 8000) and press Return.
- Configure your head tracker (or its app) to send OSC to this computer on that port. Pi UpMix understands:
- yaw, pitch and roll in degrees in one message whose address ends in
/ypr,/rotationor/head; - a quaternion (w, x, y, z) in a message whose address containsquaternion; - separate messages ending in/yaw,/pitchand/roll. - Turn Tracking on. The Tracker readout shows "Receiving, yaw ..." while data arrives.
- Face the front and click Recenter.
Head tracking turns the headphone render with your head, so the speakers stay in place in the room as you move.
Ambisonics output
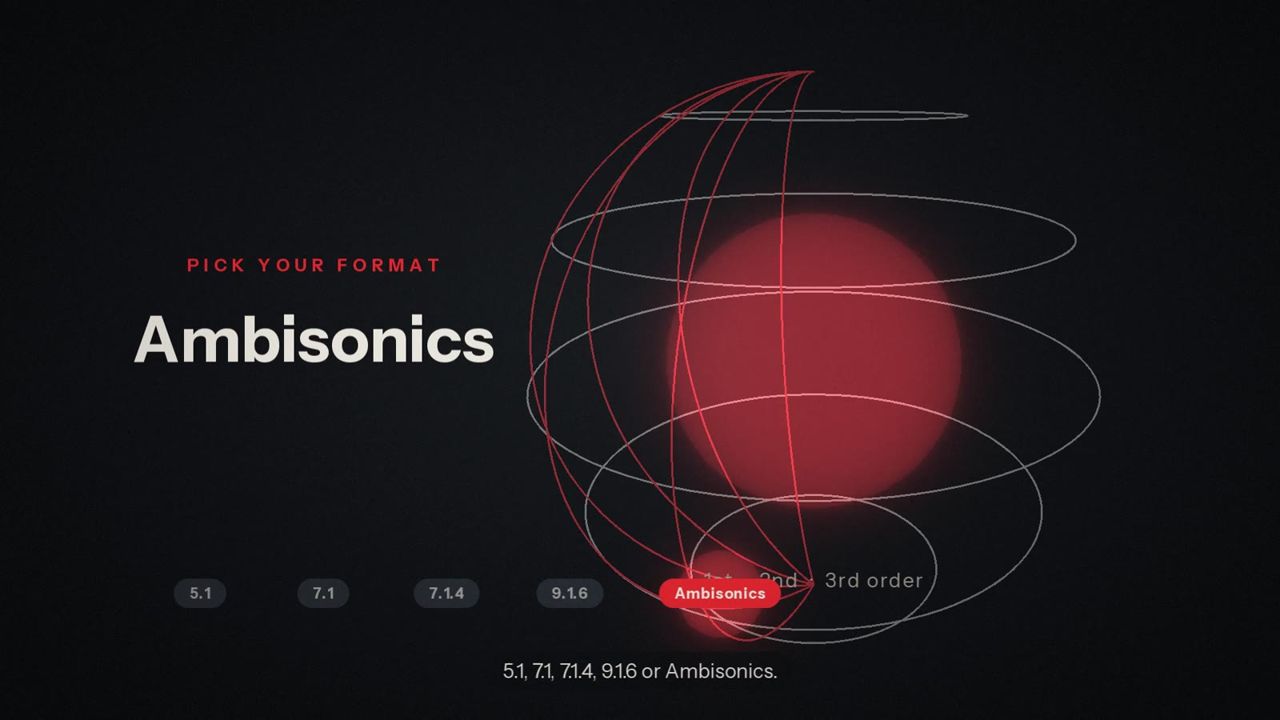
If the track's output is an Ambisonics bus (1st, 2nd or 3rd order), Pi UpMix renders the virtual layout to Ambisonics in the AmbiX convention (ACN channel order, SN3D normalisation). The Virtual layout menu chooses which layout is encoded.
Room regeneration
New in version 1.1, in creative mode. Pi UpMix measures the decay of the room in your source and regenerates a matching room in the surround and height speakers.
How to add a regenerated room
- Turn Downmix lock off.
- Go to the Space tab, Room row. Play the source for a while: Source decay shows the decay time measured from the source.
- Raise Amount.
- Leave Decay at Match source to follow the measured decay, or turn it up to set a fixed decay time (up to 8 s).
- Shape the room with Damping (how quickly the high frequencies fade) and Size (50–200 %).
- If the stereo fold-down must stay exact, raise Fold-down guard.
Spatial Match
New in version 1.1. Spatial Match learns how a reference surround or immersive mix uses its speakers and moves your upmix towards it, band by band. It works with Downmix lock on and stays exact.
How to match a reference mix
- Go to the Space tab, Match row, and click Learn....
- Choose a multichannel reference file (WAV, AIFF, FLAC or CAF with 3 to 16 channels). Pi UpMix reads it in the background.
- Reference status shows "Learned
" when it is done. - Raise Spatial match to move your upmix towards the reference.
Note: The learned reference is saved with your session, not in presets. The Spatial match amount is saved in presets.
Custom speaker layouts
New in version 1.1. If your room does not match a standard layout, type in your own speakers.
How to create a custom layout
- Go to the Space tab, Speakers row, and click Edit....
- Type one speaker per line, in output channel order: name, azimuth and elevation in degrees. Add the word lfe for a subwoofer. For example:
L    30  0
   R   -30  0
   C     0  0
   SUB   0  0 lfe
   LS  110  0
   RS -110  0
   TFL  45 45
   TFR -45 45
- Azimuth is positive to the left (-180 to 180); elevation is -90 to 90.
- Use between 2 and 16 speakers.
- Spaces, tabs, commas or semicolons separate the values; anything after
#is a comment. 3. Click Apply. The editor shows "Applied: N speakers", or an error explaining which line is wrong. 4. Click Close, then turn Custom layout On. 5. Give the track the same number of channels as speakers. The Layout readout says "N speakers, active" when it is in use, or "give the track N channels" when the channel count does not match yet.
The custom layout is saved with your session.
Presets and A/B comparison
Factory presets
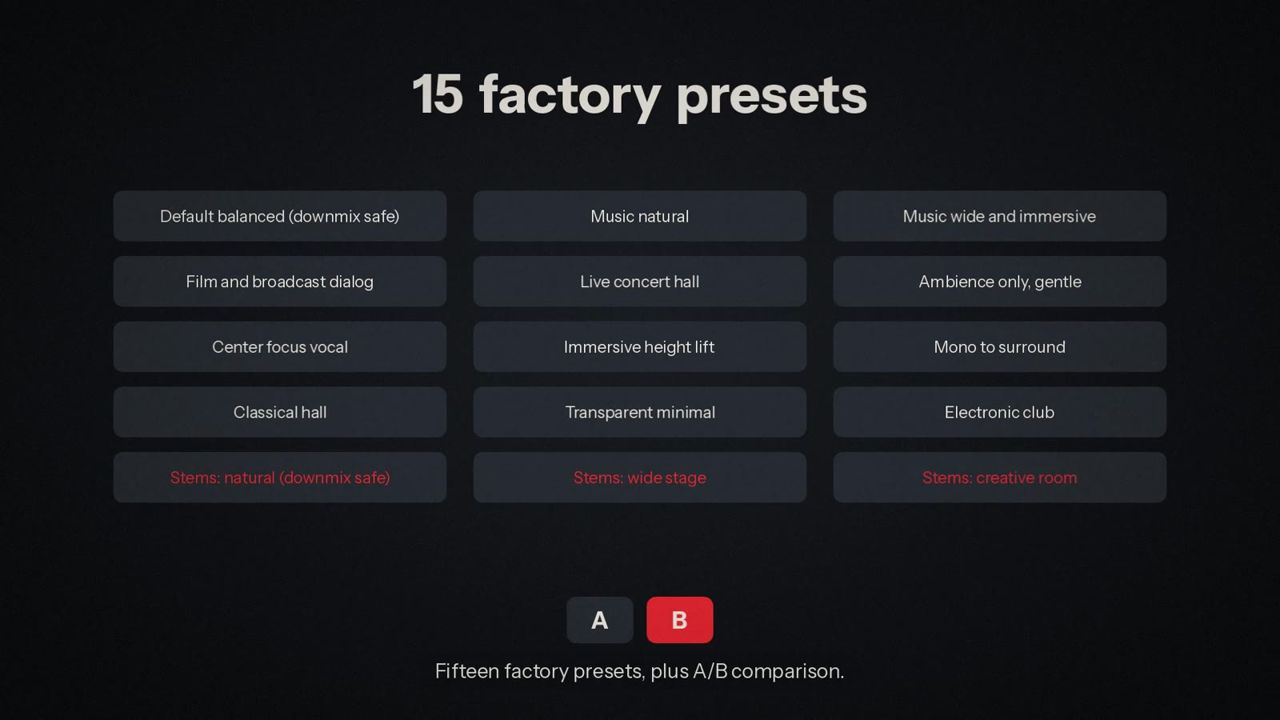
| Preset | Character |
|---|---|
| Default balanced (downmix safe) | All controls at default; a balanced starting point. |
| Music natural | Gentle center, moderate surround and height. |
| Music wide and immersive | Creative mode: wider input, more surround and height, delays and diffusion. |
| Film and broadcast dialog | Strong center for dialogue, firmer transient guard. |
| Live concert hall | Creative mode: lots of surround and height with long delays and diffusion. |
| Ambience only, gentle | No center or wides; light ambience, LFE off. |
| Center focus vocal | Full center, narrow center width. |
| Immersive height lift | Height lift and more height ambience. |
| Mono to surround | Creative mode for mono sources, with mono spread. |
| Classical hall | Light center, rich surround and height, slow response. |
| Transparent minimal | Very light upmix, LFE off. |
| Electronic club | Creative mode: wide, strong LFE, firm transient guard. |
| Stems: natural (downmix safe) | Stem separation on, natural placement. |
| Stems: wide stage | Stem separation on, drums and instruments spread wide and up. |
| Stems: creative room | Creative mode with stems and a regenerated room. |
Loading a factory preset first resets all settings to their defaults and then applies the preset. The factory presets also appear in your host's program list.
How to save and load your own presets
- Click Save. A name field appears in place of the preset menu.
- Type a name and press Return (Escape, or clicking elsewhere, cancels).
- Your preset appears in the User section of the preset menu and in the < / > order after the factory presets.
User presets are saved as .piupmix files in Documents/Saharty/Pi UpMix/Presets. You can copy them to another computer.
Note: Presets do not store Quality, Bypass, the stem Output choice or Tracking, so loading a preset never changes your latency or routing.
How to compare two settings
- Set up a sound in slot A.
- Click Copy to copy it to slot B, then click B.
- Change settings in B.
- Switch between A and B to compare instantly.
Rendering files (standalone app)
The standalone app includes an offline renderer that upmixes whole files with the current settings at high quality.
How to render a file
- Set up your sound in the standalone app (presets, tabs, Spatial Match ...).
- Click Render file... (shown as Activate to render until Pi UpMix is activated or the trial is running).
- Choose the Output: any speaker layout from LCR to 9.1.6 (default 7.1.4), Headphones (binaural stereo), Lo/Ro stereo, Lt/Rt stereo, Stem objects (8 channels) or Ambisonics order 1–3 (AmbiX).
- Choose the File format: 32-bit float WAV (default) or 24-bit WAV.
- Turn on Mono stems if you want one mono file per channel instead of one multichannel file.
- Click Choose file and render... and choose a stereo or mono audio file (WAV, AIFF, FLAC, MP3 or OGG; on macOS also M4A and CAF).
- Watch the progress bar. When it says "Done: ...", click Show in folder.
The result is written next to the source file:
- One file:
<name> (Pi UpMix <output>).wav, in the channel order shown in the table under Installation. - Mono stems: a folder
<name> (Pi UpMix <output>) stemscontaining files such asSong.L.wav,Song.C.wav.
The output is aligned with the source (the processing latency is removed). A file that would exceed 4 GB is written as mono stems automatically. Cancel stops the render and keeps the partly written files.
Settings & preferences
Quality and latency
The Quality menu (Detail tab) sets the frequency resolution of the analysis. Higher resolution separates sounds more finely but adds latency. The latency is always reported to the host, so your session stays in sync, and it is shown under the speaker map.
| Quality | Latency at 44.1/48 kHz | Use it for |
|---|---|---|
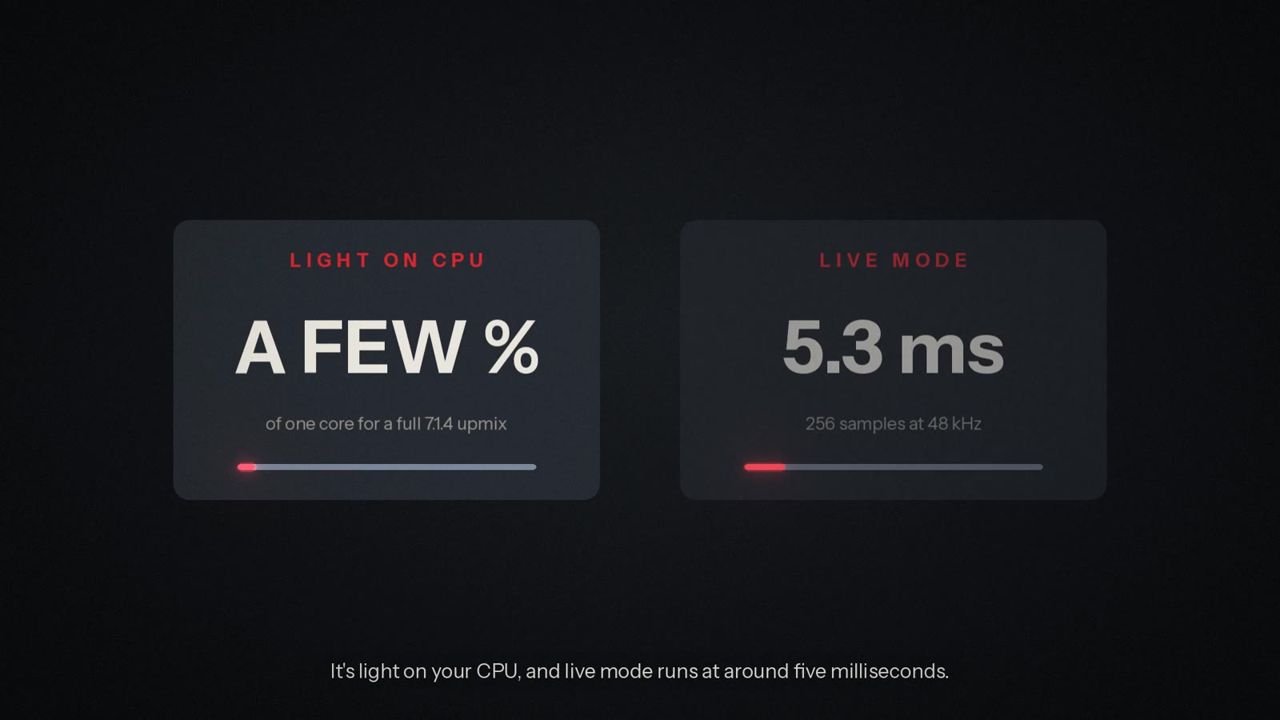
| Live (5 ms) | 256 samples (about 5.3 ms at 48 kHz) | Live sound and broadcast. |
| Low latency | 1024 samples (about 21 ms at 48 kHz) | Tracking and real-time monitoring. |
| Standard | 2048 samples (about 43 ms at 48 kHz) | Everyday mixing (default). |
| High quality | 4096 samples (about 85 ms at 48 kHz) | Final mixes and deliverables. |
At 88.2/96 kHz and 176.4/192 kHz the sample counts double and quadruple, so the latency in milliseconds stays about the same. Changing Quality briefly reconfigures the processing; it is not automatable. The offline renderer always uses high quality.
What is saved
- With the session (host project): every parameter, the current preset name, the window size, the custom layout and its on/off state, the head-tracking port, the ADM-OSC settings and the learned Spatial Match reference.
- In presets: all sound parameters (not Quality, Bypass, stem Output or Tracking).
- Not saved: solo, mute, the monitoring menu, and the A/B slots.
Automation
All parameters can be automated from your host except Quality and the stem Output choice, which change the processing structure.
Window size
Drag the window corner to resize it between 780 x 495 and 1560 x 990. The layout scales as a whole and keeps its proportions.
Keyboard shortcuts / remote control
Keyboard
| Key | Where | Action |
|---|---|---|
| Return | Preset name field | Save the preset. |
| Escape | Preset name field | Cancel saving. |
| Return | Licence key field | Activate. |
| Return | OSC port, renderer address and port fields | Apply the value. |
OSC input: head tracking
| Address (ending / containing) | Arguments | Meaning |
|---|---|---|
ends in /ypr, /rotation or /head |
yaw, pitch, roll (degrees) | Head orientation. |
contains quaternion |
w, x, y, z | Head orientation as a quaternion. |
ends in /yaw, /pitch, /roll |
one value (degrees) | One axis at a time. |
Port: OSC port on the Space tab (default 8000, UDP). Yaw is positive to the left, pitch positive up, roll positive to the right. Use Recenter to set the front.
OSC output: ADM-OSC object positions
| Address | Arguments | Sent |
|---|---|---|
/adm/obj/n/aed |
azimuth, elevation, distance (1.0) | 10 times a second per object (n = 1–8) |
/adm/obj/n/w |
width | 10 times a second per object |
Destination: Renderer address and Port on the Space tab (default 127.0.0.1:9000). Sent only while ADM-OSC is on and the Stem objects output is active.
Pi UpMix does not use MIDI or timecode.
Tips for live/studio use
Studio
- Keep Downmix lock on for deliverables. Your stereo master survives any fold-down. Use the Fold-down match readout as your proof.
- Use High quality for the final print. Standard is fine while you work; switch to High quality before you bounce, or render with the standalone app, which always uses high quality.
- Check the fold-down and headphones without rerouting. The monitoring menu's Monitor stereo fold-down and Monitor headphones play on L and R, so you can check on the same speakers or headphones. Remember to return to Monitor speakers.
- Dialogue and vocals: raise Center and Transient guard, and use Center low cut so the center speaker does not get muddy. The Film and broadcast dialog preset is a good start.
- Acoustic and classical: a slower Response (100 ms and more) and a lower Transient guard give a calmer, more natural hall.
- Busy pop and rock mixes that smear into the surrounds benefit from stem separation: drums stay in front, the vocal stays centred.
- Match a house style with Spatial Match: learn one of your own finished immersive mixes and apply it to new upmixes for consistent results across an album.
Live
- Use Live (5 ms) quality to keep the processing delay small enough to stay with the stage sound.
- Creative mode works well in rooms: surround Delay keeps the image anchored to the stage (precedence), and Diffusion helps the surrounds sound enveloping rather than like extra loudspeakers. Try Live concert hall or Electronic club.
- Bypass keeps the latency, so toggling it never shifts your timing.
- Use custom layouts for venues and installations whose speakers are not in standard positions.
- Give it its own computer or bus: in the standalone app you can feed Pi UpMix from a console bus through your audio interface and send the outputs straight to the surround and overhead speakers.
Troubleshooting
| Symptom | Cause | Fix |
|---|---|---|
| Pi UpMix does not appear in the host. | The host has not rescanned, or the format you need was not installed. | Restart the host and rescan plug-ins. Run the installer again and check the format under Customize (macOS). |
| Only L and R play; the other speakers are silent. | Pi UpMix is not activated, or the licence is limited. | Click Activate... and activate your key or start the free trial. |
| Only L and R play although activated. | The track is stereo, so Pi UpMix is producing a stereo (headphones, Lo/Ro or Lt/Rt) output. | Give the track or bus a multichannel layout (for example 7.1.4). |
| The upmix sounds strange on speakers. | The monitoring menu is set to Monitor headphones or Monitor stereo fold-down. | Set it back to Monitor speakers. |
| Some speakers are silent. | A speaker is muted or another is soloed on the speaker map. | Click Clear solo. |
| The speakers are in the wrong places (Reaper, discrete channels). | Your outputs are routed in a different order. | Route the channels in the order of the discrete channel table under Installation. |
| Delay, Diffusion, Trims or Room do nothing and look dimmed. | These are creative-mode controls and Downmix lock is on. | Turn Downmix lock off. |
| The Stems tab controls are dimmed. | Stem separation is off. | Set Separation to On, or choose the Stem objects output. |
| Stem objects has no effect. | The track has fewer than 8 output channels, or a custom layout is active. | Give the track at least 8 channels and turn Custom layout off. |
| Fold-down match shows a high value. | Downmix lock is off (creative mode). | Turn the lock on, or raise Fold-down guard to 100 %. |
| Fold-down match: no signal. | No audio is playing. | Start playback. |
| The custom layout is not used. | The track's channel count does not match the number of speakers. | Give the track as many channels as the Layout readout asks for. |
| "Use between 2 and 16 speakers." or another error in the speaker editor. | A line is incomplete or out of range. | Each line needs a name, an azimuth (-180 to 180) and an elevation (-90 to 90). |
| "Choose a surround or immersive mix (3 to 16 channels)". | The Spatial Match reference is stereo or has too many channels. | Choose a multichannel reference with 3 to 16 channels. |
| Tracker shows "No tracker data". | The tracker sends to a different port or address, the port is used by another app, or a firewall blocks UDP. | Check the port on both sides, try another port, and allow the app in your firewall. |
| The object renderer does not move the objects. | ADM-OSC is off, the address or port is wrong, or the output is not Stem objects. | Turn ADM-OSC on, check the address and port, and set Output to Stem objects. |
| The session is out of sync after changing Quality. | Some hosts only pick up a new latency when playback restarts. | Stop and restart playback. |
| Render file... reads Activate to render. | Not activated. | Activate, or start the free trial. |
| "This file could not be read." when rendering. | The file format is not supported on this system. | Convert the file to WAV, AIFF or FLAC. |
| "Writing failed. Check the free disk space." | The disk is full or not writable. | Free some space or move the source file to a writable folder. |
| macOS warns that the installer is from an unidentified developer. | Gatekeeper blocks the installer. | Right-click the installer, choose Open, then Open again, or allow it in System Settings > Privacy & Security. |
| Windows SmartScreen blocks the installer. | SmartScreen does not know the file yet. | Choose More info, then Run anyway. |
| "This licence is active on another computer". | The licence is still active on another computer. | Choose Move it here, or deactivate the other computer first. |
Specifications & system requirements
Specifications
| Item | Details |
|---|---|
| Product | Pi UpMix by Saharty, version 1.1.0 |
| Formats | AAX, VST3, AU (macOS), standalone app |
| Input | Mono or stereo; any multichannel speaker set for format conversion (up to 16 channels) |
| Speaker outputs | LCR, LCRS, quad, 5.0, 5.1, 6.0, 6.1, 7.0, 7.1, 5.0.2, 5.1.2, 5.0.4, 5.1.4, 7.0.2, 7.1.2, 7.0.4, 7.1.4, 7.0.6, 7.1.6, 9.0.4, 9.1.4, 9.0.6, 9.1.6, any speaker set made of those speakers, or a custom layout (2–16 speakers) |
| Stereo outputs | Headphones (binaural, virtual 5.1 / 7.1 / 7.1.4 / 9.1.6, optional head tracking), Lo/Ro, Lt/Rt |
| Ambisonics | 1st to 3rd order, AmbiX (ACN, SN3D) |
| Object output | 8 stem objects with ADM-OSC positions |
| Sections | Front, surround, height, LFE and output; analysis, low cuts, input, trims; stems; room, match, head tracking, custom speakers, objects |
| Downmix | Downmix lock with live fold-down match (measured null about -138 dB) |
| Quality / latency | Live (256 samples), Low latency (1024), Standard (2048), High quality (4096) at 44.1/48 kHz; reported to the host |
| Presets | 15 factory presets, user presets (.piupmix), A/B comparison |
| File renderer | Standalone app: 32-bit float or 24-bit WAV, one multichannel file or mono stems |
System requirements
| macOS minimum | macOS recommended | |
|---|---|---|
| OS | macOS 11 Big Sur | Latest macOS |
| Processor | Apple silicon or Intel (Universal) | Apple M1 or better |
| Memory | 8 GB | 16 GB (stem separation) |
| Disk | 100 MB | 100 MB |
| Host | AAX, VST3 or AU host | Pro Tools Ultimate or any immersive-capable DAW |
| Monitoring | Headphones (binaural) | Speakers up to 7.1.4 |
| Windows minimum | Windows recommended | |
|---|---|---|
| OS | Windows 10 64-bit | Windows 11 64-bit |
| Processor | Intel / AMD, 64-bit, 4 cores | Intel Core i7 / AMD Ryzen 7 |
| Memory | 8 GB | 16 GB (stem separation) |
| Disk | 100 MB | 100 MB |
| Host | AAX or VST3 host | Pro Tools Ultimate or any immersive-capable DAW |
| Monitoring | Headphones (binaural) | Speakers up to 7.1.4 |
Linux is not supported. Layouts larger than 7.1.4 depend on your host's support for those formats; contact support if you need help with them.
Support
We are here to help.
- Email: support@pi-ware.com
- Website: www.pi-ware.com (downloads, your licences and computers at pi-ware.com/account)
- Tutorials: youtube.com/@pibysaharty
When you write to us, please include your operating system, your host and its version, the Pi UpMix version (1.1.0), your track's input and output layout, and a short description of what you did and what happened.