Pi Tune
Welcome
Pi Tune is a real-time vocal pitch-correction plug-in from Pi by Saharty, built first for the live stage. It reports zero samples of latency to your console or host, so it can sit on a lead vocal without pulling the singer out of time with the band or the in-ear mix. It works just as well in the studio, on recorded vocals.
Pi Tune is for front-of-house and monitor engineers, live vocalists, worship and theatre teams, and studio engineers who want natural correction or a crisp hard-tune effect. What makes it different:
- Zero lookahead. The default Formant engine re-times the glottal pulses of the voice. The voice path is delayed by only about half a pitch period (typically 1-3 ms), and the singer's timbre is kept even for large shifts.
- The world's scales. 213 scales, modes, ragas, maqamat, makamlar and dastgah-ha in ten families, with true quarter tones for Arabic maqamat and 53-comma tuning for Turkish makamlar.
- Built for loud stages. Two pitch detectors vote on every frame, consonants and breaths are released instantly, Learn Voice calibrates to your singer in 10 seconds, and Bleed reject uses a band feed to stop Pi Tune from following the instruments.
- Show control. Key Listen learns the key from a side-chain feed. MIDI target notes, MIDI scale, Program Change and SMPTE timecode snapshots let the tuning follow the setlist.
What's new in version 1.3.0
- Formant engine is now the default: pitch-synchronous re-timing with output pulses placed exactly one target period apart, so a hard tune lands exactly on the note with no warble. Consonants and breaths go through the same path at a constant delay, so there is no dry/wet switching, chirp or comb filtering. The Classic engine is still available.
- Live voice-path delay readout on the TUNE page.
- Learn Voice calibration and the Learned Voice input type.
- Bleed reject from the side-chain.
- Better note selection: vibrato-aware hysteresis, and a quick switch (about 40 ms) to a new note when the singer has clearly moved.
- Pi by Saharty licensing with a 15-day free trial and online or offline activation.
Quick start
- Download the installer from your account at pi-ware.com and run it: the
.dmgon macOS, or the.exeon Windows. - Open your host (Logic Pro or MainStage, Pro Tools, Ableton Live, Cubase, Reaper, Studio One, Bitwig Studio, Pi Live, or any other AAX, VST3 or AU host). Rescan plug-ins if your host asks.
- Insert Pi Tune on the vocal channel as an insert effect. In VST3 hosts it is listed under Fx / Pitch Shift.
- Click the licence button at the top right of the window (it reads ACTIVATE at first). Paste your licence key and click Activate, or click Start 15-day free trial.
- On the TUNE page, set Key and Scale / Maqam to match the song. If you are not sure of the key, see Learning the key with Key Listen.
- Set Input Type to the singer's voice (Soprano, Alto / Tenor or Low Male). For the best tracking, press LEARN VOICE and have the singer sing normally for 10 seconds.
- Choose a style from the Factory presets menu in the header. Natural Live Vocal is a good start; use Hard Tune Effect for the classic robotic sound.
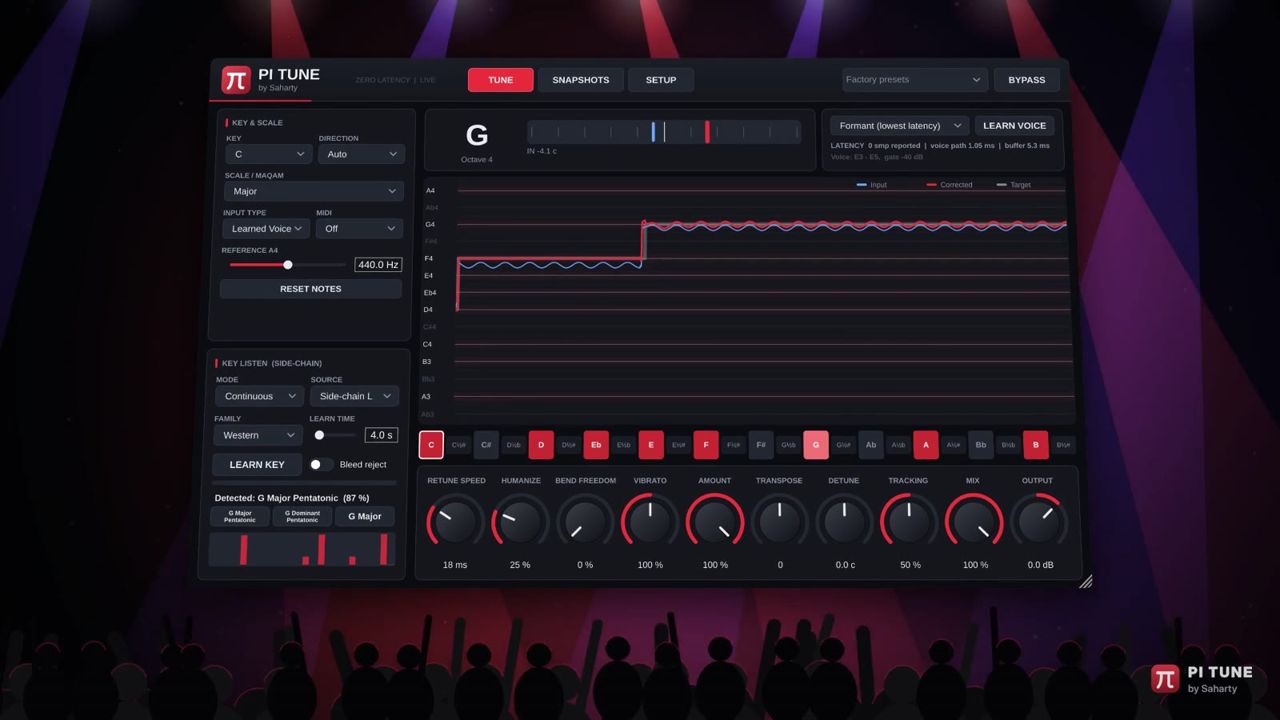
- Sing, and watch the pitch display: blue is the input, red is the corrected output, and the faint white band is the target note.
- Fine-tune with Retune Speed, Humanize and Bend Freedom, then set Output to match the bypassed level.
Installation
macOS
Pi Tune for macOS is a universal build that runs natively on Apple silicon and Intel Macs.
- Open
PiTune-1.3.0-mac.dmg. - Double-click Install Pi Tune.pkg and follow the steps.
- Open your host and insert Pi Tune on the vocal channel.
The installer places these components:
| Component | Location |
|---|---|
| VST3 | /Library/Audio/Plug-Ins/VST3 |
| Audio Unit | /Library/Audio/Plug-Ins/Components |
| AAX (Pro Tools) | /Library/Application Support/Avid/Audio/Plug-Ins |
| Standalone app | /Applications |
Note: In Pro Tools, insert Pi Tune from the Pitch Shift category on a mono or stereo vocal track. The AAX version is signed for Pro Tools on macOS.
If macOS says the installer is from an unidentified developer, right-click the .pkg and choose Open, or allow it in System Settings > Privacy & Security.
The first time you open the standalone app, macOS asks for microphone access ("Pi Tune needs audio input to tune your voice."). Click Allow. Pi Tune cannot hear your voice without it.
Windows
- Run
PiTune-1.3.0-win-setup.exeand follow the steps. - The VST3 plug-in is installed in the standard VST3 folder (
C:\Program Files\Common Files\VST3). - Open your host, rescan plug-ins if needed, and insert Pi Tune on the vocal channel.
Windows builds are 64-bit (x64). Audio Units is a macOS-only format.
Channel layouts
| Bus | Supported layouts |
|---|---|
| Main input / output | Mono in > mono out, or stereo in > stereo out (input and output must match) |
| Side-chain Key / LTC | Optional; mono or stereo |
The side-chain is used by Key Listen, Bleed reject and SMPTE LTC. You do not need it for normal tuning.
First launch
When you first open Pi Tune, the window shows the TUNE page at its design size. You can resize the window from the bottom-right corner, from 60 % to 200 % of the original size. The proportions stay fixed so nothing is cropped. Until you activate a licence or start the trial, audio passes through untuned and the licence button reads ACTIVATE.
Activation & licensing
Pi Tune uses the Pi by Saharty licensing system. One licence activates one computer, and every format on that computer (AAX, VST3, AU and Standalone) shares the same licence.
Buying a licence
Buy Pi Tune at pi-ware.com. Your licence key arrives by email after purchase. It looks like XXXXX-XXXXX-XXXXX-XXXXX. Every purchase includes free updates. You can also click BUY AT PI-WARE.COM on the SETUP page, or Buy a licence in the licence window.
Opening the licence window
Open the licence window in either of these ways:
- Click the licence button at the right of the header.
- Go to SETUP and click LICENCE....
The licence button shows your status at a glance:
| Button | Meaning |
|---|---|
| LICENSED (green) | Activated with a full licence. Every feature is on. |
| TRIAL (amber) | The free trial is running. Every feature is on. |
| NOTICE (amber) | A change is coming (for example, the licence was moved). Every feature still works during the notice period. |
| ACTIVATE (red) | Not activated, or limited. Audio passes through untuned. |
Starting the 15-day free trial
- Open the licence window.
- Click Start 15-day free trial.
The trial unlocks every feature for 15 days on this computer. The SETUP page shows the time left ("Free trial: ... left."). From three days before the end, a banner reminds you that the trial is ending.
Activating online
- Make sure the computer is connected to the internet.
- Open the licence window and paste your key into Licence key.
- Click Activate.
When activation succeeds, you see "Activated. Thank you!" and the SETUP page shows LICENSED - EVERY FEATURE ON.
Activating offline
Use offline activation for a show computer that never goes online.
- Open the licence window, paste your licence key into Licence key, then click Offline activation.
- A request code appears. Click Copy code.
- On any device with internet access, go to pi-ware.com/activate and paste the request code. Download the licence file you receive.
- Bring the licence file back to the show computer. In the licence window, click Load licence file... and choose it (
.pilicor.txt).
Note: A licence file is made for one specific computer. If you load it on another computer, Pi Tune shows "That licence file was made for a different computer."
Moving a licence to a new computer
One licence activates one computer at a time. To change computers, do one of the following:
- From the old computer: open the licence window and click Deactivate this computer, then activate on the new one.
- From the new computer: activate as usual. If the key is active elsewhere, Pi Tune asks whether to move it ("This licence is active on another computer... Move it to this computer?"). Click Move it here. The old computer gets a 24-hour notice, then switches to limited mode. The dialog shows how many moves you have left this year.
- From your account: sign in at pi-ware.com/account to see your licences and computers and to deactivate or reset machines, for example when the old computer is lost or broken.
Online checks and the notice period
Pi Tune checks the licence whenever it finds an internet connection, and it keeps working offline with no time limit. If the server cannot be reached, everything keeps working and Pi Tune checks again later.
Pi Tune never changes during a show without warning. Nothing is limited without at least 24 hours of notice on that computer (for example, after the licence is moved, a trial ends or a refund is made). During the notice period every feature works and a banner below the header shows the countdown. Click the banner to open the licence window.
Limited mode
Without a valid licence, Pi Tune runs in limited mode. The audio passes through untuned, with a smooth 50 ms crossfade so you never hear a click. The window and every control stay available, so you can still prepare a session.
Where the licence is stored
| System | Licence file |
|---|---|
| macOS | ~/Library/Application Support/Pi by Saharty/Licences/pi-tune.pilic |
| Windows | %APPDATA%\Pi by Saharty\Licences\pi-tune.pilic |
Interface tour
The Pi Tune window has a header and three pages: TUNE, SNAPSHOTS and SETUP.
Header
| Control | What it does |
|---|---|
| TUNE / SNAPSHOTS / SETUP | Switch pages. |
| Factory presets | Loads a tuning style (see Choosing a tuning style). Key and scale are kept. |
| BYPASS | Turns correction off; the audio passes through untouched. This is also the host's bypass parameter. |
| Licence button | Shows the licence status and opens the licence window. |
The header also shows the ZERO LATENCY | LIVE label. When a licence notice is active, a banner appears just below the header.
TUNE page: Key & Scale panel (left, top)
| Control | What it does | Range / default |
|---|---|---|
| Key | Tonic of the scale, in quarter tones (C, C½#, C#, D½b, D ... B½#). | 24 tonics / C |
| Direction | Which form of the scale is used when the ascending and descending forms differ. | Auto, Ascending, Descending, Both / Auto |
| Scale / Maqam | Scale, mode, raga, maqam, makam or dastgah, grouped by family in sub-menus. | 213 entries / Major |
| Input Type | Pitch range of the source. Pi Tune ignores pitches outside it. | Soprano, Alto / Tenor, Low Male, Instrument, Learned Voice |
| MIDI | How incoming MIDI notes are used. | Off, Target Notes, Scale From Notes |
| Reference A4 | Concert pitch for all scales. | 400-480 Hz / 440 Hz |
| RESET NOTES | Restores the notes of the selected scale after you edit the note strip. | - |
TUNE page: Key Listen (Side-chain) panel (left, bottom)
| Control | What it does | Range / default |
|---|---|---|
| Mode | Key-learning mode. | Off, Learn Once, Continuous |
| Source | Which signal Pi Tune listens to for the key. | Side-chain L+R, Side-chain L, Side-chain R, Main Input |
| Family | Limits the result to one group of scales. | All, Western, Arabic Maqam, Turkish Makam, Persian Dastgah, World |
| Learn Time | How long Pi Tune listens in Learn Once (and the memory for Continuous). | 2-60 s / 12 s |
| LEARN KEY | Starts a Learn Once pass now. | - |
| Bleed reject | Uses the side-chain to remove instrument leakage from pitch detection. | Off by default |
| Progress bar | Shows learning progress. | - |
| Result line | Shows the status, for example "Detected: D Hijaz (81 %)". | - |
| Suggestion buttons | The top three candidates; click one to apply it. | - |
| Chroma view | A 24-bar quarter-tone profile of what Pi Tune hears. | - |
TUNE page: tuner and engine panel (right, top)
The tuner readout shows the target note name in large letters with its octave, and a cents meter (-50 to +50 cents). The blue marker is the singer's pitch and the red marker is the corrected output. The line below shows the input deviation, for example IN +12.4 c. When nobody is singing, it shows "Waiting for voice".
The engine panel contains:
| Control / readout | What it does | Options / default |
|---|---|---|
| Engine | Chooses the pitch-shifting engine. | Formant (lowest latency), Classic |
| LEARN VOICE | Starts a 10-second voice calibration. Changes to CANCEL while it runs. | - |
| Latency line | LATENCY 0 smp reported | voice path x.xx ms | buffer x.x ms |
- |
| Voice line | The learned range and gate (for example "Voice: A2 - E5, gate -52 dB"), plus "bleed removed nn %" when Bleed reject is working. | - |
TUNE page: pitch display and note strip (right, centre)
The scrolling pitch display shows the last five seconds:
- Input (blue): what the singer sings.
- Corrected (red): what Pi Tune outputs.
- Target (wide white band): the note Pi Tune is aiming for.
Horizontal lanes mark every semitone and quarter tone. Notes that belong to the active scale are highlighted and labelled. The view follows the singer up and down automatically.
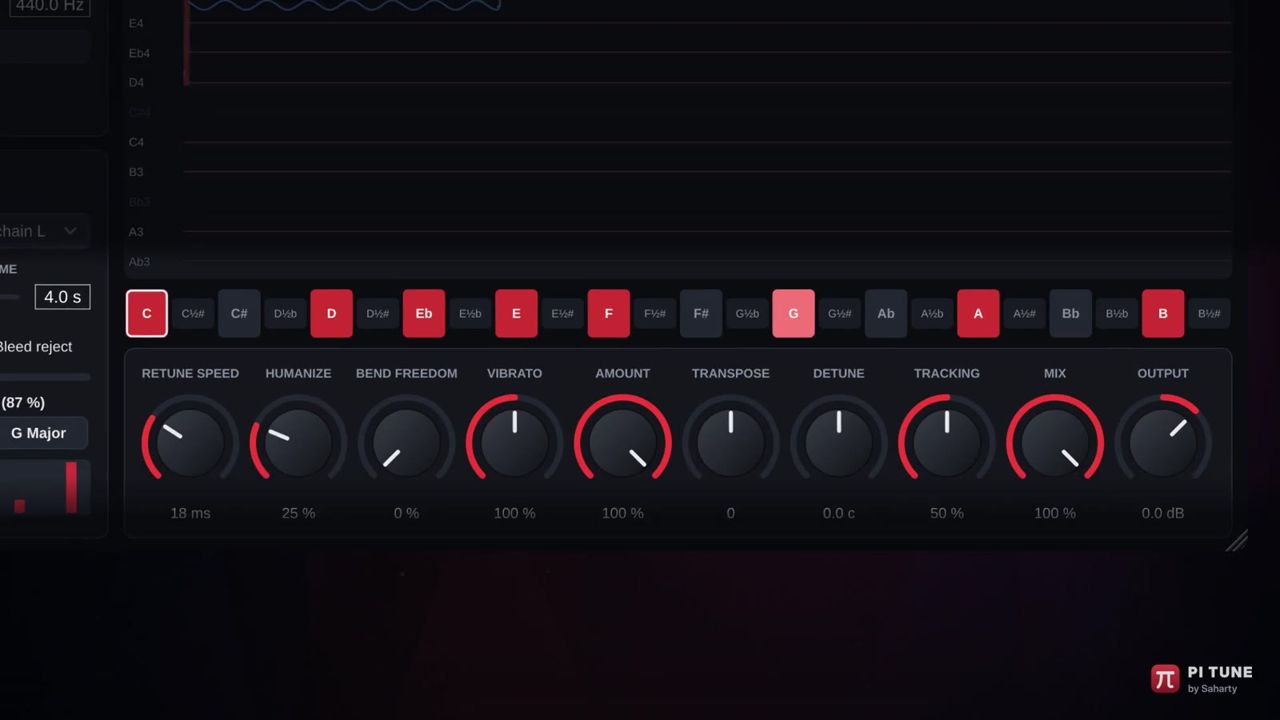
The note strip below the display has 24 cells, one per quarter tone from C to B½#. Red cells are notes Pi Tune may tune to. The tonic has a white outline, and the note currently targeted lights up brighter. Click any cell to switch that note on or off (see Editing the notes by hand).
TUNE page: correction knobs (bottom)
Drag a knob up/down or left/right to change it. Double-click a knob to return it to its default. Hover over a knob to see its tooltip.
| Knob | What it does | Range / default |
|---|---|---|
| Retune Speed | How fast the voice is pulled to the target note. 0 ms = hard-tune effect. | 0-400 ms / 20 ms |
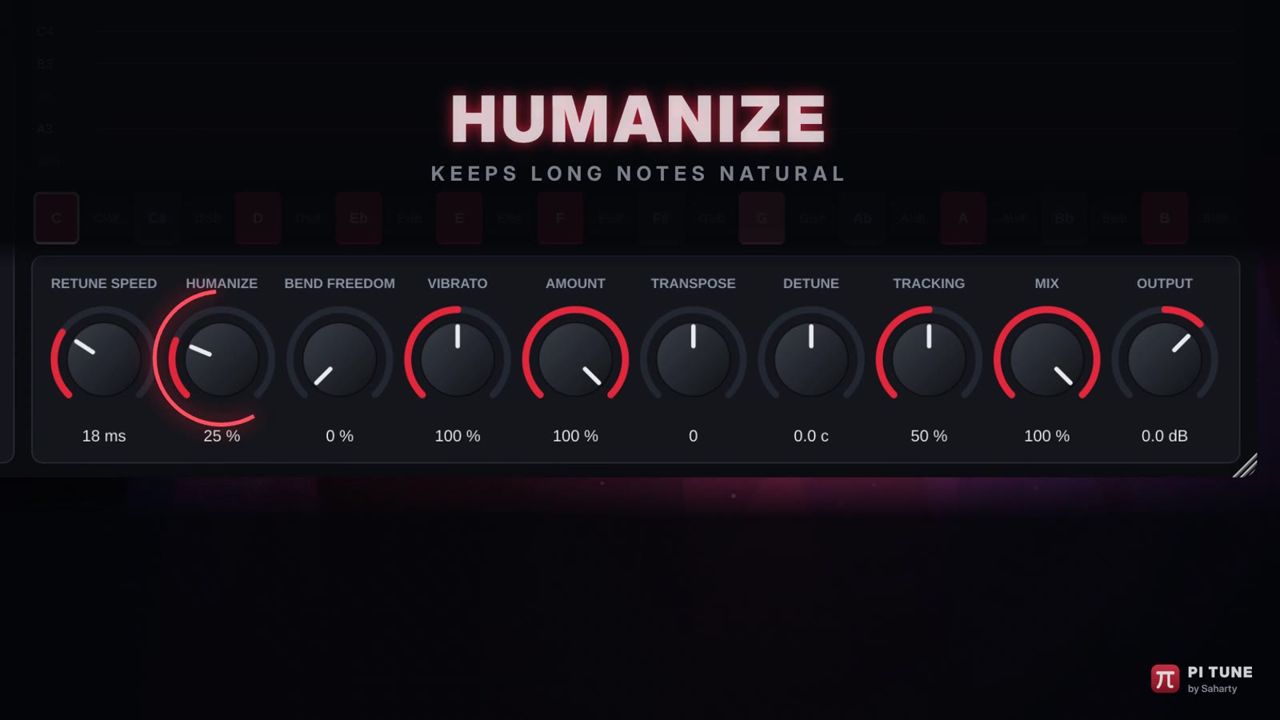
| Humanize | Slows the correction on sustained notes so long notes stay natural. | 0-100 % / 0 % |
| Bend Freedom | Only corrects when the singer is close to the note; expressive bends are left alone. | 0-100 % / 0 % |
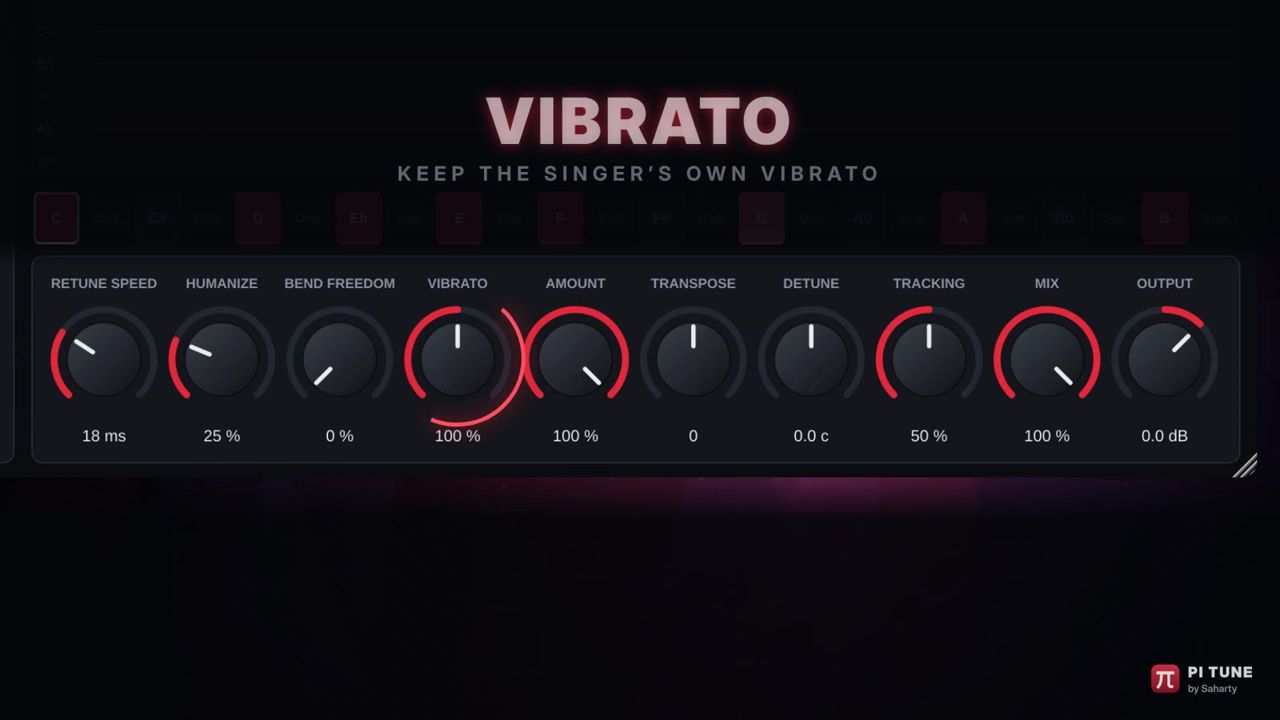
| Vibrato (Natural Vibrato) | Natural vibrato depth: 0 % removes it, 100 % keeps it, 200 % doubles it. | 0-200 % / 100 % |
| Amount (Correction Amount) | How much of the correction is applied. | 0-100 % / 100 % |
| Transpose | Shifts the output by whole semitones. | -12 to +12 st / 0 |
| Detune | Shifts the output by cents. | -100 to +100 cents / 0.0 c |
| Tracking | Pitch-detection sensitivity. Raise for breathy voices, lower for noisy stages. | 0-100 % / 50 % |
| Mix | Blend of corrected and original voice. | 0-100 % / 100 % |
| Output | Output level. | -24 to +12 dB / 0.0 dB |
SNAPSHOTS page
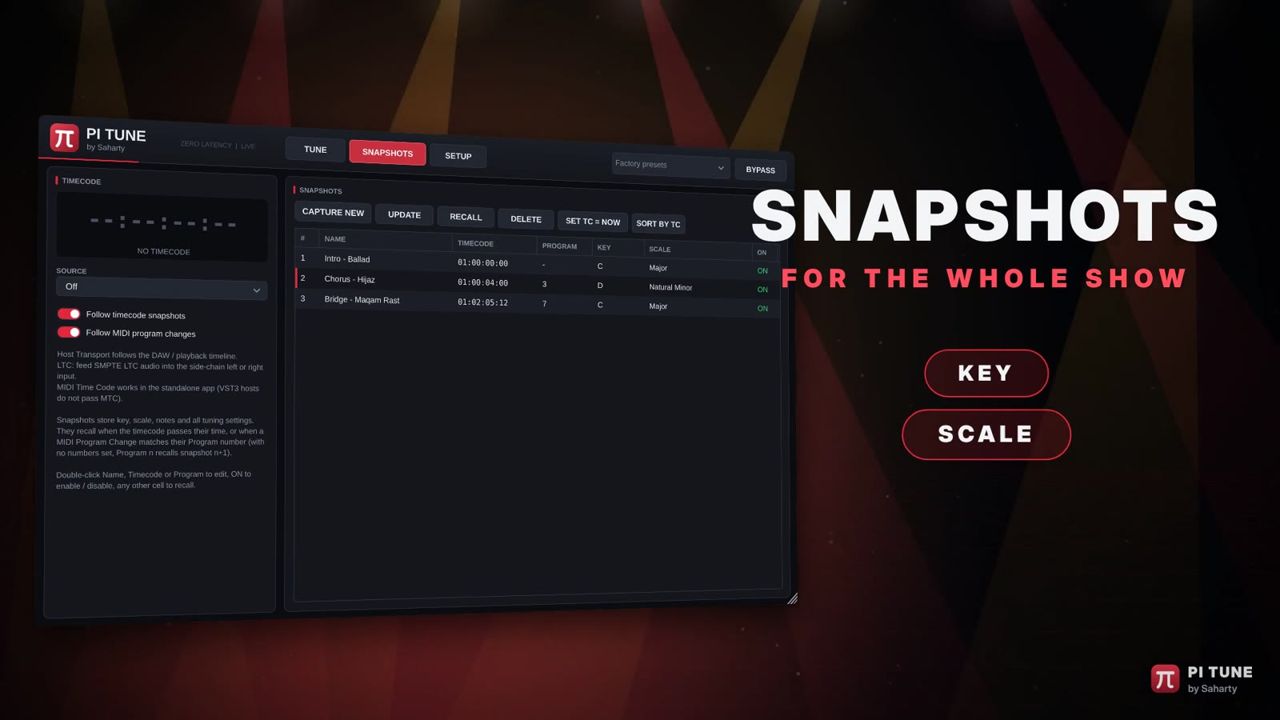
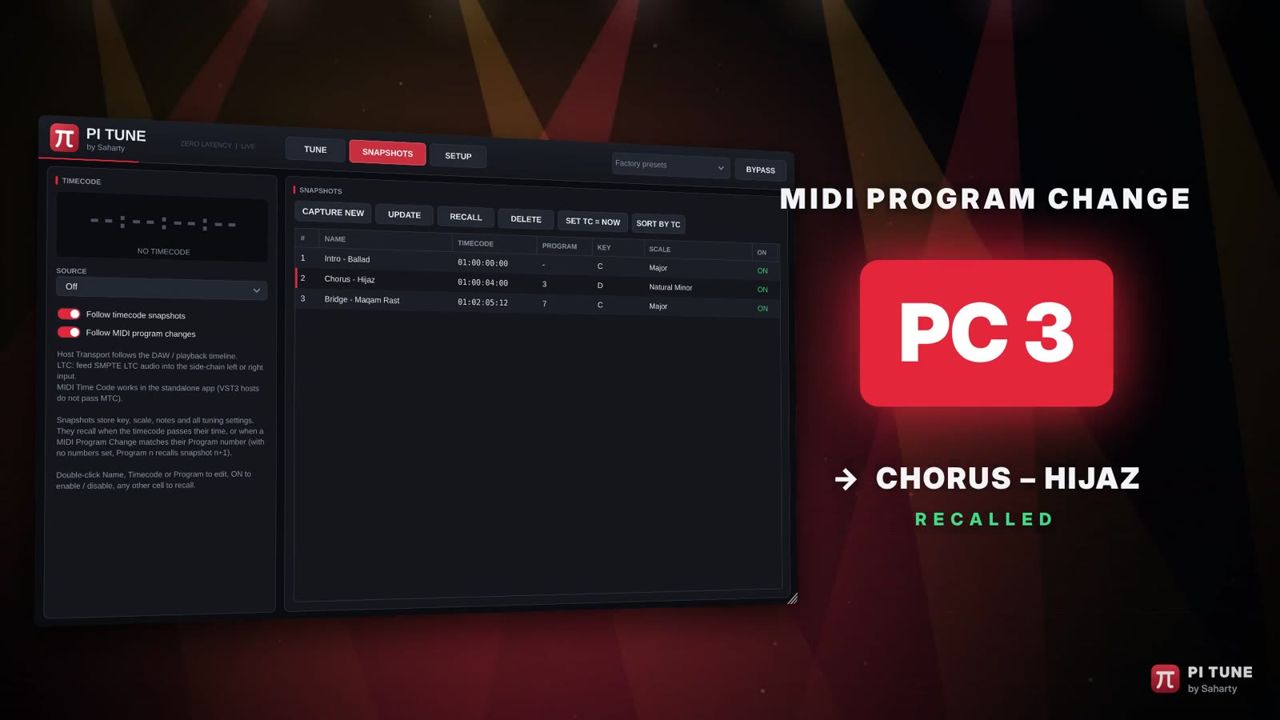
The left Timecode panel shows the current timecode in large digits, the lock status (LOCKED with the frame rate, or NO TIMECODE), the SOURCE menu, and the Follow timecode snapshots and Follow MIDI program changes switches. The right Snapshots panel holds the snapshot list and the CAPTURE NEW, UPDATE, RECALL, DELETE, SET TC = NOW and SORT BY TC buttons. See Snapshots for the whole show.
SETUP page
The Licence panel shows a status badge (for example LICENSED - EVERY FEATURE ON or NOT ACTIVATED - AUDIO PASSES THROUGH UNTUNED), the licence message, "This computer:" with the computer name, and the LICENCE... and BUY AT PI-WARE.COM buttons. The About panel shows the version number, a feature summary and the current wet-path delay.
How Pi Tune corrects in real time
You do not need to understand the engine to use Pi Tune, but knowing what it does helps you set it up well.
Zero lookahead
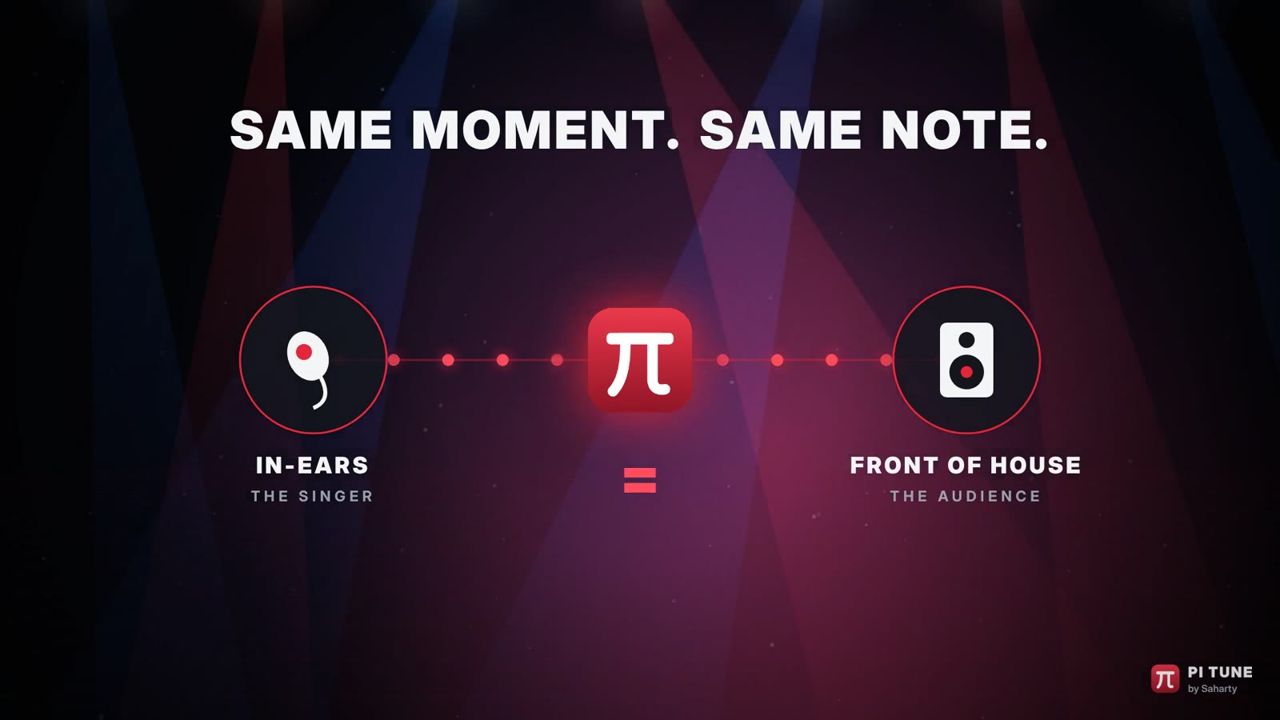
Many pitch correctors wait for a block of audio before they decide on the pitch. Pi Tune does not look ahead. It reports 0 samples of latency to the host, so your console or DAW never needs to delay-compensate the vocal channel.
The in-ears and front of house hear the corrected note at the same moment the singer sings it.
The two engines
| Engine | How it works | Voice-path delay | When to use it |
|---|---|---|---|
| Formant (lowest latency) (default) | Re-times the glottal pulses of the voice (pitch-synchronous overlap-add). Output pulses are spaced exactly one target period apart. | About half a pitch period, typically 1-3 ms | Almost always. Keeps the singer's timbre, even for large shifts, and gives an exact hard tune. |
| Classic | The original zero-lookahead delay-line shifter. | Up to about two pitch periods | Try it if you prefer its character on a particular voice or instrument. |
The latency line on the TUNE page shows the live voice-path delay, and the About panel shows the current wet-path delay. Neither engine adds plug-in latency reported to the host.
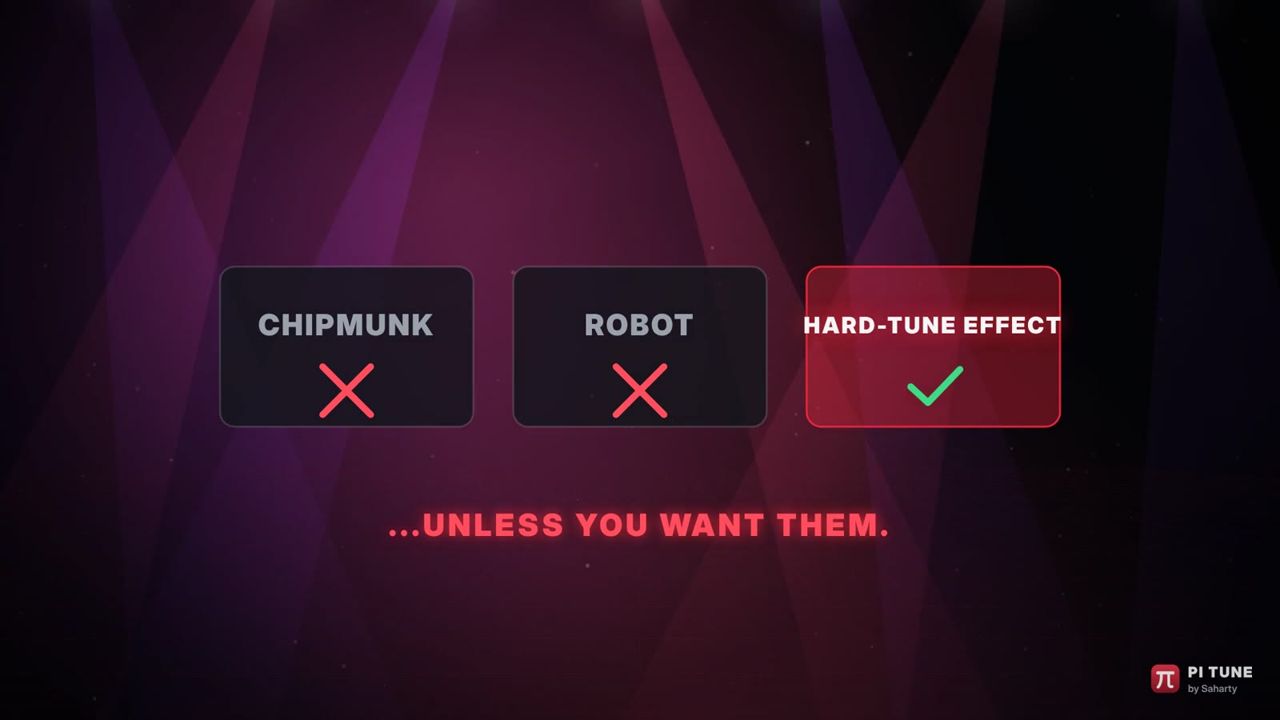
Because the formants are kept, large corrections do not sound like a chipmunk or a robot, unless you want the robot. The hard-tune sound is there when you set Retune Speed to 0 ms.
Breaths and consonants
A fast consonant detector releases "s", "sh" and "t" sounds at once, even under a reverb tail. Its threshold adapts to the singer's vowels. With the Formant engine, breaths and consonants go through the same path at a constant delay, so there is no switching, chirp or comb filtering between corrected vowels and uncorrected consonants.
Detection and note choice
Two detectors (YIN and McLeod) vote on every frame, and a tracker rejects octave and other harmonic jumps. Pi Tune then picks the nearest allowed note:
- Vibrato-aware hysteresis keeps the current note through vibrato, so the output does not flip between neighbouring notes.
- When the singer has clearly moved to a new note, Pi Tune follows within about 40 ms, so no wrong note is held after a scoop.
- When a scale has different ascending and descending forms and Direction is Auto, Pi Tune follows the melodic direction of the line.
Choosing a key and scale
How to set the key and scale
- On the TUNE page, open Key and choose the tonic. Quarter-tone tonics such as E½b or B½b are included for maqam music.
- Open Scale / Maqam. Point to a family to open its sub-menu, then choose the scale.
- Check the note strip: the red cells show the notes Pi Tune will tune to.
The scale families
| Family | Entries | Examples |
|---|---|---|
| Western | 20 | Chromatic, Major, Natural Minor, Harmonic Minor, Melodic Minor, pentatonics, blues, whole tone, diminished, triads, Power (Root & Fifth) |
| Modes | 19 | Ionian, Dorian, Phrygian, Lydian, Mixolydian, Aeolian, Locrian and more |
| Jazz & Bebop | 8 | Jazz and bebop scales |
| Exotic & Synthetic | 20 | Exotic and synthetic scales |
| Indian (Thaat & Raga) | 25 | Thaats and ragas |
| East Asian | 14 | East Asian scales |
| African & Indonesian | 10 | African and Indonesian scales |
| Arabic Maqamat | 51 | Rast, Bayati, Sikah, Hijaz, Saba, Nahawand, Ajam, Kurd, Nikriz, Huzam, Iraq, Hijazkar, Shadd Araban, Nawa Athar and more |
| Turkish Makamlar | 34 | Rast (Makam), Ussak, Huseyni, Hicaz, Hicazkar, Karcigar, Kurdilihicazkar, Nihavend, Segah, Huzzam, Saba (Makam), Suzinak and more |
| Persian Dastgah | 12 | Shur, Abu Ata, Dashti, Bayat-e Tork, Afshari, Segah (Dastgah), Chahargah, Homayoun, Bayat-e Esfahan, Mahur (Dastgah), Rast-Panjgah, Nava |

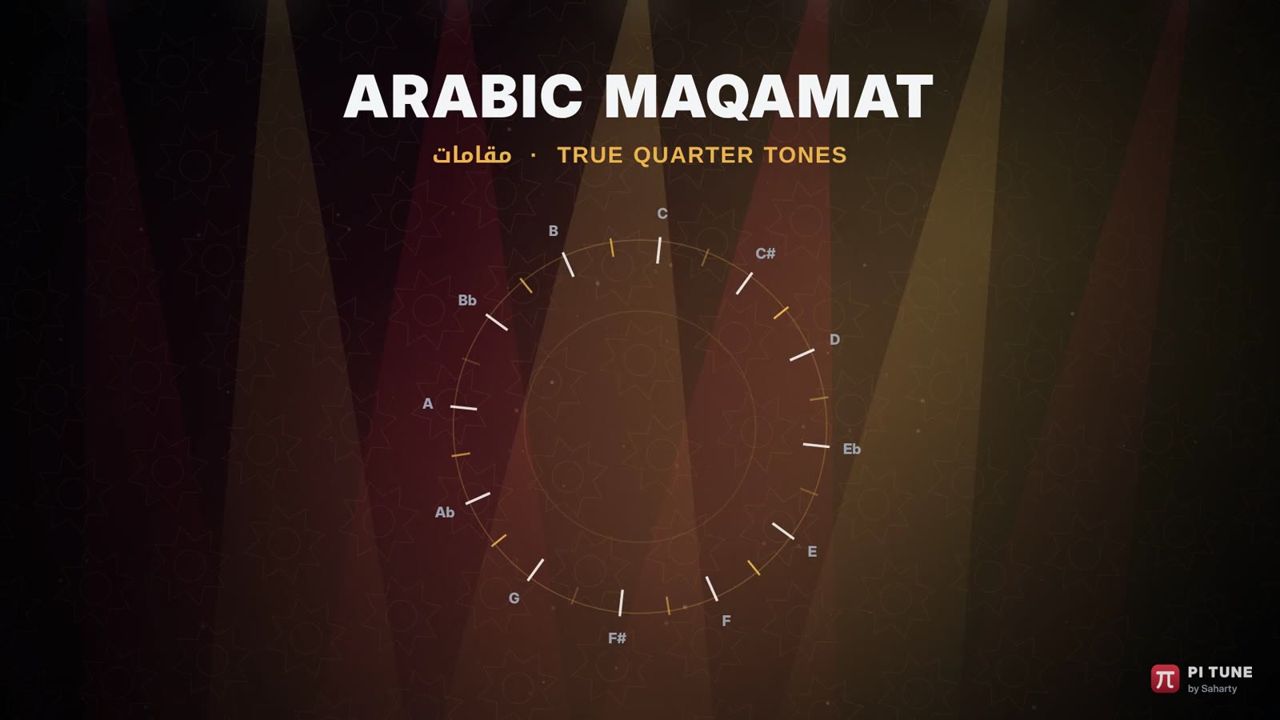
Arabic maqamat use true quarter tones (24 notes per octave). Pi Tune targets the real neutral intervals of the tradition, including the notes between the piano keys.
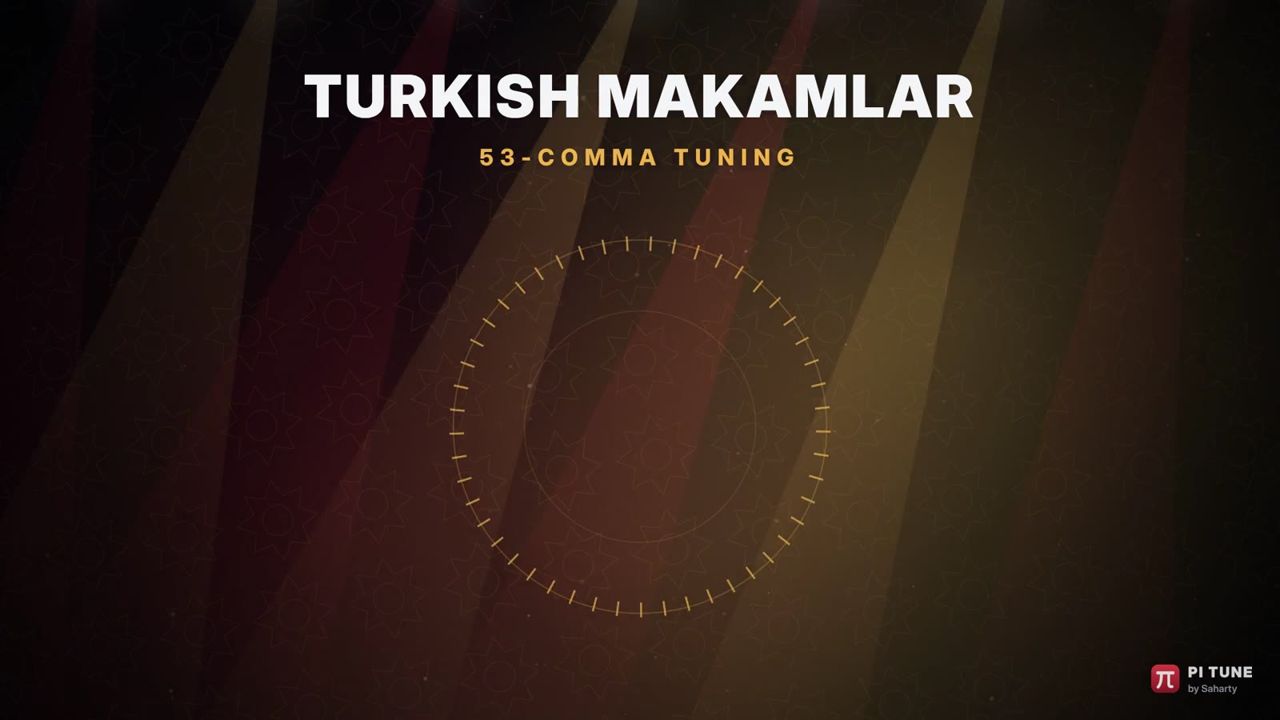
Turkish makamlar use the 53-comma system, so their intervals are even finer than a quarter tone. Persian dastgah-ha use the common 24-tone approximation (koron and sori).
Tip: Chromatic tunes to every semitone. Use it when the song changes key often or you are not sure of the key. It still tightens pitch without forcing notes into a scale.
How to use Direction
Some scales, such as Melodic Minor and several maqamat and makamlar, use different notes going up than coming down. Direction controls this:
| Setting | Behaviour |
|---|---|
| Auto | Follows the melody: ascending notes when the line rises, descending notes when it falls. |
| Ascending | Always uses the ascending form. |
| Descending | Always uses the descending form. |
| Both | Allows the notes of both forms at any time. |
For scales with a single form, Direction makes no difference.
How to set the reference pitch
If the band tunes to something other than A = 440 Hz (for example A = 442 Hz, or an instrument tuned to its own reference), drag Reference A4 to match. The range is 400-480 Hz in 0.1 Hz steps.
Editing the notes by hand
You can switch any of the 24 quarter-tone notes on or off on the note strip.
- Choose the Key and Scale / Maqam first.
- Click a red cell to remove that note, or a grey cell to add it.
- To return to the scale's own notes, click RESET NOTES.
Your edits belong to the current key and scale combination. If you choose a different key or scale, the strip shows the new scale's notes. If you return to the edited combination, your edits come back. Edited notes are saved with your session and in snapshots.
Tip: Remove a note the singer tends to land on by mistake, or a passing note you do not want "corrected" into. Fewer notes make the correction feel firmer.
Note: For Turkish makamlar and other fine-tuned scales, the notes of the scale keep their exact pitch. The strip shows them at the nearest quarter tone. A note you add by hand is placed exactly on its quarter tone.
Shaping the correction
Choosing a tuning style
The Factory presets menu sets the five style knobs. It does not change key, scale, input type or any other setting.
| Preset | Retune Speed | Humanize | Bend Freedom | Vibrato | Amount |
|---|---|---|---|---|---|
| Natural Live Vocal | 25 ms | 30 % | 20 % | 100 % | 100 % |
| Pop Tight | 10 ms | 15 % | 0 % | 85 % | 100 % |
| Hard Tune Effect | 0 ms | 0 % | 0 % | 0 % | 100 % |
| Gentle Pitch Assist | 60 ms | 50 % | 55 % | 100 % | 80 % |
| Ballad Smooth | 40 ms | 45 % | 15 % | 100 % | 100 % |
| Maqam / Tarab Natural | 35 ms | 40 % | 30 % | 110 % | 100 % |
| Melodic Rap | 4 ms | 0 % | 0 % | 30 % | 100 % |
| Choir / Backing | 15 ms | 25 % | 10 % | 70 % | 100 % |
How to get natural correction
- Start from Natural Live Vocal or Gentle Pitch Assist.
- Raise Retune Speed (30-60 ms) so the voice glides into the note instead of snapping.
- Raise Humanize so long, held notes are corrected more gently and keep their life.
- Raise Bend Freedom so deliberate slides, falls and blue notes are left alone. Pi Tune then corrects only when the singer is already close to a note.
- Keep Vibrato at 100 % to keep the singer's own vibrato.
- If it still sounds processed, lower Amount or Mix.
How to get the hard-tune effect
- Choose Hard Tune Effect (or set Retune Speed to 0 ms).
- Keep Humanize and Bend Freedom at 0 %.
- Set Vibrato to 0 % to flatten the vibrato completely.
- Use a scale with few notes (for example Minor Pentatonic) for a more obvious effect.
With the Formant engine, the output pulses are placed exactly one target period apart, so a 0 ms hard tune lands exactly on the note with no residual detune or warble.
Vibrato control
Vibrato acts on the singer's natural vibrato:
- 0 % removes the vibrato (a straight, steady note).
- 100 % keeps it as sung.
- 200 % doubles its depth.
Transpose, Detune and Mix
- Transpose shifts the corrected voice by -12 to +12 semitones, for an octave or harmony effect.
- Detune moves the output by up to ±100 cents. Use small values (5-10 cents) on a doubled part for width.
- Mix blends the corrected voice with the original voice.
- Output sets the level after Pi Tune (-24 to +12 dB).
Calibrating to the singer
Choosing the Input Type
Input Type tells Pi Tune where to look for the pitch. A range that fits the voice avoids octave errors and stops Pi Tune from reacting to sounds outside the voice.
| Input Type | Detection range |
|---|---|
| Soprano | 150-1300 Hz |
| Alto / Tenor (default) | 85-900 Hz |
| Low Male | 55-500 Hz |
| Instrument | 40-1600 Hz |
| Learned Voice | The range measured by LEARN VOICE |
How to use Learn Voice
Learn Voice measures the singer's real range and the noise floor of the stage. It then sets a detection range and a gate made for that singer.
- Make sure the vocal mic is live and the stage is at its normal level (band soundcheck or line check).
- On the TUNE page, click LEARN VOICE. The button changes to CANCEL and a progress bar fills over 10 seconds.
- Ask the singer to sing a few phrases across their range, as they would in the show.
- When the bar is full, Pi Tune sets Input Type to Learned Voice and shows the result, for example "Voice: A2 - E5, gate -52 dB".
If the singer is breathy, Learn Voice also raises Tracking (to between 50 % and 80 %) so the detector follows the voice more readily.
If the result says "Not enough singing heard - try again", Pi Tune did not hear enough sung notes. Run it again and make sure the singer sings during the full 10 seconds. Click CANCEL at any time to stop without changing anything.
The learned voice is saved with your session and project, so you only need to do this once per singer.
Setting Tracking
Tracking sets how readily Pi Tune decides it hears a pitch:
- Raise it for soft, breathy or airy voices that Pi Tune sometimes lets through untuned.
- Lower it on a loud, noisy stage where Pi Tune reacts to spill or noise between phrases.
Rejecting band bleed on stage
On a loud stage, the vocal mic also picks up drums, guitars and monitors. Bleed reject stops Pi Tune from following those instruments.
How to set up Bleed reject
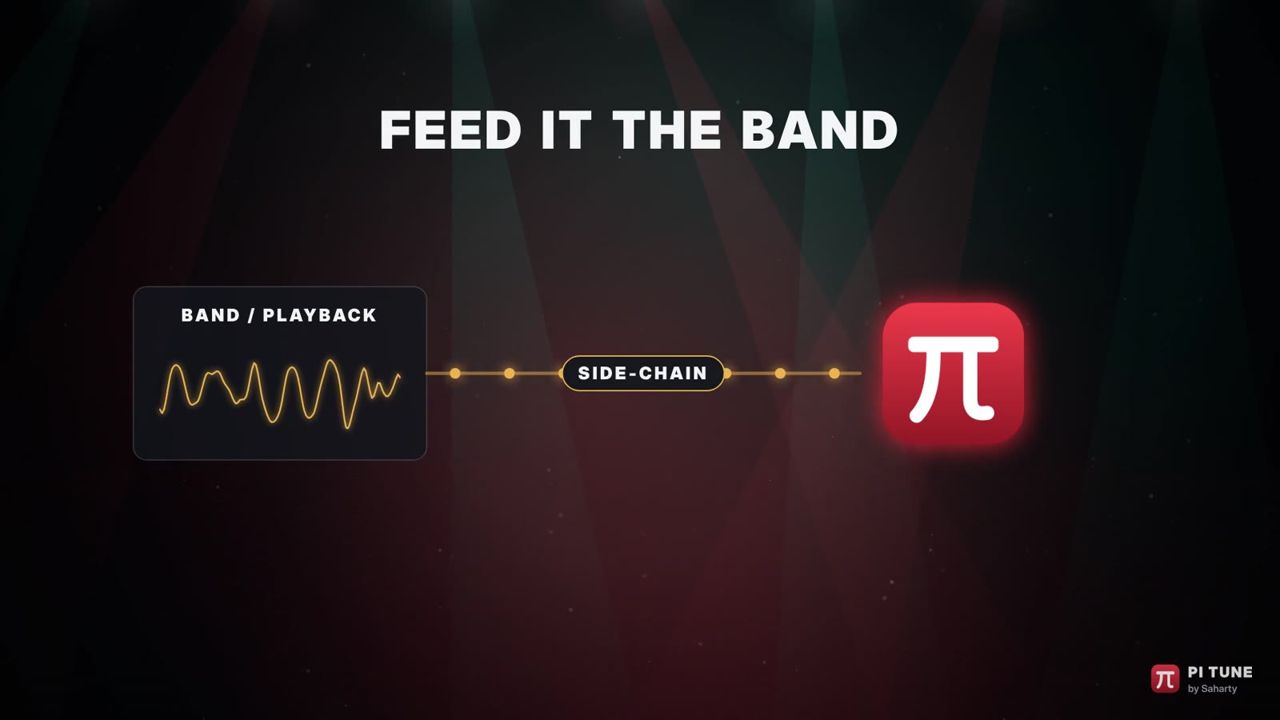
- Send a feed of the band without vocals (for example an instrument sub-group, or a mix of the loudest stage sources) to Pi Tune's side-chain input, Key / LTC. How you route a side-chain depends on your host.
- On the TUNE page, turn on Bleed reject in the Key Listen (Side-chain) panel.
- Have the band play. The voice line in the engine panel shows "bleed removed nn %" while it works.
An adaptive filter learns how the band feed leaks into the vocal mic and removes it from the detector only. Your vocal audio is not filtered, so the sound of the mic does not change. Pi Tune simply follows the singer and not the band.
Note: If you use one side-chain channel for SMPTE LTC, Bleed reject never uses that channel. It uses only the other side-chain channel.
Warning: Do not include the vocal itself in the bleed-reject feed. Pi Tune would then treat the voice as bleed.
Learning the key with Key Listen
Key Listen works out the key and scale (or maqam, makam or dastgah) by listening to a reference signal, such as the keys, a guitar, the band mix or the playback. It can also listen to the vocal itself.
How to learn the key once
- Route a reference signal to the side-chain input Key / LTC. Harmonic instruments (keys, guitar, strings, the full band or the playback) work best.
- Set Source to Side-chain L+R, Side-chain L or Side-chain R. To learn from the singer instead, choose Main Input.
- Set Family to the kind of music if you know it (for example Arabic Maqam). This avoids picking a scale from the wrong tradition. Leave it on All if you are not sure.
- Set Learn Time (2-60 s; 12 s by default). Longer is more reliable; shorter is faster.
- Click LEARN KEY (or set Mode to Learn Once). The progress bar fills and the result line shows "Listening... nn %".
- When it finishes, Pi Tune sets Key and Scale / Maqam to the best match and shows it, for example "Detected: D Hijaz (81 %)".
- If the best match is not right, click one of the three suggestion buttons below the result to apply it instead.
The chroma view at the bottom of the panel shows how strongly each of the 24 quarter tones is heard. It helps you see whether the reference signal is clear.
How to follow key changes automatically
Set Mode to Continuous. Pi Tune keeps listening with a sliding memory. It changes Key and Scale / Maqam only when:
- the same new result has held for several analyses in a row (about 1.5 seconds),
- it is reasonably confident (more than 55 %), and
- it has listened for at least half the Learn Time.
This avoids jumping around on a single chord.
Tip: On a live show, Learn Once during the intro, or snapshots (see below), is usually safer than Continuous. Use Continuous for jams or unknown setlists.
Applying a learned key resets any hand-edited notes on the note strip. When Mode is Off, the result line shows "Off - choose a mode or press Learn". If there is no signal yet, it shows "Waiting for reference signal...".
Controlling Pi Tune with MIDI
Pi Tune accepts MIDI from your host or, in the standalone app, from a MIDI input.
MIDI Target Notes: sing to the keyboard
- Set MIDI on the TUNE page to Target Notes.
- Route a MIDI track or keyboard to Pi Tune.
- While keys are held, Pi Tune tunes the voice to the nearest held note. If the singer is far from every held key (more than a fifth), Pi Tune uses the same note names in the singer's octave instead.
- When no keys are held, Pi Tune falls back to the selected scale.
This is ideal for exact melodies programmed from a MIDI file, or for a keyboard player who "plays" the vocal tuning.
MIDI Scale From Notes: a chord defines the notes
- Set MIDI to Scale From Notes.
- Hold a chord or a group of notes. Pi Tune allows only the note names you are holding, in any octave.
- Release all keys to go back to the selected scale.
Program Change
When Follow MIDI program changes is on (on the SNAPSHOTS page; on by default), a MIDI Program Change recalls a snapshot. See the next chapter.
Snapshots for the whole show
Snapshots store everything that defines the tuning of a song or a section, and recall it by timecode, MIDI Program Change or a click.
What a snapshot stores
| Stored in a snapshot | Not stored in a snapshot |
|---|---|
| Key, Scale / Maqam, Direction, Reference A4, Input Type, MIDI mode, Engine | BYPASS |
| Retune Speed, Humanize, Bend Freedom, Vibrato, Amount | Key Listen settings (Mode, Source, Family, Learn Time) |
| Transpose, Detune, Tracking, Mix, Output | Bleed reject |
| Your hand-edited notes on the note strip | Timecode SOURCE and the follow switches |
How to create snapshots
- Set up the tuning for the first song on the TUNE page.
- Go to SNAPSHOTS and click CAPTURE NEW. A new row appears ("Snapshot 1"). If timecode is running, its current time is stored with the snapshot; otherwise its time is 00:00:00:00.
- Repeat for each song or section.
How to edit the snapshot list
| Action | How |
|---|---|
| Rename | Double-click the Name cell, type, press Return. |
| Set the time | Double-click the Timecode cell and type hh:mm:ss:ff (:, ; or . are accepted as separators). Or select the row and click SET TC = NOW to use the current timecode. |
| Assign a Program Change | Double-click the Program cell and type 0-127. Leave it empty for none. |
| Enable / disable | Double-click the On cell. Disabled snapshots are never recalled automatically. |
| Recall | Select the row and click RECALL, or double-click any other cell (#, Key or Scale). |
| Overwrite with the current settings | Select the row and click UPDATE. |
| Delete | Select the row and click DELETE. |
| Put in time order | Click SORT BY TC. |
Press Escape while editing a cell to cancel. The active (most recently recalled) snapshot is marked with a red bar at the left of its row.
Recalling snapshots with MIDI Program Change
- On the SNAPSHOTS page, turn on Follow MIDI program changes.
- Either type a Program number into each snapshot's Program cell, or leave them all empty.
- Send a Program Change to Pi Tune from your host, a show-control system or a MIDI pedal.
If any snapshot has a Program number, Pi Tune recalls the first enabled snapshot whose number matches. If no snapshot has a number, Program n recalls snapshot n+1 (Program 0 recalls snapshot 1, Program 1 recalls snapshot 2, and so on).
Recalling snapshots with timecode
- Choose the timecode SOURCE:
| Source | Use it when |
|---|---|
| Host Transport | The DAW or playback system's timeline drives the show. Pi Tune reads the host's position (including the session start time) and frame rate. |
| LTC on Side-chain L / LTC on Side-chain R | You have SMPTE LTC audio. Patch it into the left or right channel of the Key / LTC side-chain. 24, 25, 29.97 drop-frame and 30 fps are detected automatically. |
| MIDI Time Code | You send MTC. This works in the standalone app; VST3 hosts do not pass MTC to plug-ins. |
| Off | No timecode. |
- Check that the display shows the running time and LOCKED with the frame rate. NO TIMECODE means nothing is being received.
- Turn on Follow timecode snapshots (on by default).
- Give each snapshot its start time, then click SORT BY TC to keep the list tidy.
During the show, Pi Tune always applies the latest enabled snapshot whose time has been reached. A snapshot is recalled once, when the timecode passes its time. If you change a setting by hand afterwards, Pi Tune keeps your change until the next snapshot time is reached.
Note: When LTC is on one side-chain channel, Key Listen and Bleed reject automatically ignore that channel. You can carry LTC on one side and a band feed on the other.
Snapshots are saved inside your host session or project (and in the standalone app's saved state), together with all other settings.
Settings & preferences
Pi Tune has no separate preferences file. Every setting is part of the plug-in state and is saved with your host session, including:
- all parameters on the TUNE page,
- your hand-edited notes,
- the learned voice profile (range and gate),
- the snapshot list,
- the timecode source and follow switches.
All parameters can be automated from your host. The host's bypass control is linked to Pi Tune's BYPASS button.
Window size
Drag the bottom-right corner to resize the window between 60 % and 200 % of its normal size. The layout scales evenly.
Standalone app
The standalone app runs Pi Tune without a host, for example on a dedicated computer between the console and the PA, or for practice. Use the app's Options menu to choose the audio device, input and output channels, sample rate, buffer size and MIDI input. Choose the smallest buffer size your system can run without dropouts; the TUNE page shows the current buffer in milliseconds next to the voice-path delay.
Keyboard shortcuts / remote control
Mouse and keyboard
| Action | Shortcut |
|---|---|
| Reset a knob to its default | Double-click the knob |
| Confirm a snapshot cell edit | Return (or click elsewhere) |
| Cancel a snapshot cell edit | Escape |
| Close the licence window | Escape |
MIDI messages
| Message | Effect |
|---|---|
| Note On / Note Off | Target notes (MIDI = Target Notes) or scale notes (MIDI = Scale From Notes) |
| All Notes Off / All Sound Off | Releases all held notes; Pi Tune returns to the selected scale |
| Program Change 0-127 | Recalls a snapshot (when Follow MIDI program changes is on) |
| MIDI Time Code (quarter-frame and full-frame) | Timecode for snapshots (when SOURCE = MIDI Time Code) |
Timecode
| Source | Formats |
|---|---|
| Host transport | Host position and frame rate |
| SMPTE LTC audio on the side-chain | 24, 25, 29.97 drop-frame, 30 fps |
| MIDI Time Code | 24, 25, 29.97 drop-frame, 30 fps |
Tips for live/studio use
- Insert Pi Tune first in the vocal chain, before compression and effects. Reverb or delay before Pi Tune makes detection harder.
- Run Learn Voice at soundcheck, with the band playing at show level. The gate it sets sits above the stage noise but below the singer's quietest notes.
- Use the right Input Type. A wrong range is the most common reason for octave errors. If you cannot run Learn Voice, choose the range closest to the singer.
- Feed Bleed reject the loud stuff. The instruments that leak most into the vocal mic (drums, guitar amps, wedges) are the ones to include in the side-chain feed.
- One side-chain, two jobs. Put LTC on one side-chain channel and a band feed on the other: you get timecode snapshots and Key Listen or Bleed reject at the same time.
- Keep the buffer small. Pi Tune adds no plug-in latency, but your host's buffer still delays the signal. The latency line on the TUNE page shows both the voice path and the buffer.
- Prefer snapshots to Continuous key listening on a show. Snapshots are predictable; Continuous mode is best for jams or unknown songs.
- For maqam music, choose the maqam, not a Western scale with the same tonic. Pi Tune then targets the real neutral intervals. Maqam / Tarab Natural is a good starting style, with enough Bend Freedom to leave ornaments alone.
- For backing vocals and choirs, try Choir / Backing, or lower Mix so the group keeps some natural spread.
- In the studio, the same settings work on recorded vocals. With MIDI set to Target Notes, you can draw the exact melody on a MIDI track.
Troubleshooting
| Symptom | Cause | Fix |
|---|---|---|
| Audio passes through but is not tuned | Not activated, trial ended or licence moved (limited mode) | Check the licence button and SETUP page. Activate your key or start the trial. |
| Audio passes through but is not tuned | BYPASS is on, or host bypass is engaged | Turn off BYPASS in the header or in your host. |
| No correction; tuner shows "Waiting for voice" | Input too quiet, or below the learned gate | Check the input gain. Lower Tracking only if the stage is noisy; otherwise raise it, or run LEARN VOICE again. |
| Notes jump an octave or land on wrong notes | Input Type does not match the singer | Choose the right Input Type or run LEARN VOICE. |
| Pi Tune follows the band instead of the singer | Loud bleed into the vocal mic | Feed the band (without vocals) to the side-chain and turn on Bleed reject. Lower Tracking. |
| Breathy passages are left untuned | Detection is too strict for this voice | Raise Tracking, or run LEARN VOICE. |
| Correction sounds robotic | Retune Speed very fast, Humanize at 0 % | Use Natural Live Vocal or raise Retune Speed, Humanize and Bend Freedom. |
| Correction is too weak | Slow Retune Speed, low Amount or Mix, high Bend Freedom | Lower Retune Speed; raise Amount and Mix; lower Bend Freedom. |
| The wrong notes are targeted | Wrong key or scale, or edited notes | Check Key and Scale / Maqam; click RESET NOTES. |
| Key Listen shows "Waiting for reference signal..." | No side-chain signal, or the source is wrong | Route a signal to the Key / LTC side-chain and check Source. |
| Key Listen picks a scale from the wrong tradition | Family is set to All | Set Family to the style of music, or click one of the suggestion buttons. |
| "Not enough singing heard - try again" | Too little singing during Learn Voice | Run LEARN VOICE again and sing throughout the 10 seconds. |
| Timecode shows NO TIMECODE | No LTC or MTC received, wrong source or channel, or the host transport is stopped | Check SOURCE, the side-chain routing and the LTC channel (L or R). For MTC use the standalone app. |
| Snapshots do not recall on timecode | Follow timecode snapshots is off, or the snapshot is disabled | Turn it on; double-click On to enable the snapshot; check its time. |
| Program Change recalls the wrong snapshot | Some snapshots have Program numbers and some do not | Give every snapshot a Program number, or clear them all to use the order of the list. |
| MIDI notes have no effect | MIDI is Off, or MIDI is not routed to Pi Tune | Set MIDI to Target Notes or Scale From Notes and route MIDI to the plug-in. |
| Pi Tune does not appear in the host | Plug-in not scanned, or wrong format for the host | Rescan plug-ins. Use AU in Logic Pro and MainStage, AAX in Pro Tools, VST3 elsewhere. |
| macOS blocks the installer | Gatekeeper | Right-click the .pkg and choose Open, or allow it in System Settings > Privacy & Security. |
| Standalone app hears nothing on macOS | Microphone permission denied | Allow Pi Tune in System Settings > Privacy & Security > Microphone. |
| "Could not reach the Pi licence server" | No internet connection | Check the connection, or use Offline activation. |
| "That licence file was made for a different computer." | The licence file was made from another computer's request code | Create a new request code on this computer and activate again at pi-ware.com/activate. |
| "This licence is active on another computer" | One licence, one computer | Click Move it here, or deactivate the other computer first. |
Specifications & system requirements
Specifications
| Item | Value |
|---|---|
| Version | 1.3.0 |
| Formats | AAX (macOS), VST3, AU (macOS), Standalone |
| Latency | 0 samples reported (no lookahead) |
| Voice-path delay | About half a pitch period with the Formant engine (typically 1-3 ms) |
| Engines | Formant (lowest latency), Classic |
| Channels | Mono or stereo in/out; optional mono or stereo side-chain Key / LTC |
| Scales | 213 in 10 families, 24 quarter-tone tonics |
| Tuning systems | 12-tone, 24-tone (quarter tones), 53-comma (Turkish makamlar) |
| Reference pitch | A4 = 400-480 Hz (440 Hz default) |
| Key detection | Learn Once / Continuous from the side-chain or the main input, top-3 suggestions |
| MIDI | Target Notes, Scale From Notes, Program Change, MIDI Time Code |
| Timecode | Host transport, SMPTE LTC (24 / 25 / 29.97 DF / 30 fps), MTC |
| Factory presets | 8 tuning styles |
| Licence | One computer per licence, online and offline activation, 15-day free trial, free updates |
System requirements
| macOS minimum | macOS recommended | Windows minimum | Windows recommended | |
|---|---|---|---|---|
| OS | macOS 14 Sonoma | Latest macOS | Windows 10 64-bit | Windows 11 64-bit |
| Processor | Apple silicon or Intel (Universal) | Apple silicon | Intel / AMD, 64-bit, 2 cores | Intel Core i5 / AMD Ryzen 5 |
| Memory | 4 GB | 8 GB | 4 GB | 8 GB |
| Disk | 50 MB | 50 MB | 50 MB | 50 MB |
| Host | Pro Tools (AAX), any VST3 or AU host, or standalone | Live host with a low-latency buffer | Any VST3 host, or standalone | Live host with a low-latency buffer |
An internet connection is needed for online activation and the free trial. Offline activation is available for computers that never go online.
Compatible hosts
| Host | Format |
|---|---|
| Logic Pro / MainStage | AU |
| Ableton Live | VST3 / AU |
| Cubase / Nuendo | VST3 |
| Reaper | VST3 / AU |
| Studio One | VST3 / AU |
| Bitwig Studio | VST3 |
| Pi Live | VST3 / AU |
| Pro Tools | AAX (macOS) |
Support
- Email: support@pi-ware.com
- Website: www.pi-ware.com (product page, downloads, your licences and computers at pi-ware.com/account)
- Tutorials: youtube.com/@pibysaharty
When you contact support, please include:
- the Pi Tune version (shown on the SETUP page, in the About panel),
- your operating system and host (with its version),
- the format you use (VST3, AU or Standalone),
- what you expected and what happened, and the exact text of any message.