Pi Immersive Mastering Suite
Welcome
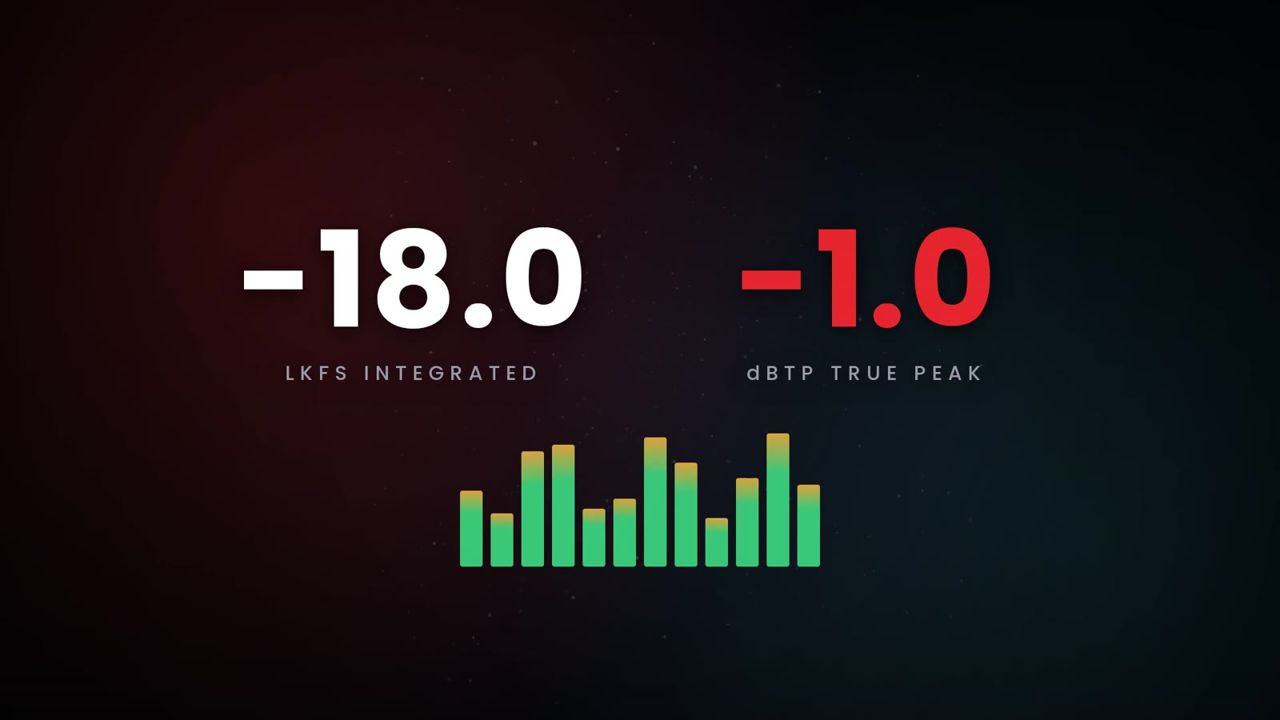
Pi Immersive Mastering Suite by Saharty is a standalone application for macOS and Windows. You use it to master, assemble and deliver immersive albums. Import your ADM BWF masters and put them in order on an album timeline. Trim and fade each song, then master it with a spatial-zone EQ, linked multichannel dynamics and your own VST3 or Audio Unit plug-ins. One click brings every song to the release targets (−18 LKFS integrated, −1 dBTP true peak), and the export is a mastered ADM BWF file with its beds, objects and metadata intact.
Who it is for. The suite is for mastering engineers, mixing engineers and labels who deliver immersive music to streaming platforms and distributors. It also suits anyone who needs to check an ADM BWF master before it leaves the studio. You can work in a 7.1.4 or 9.1.6 room. You can also work on good headphones with the built-in binaural renderer and head tracking.
What's in version 1.0.0: ADM BWF import with up to 128 objects, album timeline editing, spatial-zone EQ, linked dynamics and plug-ins, BS.1770-4 loudness with Auto Match, per-object fixes, Export & Deliver with ready-made platform profiles and automatic quality control, album renders, stereo upmix, and the pimaster command line tool with watch folders.
Note: All loudness values are measured with the suite's internal renderer. For critical releases, confirm your final deliverables in your reference renderer as well.
Quick start
- Install the application (see Installation), open it and accept the licence agreement. Then activate your licence, or click Start 15-day free trial.
- Click the gear icon (Settings) and choose your audio interface. For speaker monitoring, pick a device with at least 12 outputs (7.1.4). With a stereo device, choose Monitor: Binaural in the header to listen on headphones.
- Drag your ADM BWF masters (.wav) onto the timeline, or click + ADD SONGS.
- Drag the songs into album order. Set gaps with GAPS or with the Gap Before knob on the Song tab.
- Press Space to play. Use ORIGINAL (shortcut A) to compare the master with the original.
- Shape the sound if you need to, using the Zone EQ, Dynamics, Multiband and Inserts tabs.
- Click AUTO MATCH ALBUM in the Loudness panel. Each song's output gain, and its true-peak limiter if needed, is set so the song meets −18 LKFS / −1 dBTP.
- Check the Album tab. Every song should show PASS in the Spec column.
- Enter the album title, artist and UPC (ALBUM INFO), plus each song's title and ISRCs (Song tab).
- Choose File › Export & Deliver… (Cmd/Ctrl+E), pick a delivery profile and click DELIVER. When the job finishes, open the quality control report.
Installation
macOS
- Download
PiImmersiveMasteringSuite-1.0.0-macOS.dmgfrom your account at pi-ware.com. - Open the disk image and drag Pi Immersive Mastering Suite by Saharty onto the Applications folder.
- Start the application from Applications.
The application is a universal build that runs natively on Apple silicon and Intel Macs.
If macOS says that the app "cannot be opened because the developer cannot be verified":
- Open System Settings › Privacy & Security.
- Scroll down and click Open Anyway next to Pi Immersive Mastering Suite.
You can also right-click the app in Applications and choose Open.
Windows
- Download
PiImmersiveMasteringSuite-1.0.0-Windows-Setup.exeand run it. - Read and accept the licence agreement, then follow the installer.
- To use the command line tool from any Command Prompt, tick Add the pimaster command line tool to PATH.
On Windows the suite uses WASAPI and DirectSound devices.
Plug-ins you use inside the suite
Pi Immersive Mastering Suite is an application that hosts your plug-ins. It runs them as linked multichannel inserts. You do not install it into a DAW. It hosts VST3 plug-ins on macOS and Windows, and Audio Units on macOS.
Your plug-ins stay in their usual system folders. The Plug-in Manager (Tools › Plug-in Manager…) scans them in a separate process, so a faulty plug-in cannot crash the suite during the scan.
The pimaster command line tool
Both installers include pimaster, which uses the same licence as the application.
- macOS: the tool is inside the application bundle. To make it available in Terminal, run this once:
sudo mkdir -p /usr/local/bin && sudo ln -sf "/Applications/Pi Immersive Mastering Suite by Saharty.app/Contents/MacOS/pimaster" /usr/local/bin/pimaster - Windows:
pimaster.exeis installed next to the application. If you ticked the PATH option, open a new Command Prompt and typepimaster --help.
First launch
On first launch the suite:
- Shows the licence agreement. Click I AGREE to continue or QUIT to leave.
- Opens the licence window once if this computer has never been activated (see the next chapter).
- Picks a monitoring format. If your audio device has 12 or more outputs, it chooses 7.1.4. Otherwise it chooses Binaural.
Activation & licensing
Licences are sold at pi-ware.com. After you buy, your licence key (format XXXXX-XXXXX-XXXXX-XXXXX) arrives by email. One licence activates one computer. The application and pimaster share the same licence on that computer.
Open the licence window
Choose Help › Licence…, or click the licence banner at the top of the main window. The window shows the licence status, the name of This computer, and these controls:
| Control | What it does |
|---|---|
| Licence key | Field for the key from your order email |
| Activate | Activates the key online on this computer |
| Start 15-day free trial | Starts the full-featured trial; you don't need payment details |
| Deactivate this computer | Frees this computer so you can activate the licence on another one |
| Offline activation | Shows a request code for computers without internet |
| Copy code | Copies the offline request code |
| Load licence file… | Loads the licence file you got from the website |
| Buy a licence | Opens the shop page |
Activate online
- Paste your key into Licence key.
- Click Activate. The status changes to "Activated … Every feature is on."
If the key is already active on another computer, the suite asks whether to Move it here. If you confirm, the other computer gets a 24-hour notice before its features are limited.
Free trial
Click Start 15-day free trial. Every feature works for 15 days. During the trial, the banner at the top of the window shows how much time is left.
Offline activation
- Enter your licence key, then click Offline activation.
- Click Copy code and paste the request code at pi-ware.com/activate on any device that has internet.
- Download the licence file (
.pilic) you get, then click Load licence file… and select it.
Moving to a new computer
- On the old computer, click Deactivate this computer in the licence window. Then activate on the new one.
- If the old computer is lost or broken, deactivate or reset it from your account at pi-ware.com/account. You can also activate on the new computer and confirm Move it here.
How licence checks work
- The suite checks the licence when it has an internet connection: at launch, then every 60 minutes. When offline it retries every 2 minutes. It keeps working offline with no time limit.
- 24-hour rule: features are never limited without at least 24 hours of notice on that computer. This covers a licence moved elsewhere, a trial that ended, a refund, or a computer deactivated from your account. During the notice every feature works, and the banner shows a countdown.
Limited mode
Without a licence, or after the notice period, you can still open, edit, play, monitor and analyse everything. These features are disabled:
- saving projects
- Export & Deliver
- album renders
- upmixes
- quality control reports
- watch folders
Their buttons and menu items read Activate to save and open the licence window. Closing the app or a project is never blocked. When you activate, the status bar says "Thank you - saving, export and delivery are available."
The licence file is stored here:
- macOS:
~/Library/Application Support/Pi by Saharty/Licences/pi-immersive-mastering.pilic - Windows:
%APPDATA%\Pi by Saharty\Licences\pi-immersive-mastering.pilic
Interface tour
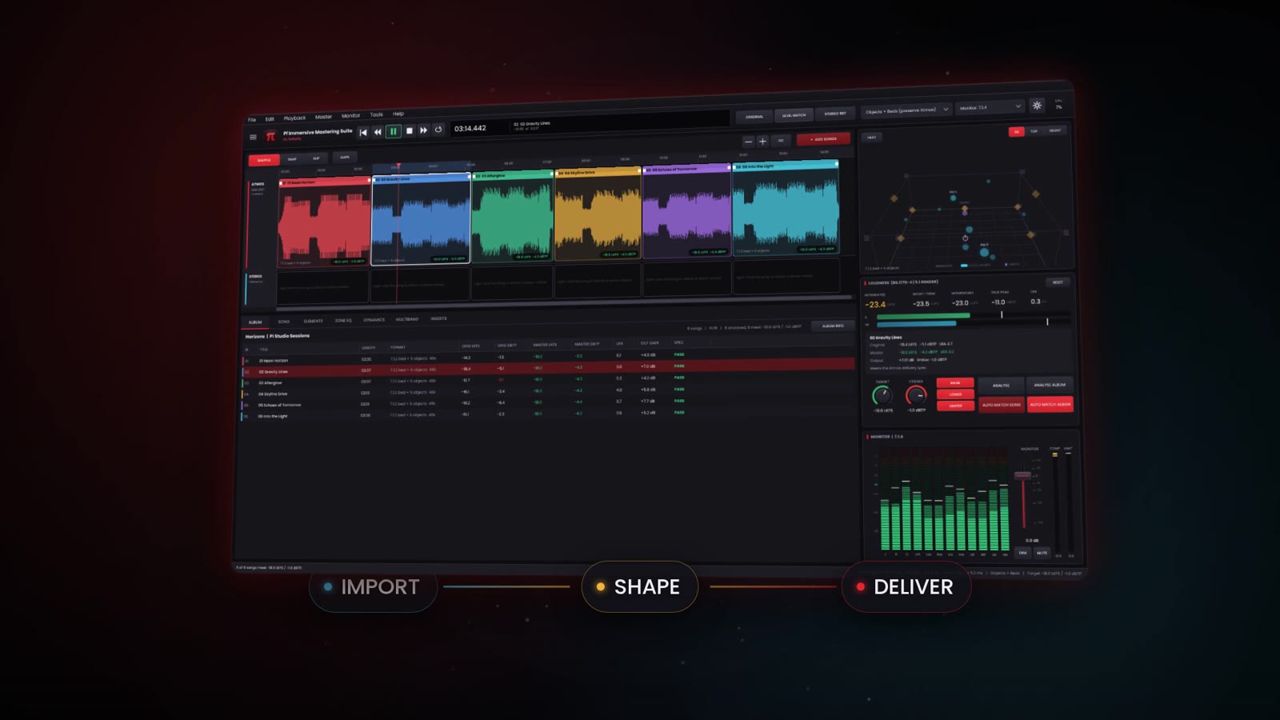
The main window has seven areas:
- the header bar at the top
- the timeline on the left
- the inspector tabs below the timeline
- the Room view on the right
- the Loudness panel below the Room view
- the Monitor panel below the Loudness panel
- the status bar at the bottom
Header bar
| Control | What it does | Range/default |
|---|---|---|
| Menu (☰) | Opens all menus (File, Edit, Playback, Master, Monitor, Tools, Help) | — |
| Go to start / Previous song / Play / Pause / Stop / Next song | Transport. Pressing Stop while stopped returns to the start | — |
| Loop selected song | Repeats the selected song | Off |
| Time display | Album time, current song number and title, remaining time of the song | — |
| ORIGINAL | A/B: plays the unprocessed original, time-aligned with the master | Off (key A) |
| LEVEL MATCH | Plays the original at the master's loudness while you compare | On |
| STEREO REF | Plays the song's attached stereo master | Off (key R) |
| Processing domain | Objects + Beds or 7.1.4 Render (channel master) | Objects + Beds |
| Monitor format | Monitor: 7.1.4 / 9.1.6 / 7.1.2 / 5.1.4 / 5.1.2 / 7.1 / 5.1 / 2.0 / Binaural | 7.1.4 with 12+ outputs, otherwise Binaural |
| Settings (gear) | Opens Settings | — |
| CPU | Shows audio and renderer load. Amber above 60 %, red above 85 % | — |
Timeline
The timeline has two lanes. The upper lane holds the immersive ADM BWF masters. The lower STEREO reference lane shows each song's stereo master.
| Control | What it does |
|---|---|
| SHUFFLE | Songs stay in sequence. Drag to reorder; trims ripple and gaps are kept |
| SNAP | Move songs freely. They snap to neighbours and to the playhead and never overlap |
| SLIP | Move songs freely. Overlapping material of the earlier song is trimmed automatically |
| FIT | Zooms out to show the whole album |
| GAPS | Sets the gap between all songs |
| + ADD SONGS | Imports ADM BWF (.wav) masters |
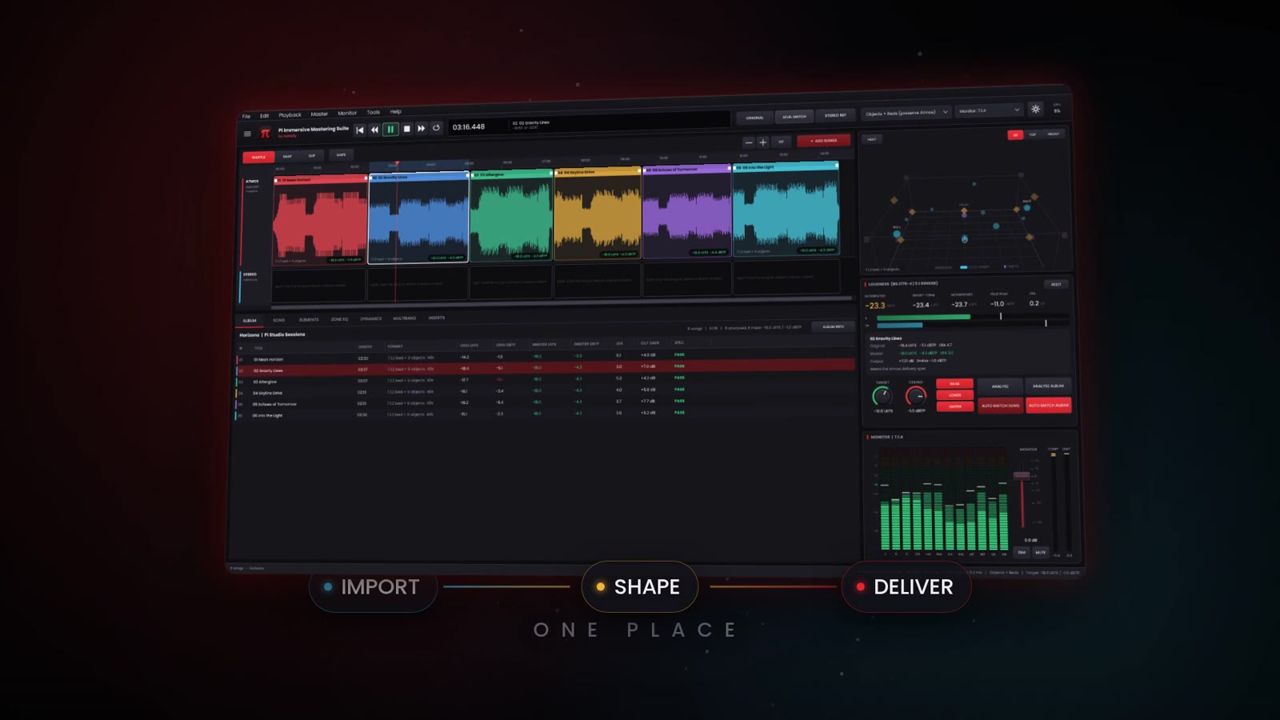
Ways to edit on the timeline:
- Drag a song to move or reorder it.
- Drag a song's edges to trim it.
- Drag the white squares to set fades.
- Hold Cmd (macOS) or Ctrl (Windows) and turn the mouse wheel to zoom.
- Right-click a song for its context menu: Play from song start, Rename…, Analyse loudness, Auto Match to -18 LKFS / -1 dBTP, Attach stereo reference…, Remove stereo reference, Fade-in curve, Fade-out curve, Reset trims and fades, Set gap before this song…, Crossfade with the previous song…, Audition the transition from the previous song, Show file and Remove from album.
Inspector tabs
| Tab | Contents |
|---|---|
| Album | Table of all songs with loudness before and after mastering, and pass/fail |
| Song | Title, artist, ISRCs, gains, trims, fades, gap, stereo reference, insert activation |
| Elements | Per-object gain, mute, solo, position offset and headphone render mode |
| Zone EQ | 8-band EQ on every bed channel and object, with zone targeting |
| Dynamics | Linked compressor and render-aware true-peak limiter |
| Multiband | 4-band zone dynamic EQ |
| Inserts | Up to 8 linked multichannel plug-in slots and the internal sidechain |
The suite remembers the last tab you used.
Room view
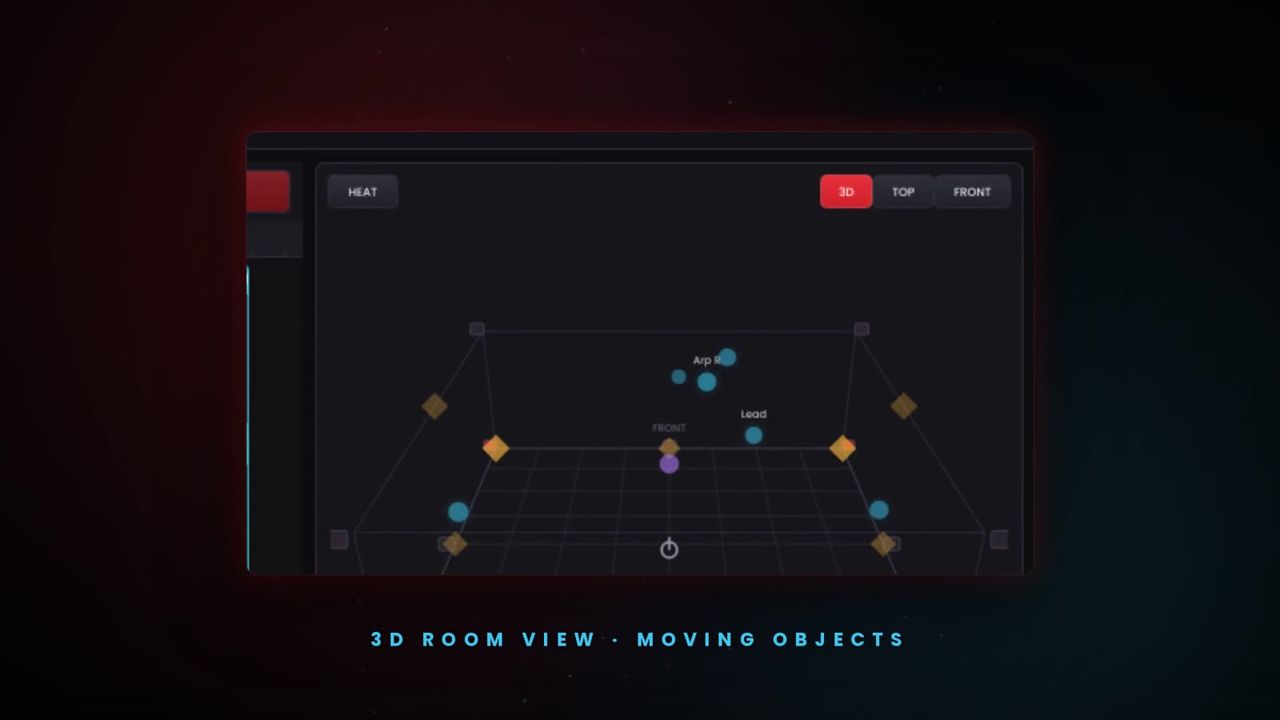
The Room panel shows the speakers, bed channels and moving objects of the song that is playing.
| Control | What it does |
|---|---|
| 3D / TOP / FRONT | Choose the view angle. In 3D, drag to orbit |
| HEAT | Object activity heatmap: shows where the song's energy has been. It builds up while the song plays |
| IMMERSION, HEIGHT and WIDTH bars | Show how immersive, high and wide the audio you hear is |
Loudness panel
The panel title, Loudness (BS.1770-4 | 5.1 render), shows how the values are measured.
| Control | What it does | Range/default |
|---|---|---|
| Integrated | Live integrated loudness. Green on target, red above, amber more than 1 LU below | LKFS |
| Short-term / Momentary | Live short-term and momentary loudness | LUFS |
| True Peak | Held true peak. Red above the ceiling | dBTP |
| LRA | Loudness range | LU |
| RESET | Restarts the live measurement | — |
| S / TP bars | Short-term loudness and true peak, with a white marker at the target | — |
| Song box | Original, Master and Output values of the selected song, plus a status line | — |
| Target | Integrated loudness target | −30 to −10 LKFS, default −18 |
| Ceiling | True-peak ceiling | −6 to 0 dBTP, default −1 |
| RAISE | Lets Auto Match raise songs that are too quiet | On |
| LOWER | Lets Auto Match lower songs that are too loud | On |
| LIMITER | Uses the true-peak limiter when gain alone would exceed the ceiling. When off, Auto Match uses gain only | On |
| ANALYSE / ANALYSE ALBUM | Measures the selected song, or every song | — |
| AUTO MATCH SONG / AUTO MATCH ALBUM | Measures, then sets the output gain and limiter so songs meet the targets | — |
Monitor panel
| Control | What it does | Range/default |
|---|---|---|
| Speaker meters | One meter per output of the current format. Click a meter to solo that speaker, right-click to mute it | — |
| Monitor fader | Monitor level | −60 to +12 dB, default 0 |
| DIM / MUTE | Dims or mutes the monitor outputs | Off |
| COMP / LIMIT | Gain reduction of the linked compressor and the true-peak limiter | — |
Status bar
The status bar shows messages on the left. On the right it shows the audio device, sample rate, buffer size, chain latency, any dropouts, the processing domain and the current targets.
Building the album
How to import masters
- Drag
.wav,.bwfor.rf64files onto the timeline. You can also click + ADD SONGS or use the import command in the File menu (Cmd/Ctrl+I). - The songs appear in order and their waveforms are drawn in the background. The first import zooms to fit.
Note: All songs of an album must share one sample rate: 44.1, 48 or 96 kHz. The first song sets the album rate, and the suite refuses a song with a different rate. Deliveries can still be converted to another rate with the built-in high-quality resampler.
If you drop a project file (.pims) onto the timeline, the suite opens that project instead.
How to order songs and set gaps
- Choose an edit mode: SHUFFLE (in sequence), SNAP or SLIP. The same modes are in the Edit menu.
- Drag songs into album order.
- To set one gap, select the song and turn Gap Before on the Song tab (0–20 s, default 2 s). You can also right-click the song and choose Set gap before this song….
- To set every gap at once, click GAPS or choose Edit › Set Gap Between All Songs…. Enter 0 for gapless playback. In Shuffle mode, a negative value creates a crossfade.
How to crossfade two songs
- Right-click the later song and choose Crossfade with the previous song….
- Enter the length in seconds (default 3.00). The songs overlap with equal-power fades.
- Choose Audition the transition from the previous song. The suite renders the transition offline, through both songs' mastering chains, and plays it exactly as it will sound.
Album renders include the crossfade.
How to trim and fade
You can trim and fade in two places:
- On the timeline: drag a song's left or right edge to trim it, and drag the white square handles to set the fade-in and fade-out.
- On the Song tab: type exact values in TRIM START / TRIM END (format
m:ss.000) and press Return. Then set Fade In and Fade Out (0–30 s each) and pick the FADE CURVES: Linear, Equal Power, S-Curve, Exponential or Logarithmic.
All edits are non-destructive. To start over, right-click the song and choose Reset trims and fades.
Song tab reference
| Control | What it does | Range/default |
|---|---|---|
| Song title | Title used in the timeline, reports and file names | File name |
| Track artist | Only needed if it differs from the album artist | Empty |
| Immersive ISRC | ISRC of the immersive master. It must differ from the stereo ISRC | Empty |
| Stereo ISRC | ISRC of the stereo master | Empty |
| Input Gain | Gain before the EQ, inserts and dynamics | −24 to +24 dB, 0 |
| Output Gain | Gain after the dynamics, before the true-peak limiter. Auto Match sets it | −40 to +36 dB, 0 |
| TRIM START / TRIM END | Exact trims | 0:00.000 |
| Gap Before | Silence before the song | 0–20 s, 2 s |
| Fade In / Fade Out | Fade lengths | 0–30 s, 0 |
| FADE CURVES | Shape of the fade-in and fade-out | 5 shapes |
| CHOOSE… / CLEAR / MATCH LEVEL | Attach, remove or level-match the stereo reference | — |
| Ref Gain | Playback gain of the stereo reference | −30 to +12 dB, 0 |
| Ref Offset | Time offset of the stereo reference | −2000 to +2000 ms, 0 |
| Inserts Active 1–8 | Turns individual inserts on or off for this song only. Latency stays constant | All on |
The Song panel also shows the song's file, format (beds and objects), sample rate, bit depth, channel count, container type and length. It also shows any warning raised while the ADM metadata was read.
Album info and project files
- ALBUM INFO on the Album tab, or File › Album Info…, holds the album title, artist and UPC / EAN. Click SAVE to store them.
- Save your work with File › Save Project (Cmd/Ctrl+S) as a
.pimsproject. Projects from earlier versions of the suite open too. - If audio files have moved, the suite lists the missing files when it opens the project. Click Locate… to relink them.
- Undo and Redo (Cmd/Ctrl+Z, Cmd/Ctrl+Shift+Z or Ctrl+Y) cover all album and processing edits.
Monitoring and comparing
How to choose a monitoring format
Pick a format from the header's monitor list, or from Monitor › Monitoring Format. The internal renderer feeds 2.0, 5.1, 7.1, 5.1.2, 5.1.4, 7.1.2, 7.1.4, 9.1.6 or Binaural (headphones). It uses this channel order from the first monitor output: L R C LFE Lss Rss Lrs Rrs Ltf Rtf Ltr Rtr. You can change the first output in Settings › Monitoring & Measurement.
How to compare original and master
- Press A, or click ORIGINAL, to hear the unprocessed original. It is time-aligned with the master.
- Keep LEVEL MATCH on to hear the original at the master's loudness. This way you judge the processing, not the level. Playback › Level-match Original does the same.
- Press A again to return to the master.
How to compare with the stereo master
- Right-click a song and choose Attach stereo reference…, or click CHOOSE… on the Song tab. Select the song's stereo master.
- Analyse the song, then click MATCH LEVEL. The suite measures the stereo file and sets Ref Gain so the reference plays at the loudness of the master's stereo render.
- Press R to switch between the immersive programme and the stereo reference. Use Ref Offset if the stereo file starts at a different time.
Headphones and head tracking
Choose Monitor › Headphone Profile & Head Tracking… to open Monitor Setup.
On the Headphones tab:
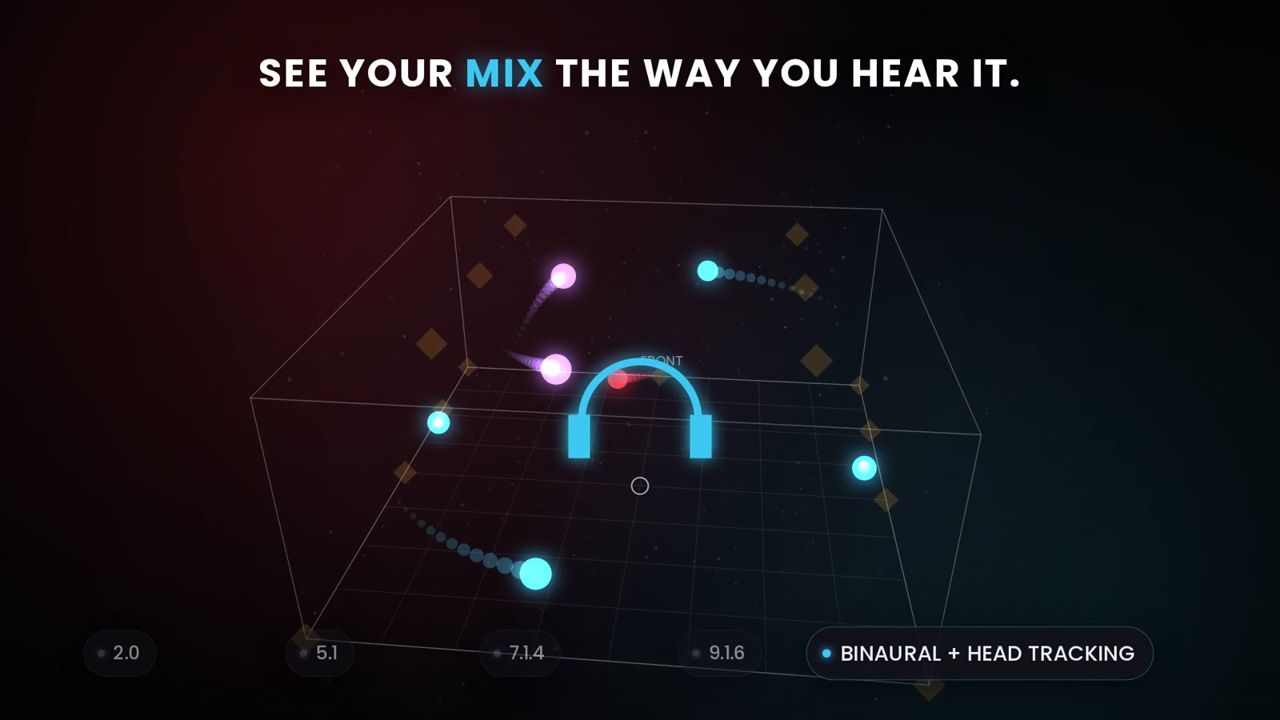
- LOAD SOFA / WAV… loads a personal or measured HRTF. Supported files are SOFA (AES69), 24-channel WAV (12 speakers × 2 ears, in 7.1.4 order) and 14-channel HeSuVi WAV.
- USE BUILT-IN returns to the built-in head model.
- Head tracking source: Off, Headphone motion sensors (AirPods, Beats - macOS 14 or later) or OSC head tracker. The display shows yaw, pitch and roll.
- RECENTRE sets your current head position as straight ahead. Monitor › Recentre Head does the same.
Toggle head tracking with Cmd/Ctrl+Shift+H. Head tracking only affects monitoring; renders and exports are not affected.
Solo and mute while listening
- Click a speaker meter to solo that speaker, or right-click it to mute it.
- On the Elements tab, S solos one element and the Zone solo list plays one spatial zone (front, surround, height and so on).
Solo is for monitoring only. It never changes the export.
Mastering the sound
Processing domain
The header's domain list chooses how processing is applied. You can also use the Master menu.
- Objects + Beds: every bed channel and object is processed, and the export keeps the object-based master. This is the default and the choice for releases.
- 7.1.4 Render (channel master): the programme is rendered to 7.1.4 first, then processed. It is lighter on the CPU. The export is a channel-based master made of a 7.1 bed plus 4 height objects.
The signal flow for each song is: element gain/mute → Input Gain → Zone EQ → inserts → Multiband → linked compressor → Output Gain → true-peak limiter.
How to use the Zone EQ
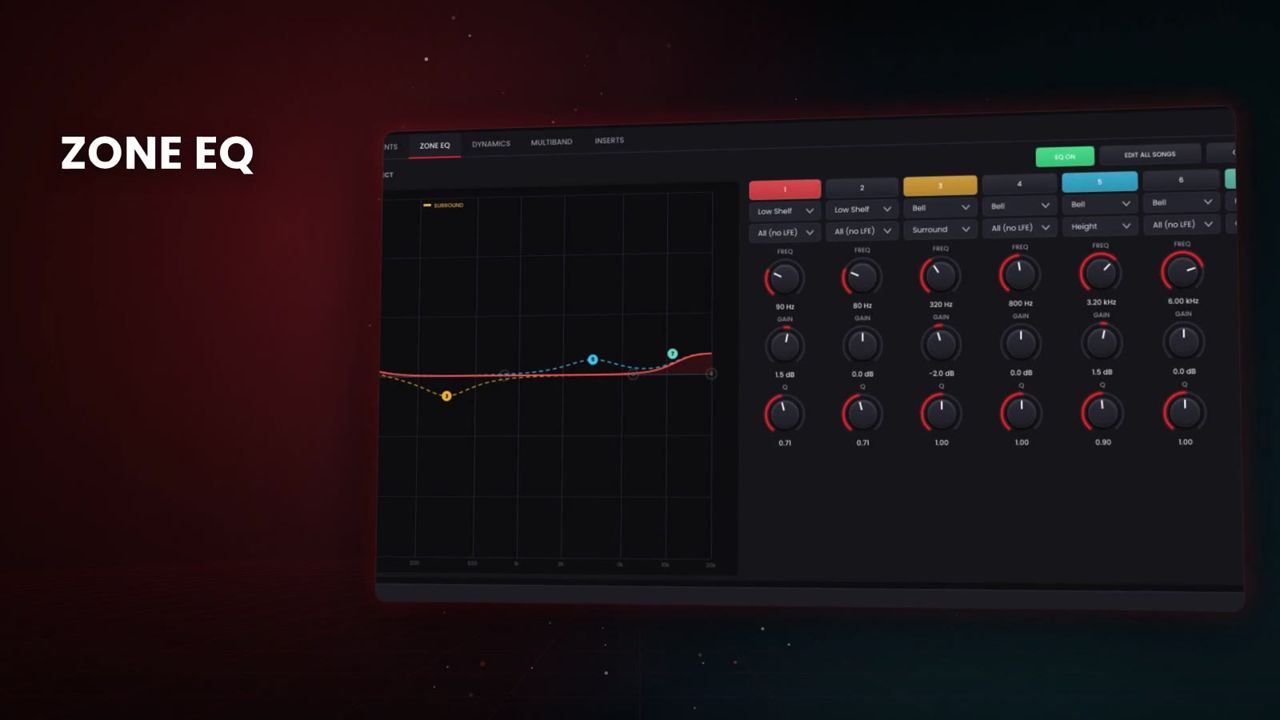
The Zone EQ has eight bands. Each band applies to every bed channel and object in the zone you choose. Moving objects are equalised according to where they are at each moment.
- Click EQ ON.
- Click a band number (1–8) to turn the band on. You can also drag its point in the graph.
- Choose the band's type: High Pass, Low Shelf, Bell, High Shelf or Low Pass.
- Choose the zone: All (no LFE), Front, Surround, Height, LFE, Beds, Objects or Everything.
- Set Freq (20 Hz–20 kHz), Gain (−18 to +18 dB) and Q (0.1–12, default 0.707).
The graph shows the curves for FRONT / ALL, HEIGHT and SURROUND separately. The default band layout is a high-pass at 20 Hz, a low shelf at 80 Hz, bells at 200 Hz, 800 Hz, 2.5 kHz and 6 kHz, a high shelf at 10 kHz and a low-pass at 20 kHz. All bands start off with 0 dB gain.
The following buttons are on the Zone EQ, Dynamics and Multiband tabs:
- EDIT ALL SONGS applies each change you make to every song.
- COPY TO ALL SONGS copies this song's settings to the whole album.
- RESET (Zone EQ only) restores the defaults.
How to use linked dynamics
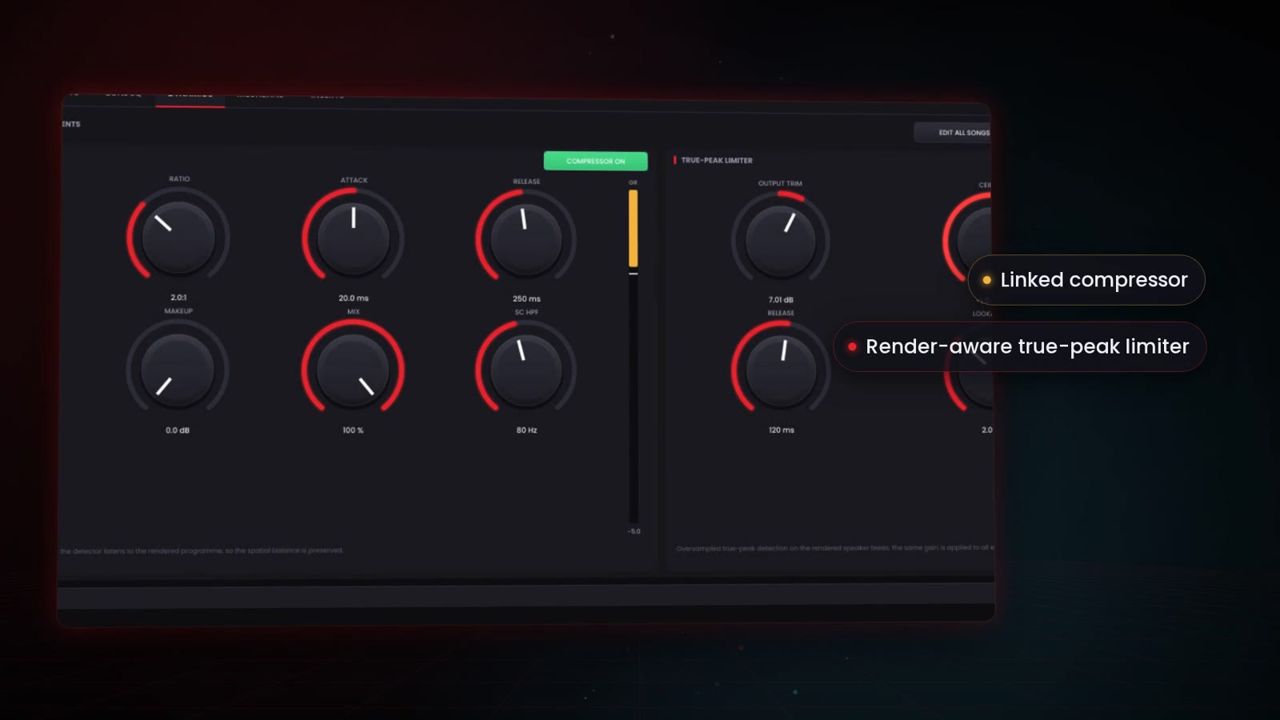
The Dynamics tab has two processors, and each one is linked across all elements. One gain change is applied to every bed channel and object, so the spatial balance never shifts.
The compressor (turn it on with COMPRESSOR ON) has these controls:
| Control | What it does | Range/default |
|---|---|---|
| Threshold | Level (power sum of the rendered speaker feeds) above which compression starts | −60 to 0 dB, −18 |
| Ratio | Compression ratio | 1:1–20:1, 2:1 |
| Attack | Attack time | 0.1–200 ms, 20 |
| Release | Release time | 10–3000 ms, 250 |
| Knee | Soft-knee width | 0–24 dB, 6 |
| Makeup | Makeup gain | 0–24 dB, 0 |
| Mix | Parallel mix | 0–100 %, 100 |
| SC HPF | Detector high-pass that reduces pumping from low frequencies | 20–500 Hz, 80 |
The true-peak limiter (turn it on with LIMITER ON) has these controls:
| Control | What it does | Range/default |
|---|---|---|
| Output Trim | Song output gain (the same value as Output Gain) | −40 to +36 dB, 0 |
| Ceiling | True-peak ceiling, measured on the rendered output | −6 to 0 dBTP, −1 |
| Release | Limiter release | 1–1000 ms, 120 |
| Lookahead | Attack window | 0.5–5 ms, 2 |
The limiter uses oversampled true-peak detection on the rendered speaker feeds. By default it measures on the 5.1 render; in strict mode it measures on the 2.0, 5.1 and 7.1.4 renders. Its latency is constant: 5 ms plus the detector.
How to use the Multiband
The Multiband tab is a linked dynamic EQ with four bands. Each band listens to its zone of the rendered 7.1.4 programme. When the band gets louder than its threshold, it cuts that frequency band in every element of the zone by the same amount. It has no latency and is transparent when idle.
- Click MULTIBAND ON, then BAND 1–BAND 4 to turn on the bands you need.
- Choose the band's zone, for example Height to tame harsh overheads.
- Set the controls:
| Control | Range/default |
|---|---|
| Frequency | 20 Hz–20 kHz, 1 kHz |
| Q | 0.2–10, 0.9 |
| Threshold | −80 to 0 dB, −30 |
| Ratio | 1:1–20:1, 2:1 |
| Attack | 0.1–500 ms, 10 |
| Release | 5–5000 ms, 150 |
| Range | 0–24 dB, 6 (maximum cut) |
Each band has a GR meter that shows how much it is cutting.
How to use your own plug-ins (linked inserts)
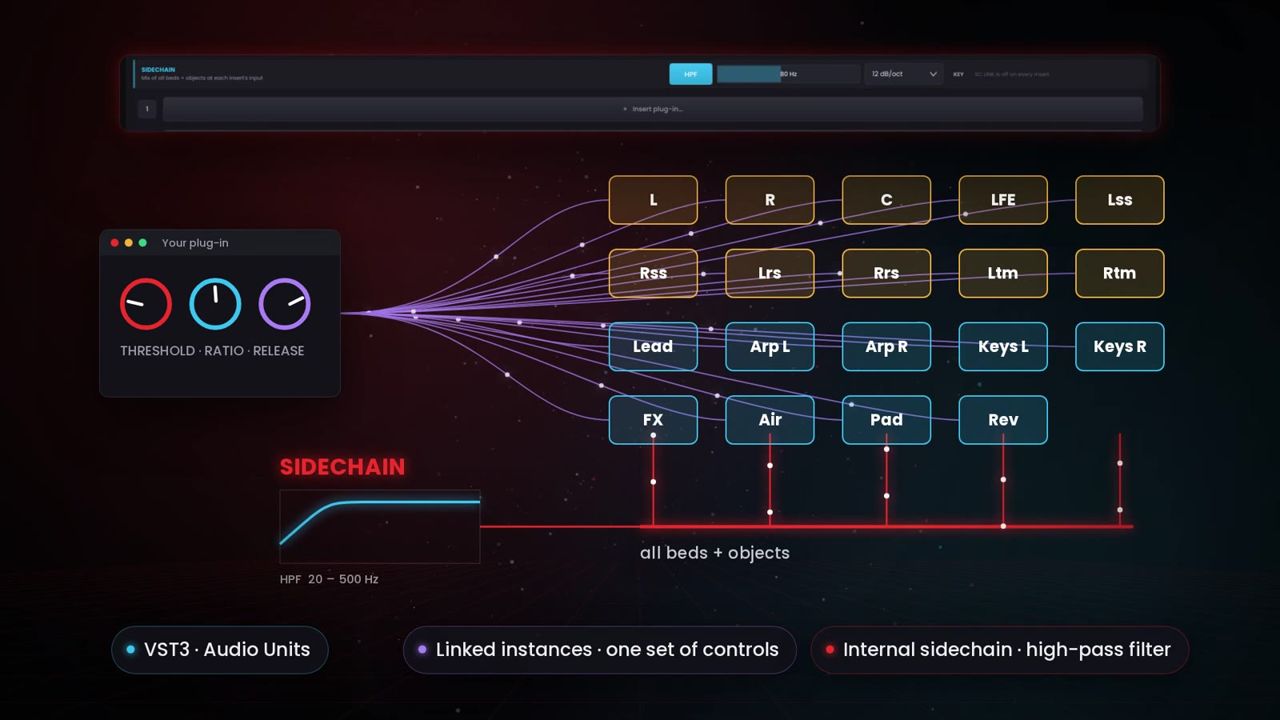
The Inserts tab has 8 slots. Each plug-in runs as linked instances on every bed channel and object. All parameters follow the editor of the first instance.
- Click PLUG-IN MANAGER and use Scan / Options… to scan for VST3 plug-ins (and Audio Units on macOS).
- Click an empty slot and pick a plug-in from Insert. On a filled slot, the same menu offers Replace with, Open editor and Remove.
- Choose how the plug-in is made multichannel: - Mono (per element): one instance per bed channel and object. - Stereo pairs: stereo instances on L/R pairs. - Native multichannel: one 7.1.4 instance (for the 7.1.4 render domain).
- Choose the target (the same zone list as the EQ). Zone targets follow moving objects.
- Click EDIT to open the plug-in editor. The window title shows how many linked instances are running.
- If a plug-in keeps internal state that its parameters do not cover, click SYNC. It copies the complete state of the first instance to every linked instance.
- BYPASS bypasses the slot. The ✕ button removes the plug-in.
Internal sidechain. Turn on SC LINK on a slot to feed the plug-in's sidechain input with the mix of all beds and objects as it reaches that insert. Every linked instance gets the same key, so they all react to the whole programme together. Turn on the external sidechain inside the plug-in too.
The SIDECHAIN strip at the bottom has:
- an HPF switch
- the sidechain high-pass frequency (20–500 Hz; double-click for 80 Hz)
- a slope of 12 dB/oct or 24 dB/oct
The filter acts on the sidechain only, so kick and bass do not drive the gain reduction. The audio itself is not filtered.
Plug-in latency is compensated automatically. The panel shows the chain latency in samples.
Tip: On the Song tab, the Inserts Active buttons turn individual inserts off for songs that do not need them. Latency stays the same, so the album timing never changes.
Per-object fixes (Elements tab)
The Elements tab lists every bed channel and object of the selected song. The columns are TYPE, NAME, LEVEL, GAIN, M S, POSITION OFFSET (X / Y / Z) and HEADPHONE MODE.
| Control | What it does | Range/default |
|---|---|---|
| GAIN | Element gain before the mastering chain (double-click for 0 dB) | −30 to +12 dB, 0 |
| M | Mutes the element. Muted objects can be left out of the export | Off |
| S | Solos the element for monitoring | Off |
| X / Y | Position offset added to the object | −2 to +2, 0 |
| Z | Height offset | −1 to +1, 0 |
| Headphone mode | As authored, Off, Near, Mid or Far | As authored |
| Zone solo | Listen to one spatial zone only | Off |
| CLEAR SOLO / RESET ALL EDITS | Clear soloing, or remove all element edits | — |
Position offsets move the object in the monitor, in the analysis and in the exported ADM. Headphone modes are written as ITU-R BS.2076-2 headphoneVirtualise metadata.
Loudness and Auto Match
How measurement works
Integrated, short-term and momentary loudness follow ITU-R BS.1770-4, and loudness range follows the EBU method. The suite measures them on the 5.1 re-render of the programme. True peak is measured on the 5.1 render. In strict mode (see Settings) it is measured on the 2.0, 5.1 and 7.1.4 renders.
A song "meets the spec" when both of these are true:
- its integrated loudness is at most the target + 0.1 LU
- its true peak is at most the ceiling
How to auto match a song or the album
- Check Target and Ceiling in the Loudness panel. The defaults are −18 LKFS and −1 dBTP.
- Choose the behaviour: - RAISE and LOWER allow quiet songs to come up and loud songs to come down. - LIMITER lets the limiter catch peaks when gain alone would cross the ceiling. With LIMITER off, songs may stay below the target.
- Click AUTO MATCH SONG (Cmd/Ctrl+M) or AUTO MATCH ALBUM (Cmd/Ctrl+Shift+M).
- Each song is measured and its Output Gain is set. The limiter is set too if needed. A progress window shows the work, and you can cancel it.
- The status bar reports how many songs meet the targets. The Album tab shows PASS in green, CHECK in red, or changed when a song needs analysing again after an edit.

Tip: Any change to processing marks the measured values as stale. Click ANALYSE or ANALYSE ALBUM to measure again without changing the gain.
Album tab
The Album tab lists every song with these columns: Title, Length, Format, Orig LKFS, Orig dBTP, Master LKFS, Master dBTP, LRA, Out Gain and Spec. Double-click a row to go to that song.
How to balance the album (Album Match)
Master › Album Match (loudness balance and tone)… measures every song, then sets each song's output gain and limiter so it ends at or below the target and ceiling. It can also nudge the tone so the songs sound like one album.
- Choose the Loudness mode: - Keep the album balance (the loudest song reaches the target) - Every song to the target - Match the reference song as mastered
- Choose the Tonal balance mode: - Leave the tone as it is - Towards the album average - Towards the reference song
- Pick the Reference song if a mode needs one.
- Set Strength (0–100 %, default 60) and Max EQ (0.5–6 dB, default 3). Tonal matching adjusts the shelves and bells of the Zone EQ (all zones) by at most Max EQ.
- Click RUN ALBUM MATCH.
Delivery
How to export and deliver
- Choose File › Export & Deliver… (Cmd/Ctrl+E).
- Pick a Delivery profile. Each profile shows a short description of what it writes and checks.
- Under Destination, click CHOOSE… for the folder and set the file-name pattern. Tick Create a package folder (album - profile) to keep each delivery in its own folder.
- Choose All songs or Selected song only.
- Review or change the deliverables. Changing anything turns the profile into Custom.
- Click DELIVER. When the job is done, click Show Folder or Open QC Report.
Delivery profiles
| Profile | What it writes |
|---|---|
| Apple Music (Spatial Audio) | ADM BWF 48 kHz / 24-bit, −18 LKFS / −1 dBTP, conformed stereo master, its own immersive ISRC. Upmixed stereo is not accepted |
| Amazon Music | ADM BWF 48 kHz / 24-bit, −18 LKFS / −1 dBTP, stereo master of identical length, its own immersive ISRC |
| TIDAL | ADM BWF 48 kHz / 24-bit, −18 LKFS / −1 dBTP, a headphone render mode on every element, and no extra silence at the start compared with the stereo master |
| Distributor (2 GB per file) | ADM BWF 48 kHz / 24-bit for distributors that limit files to 2 GB, plus a conformed stereo master |
| Client review | Review videos, binaural and stereo re-renders and a 5.1 render for listening sessions; no ADM master |
| IAMF (open immersive format) | IAMF master (7.1.4 LPCM in .mp4 for upload and a standalone .iamf stream), with the measured loudness in its mix presentation, plus a stereo master |
| Archive (all formats) | ADM master at the session rate, plus stereo, binaural, 5.1 and 7.1.4 re-renders and an IAMF master |
| Custom | Any combination you choose |
Deliverables and options
The deliverables you can tick are:
- ADM BWF master
- Stereo master
- Binaural (headphones)
- 5.1 re-render
- 7.1.4 re-render
- IAMF immersive master (7.1.4 LPCM .mp4 + .iamf)
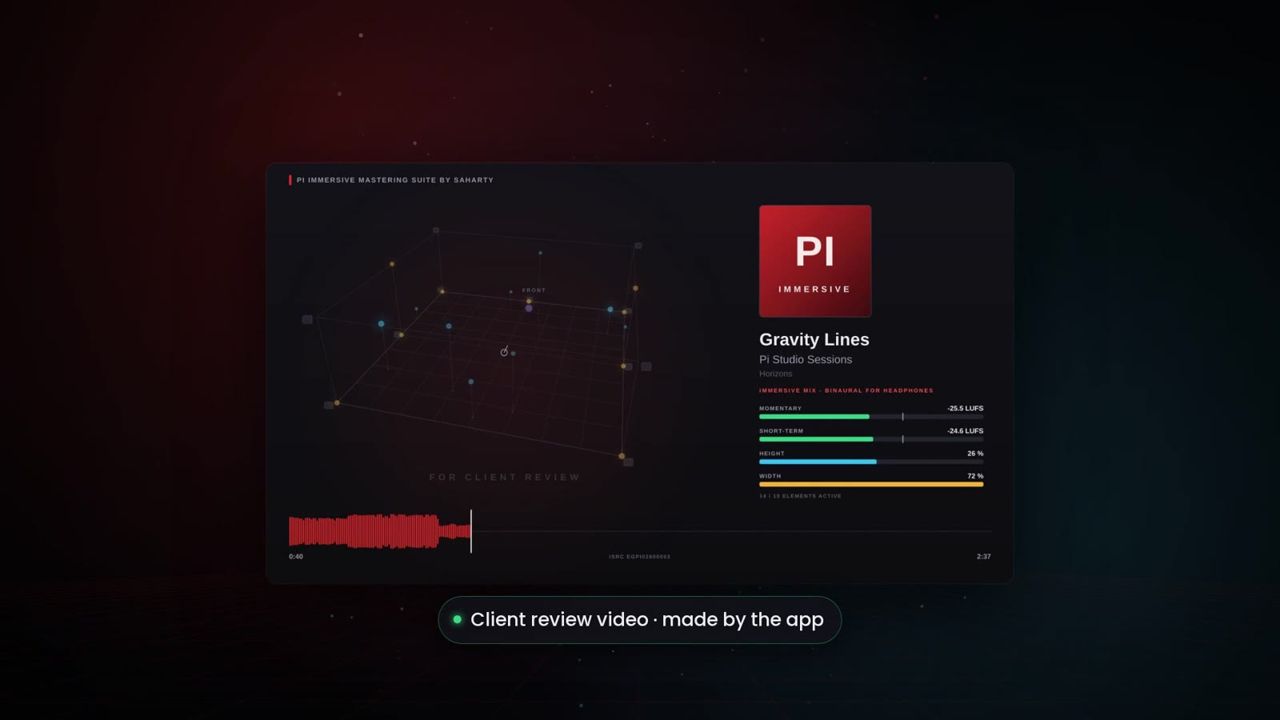
- Client review video (MP4 with the immersive visualiser)
The other options are:
- Stereo source: Lo/Ro re-render of the master, or Stereo reference, conformed (2.0 direct). The second option delivers your attached stereo master cut to exactly the same length and start as the immersive master.
- ADM master rate and Re-renders rate: Session rate, 44.1 kHz, 48 kHz or 96 kHz.
- ADM clean-up: Leave muted objects out, Leave silent objects out and Write a headphone render mode for every element. When objects are removed, the vendor metadata chunk is dropped.
- Reports and metadata:
- Loudness report (CSV + text)
- Quality control report (PDF + CSV)
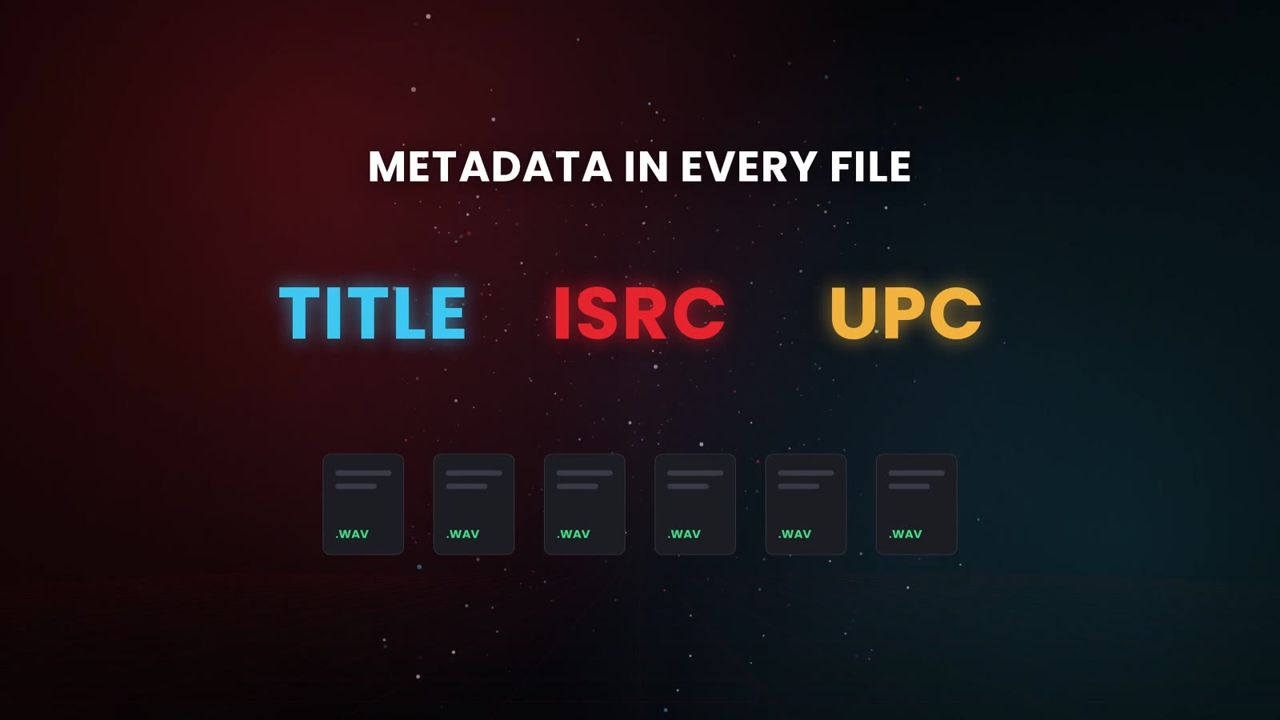
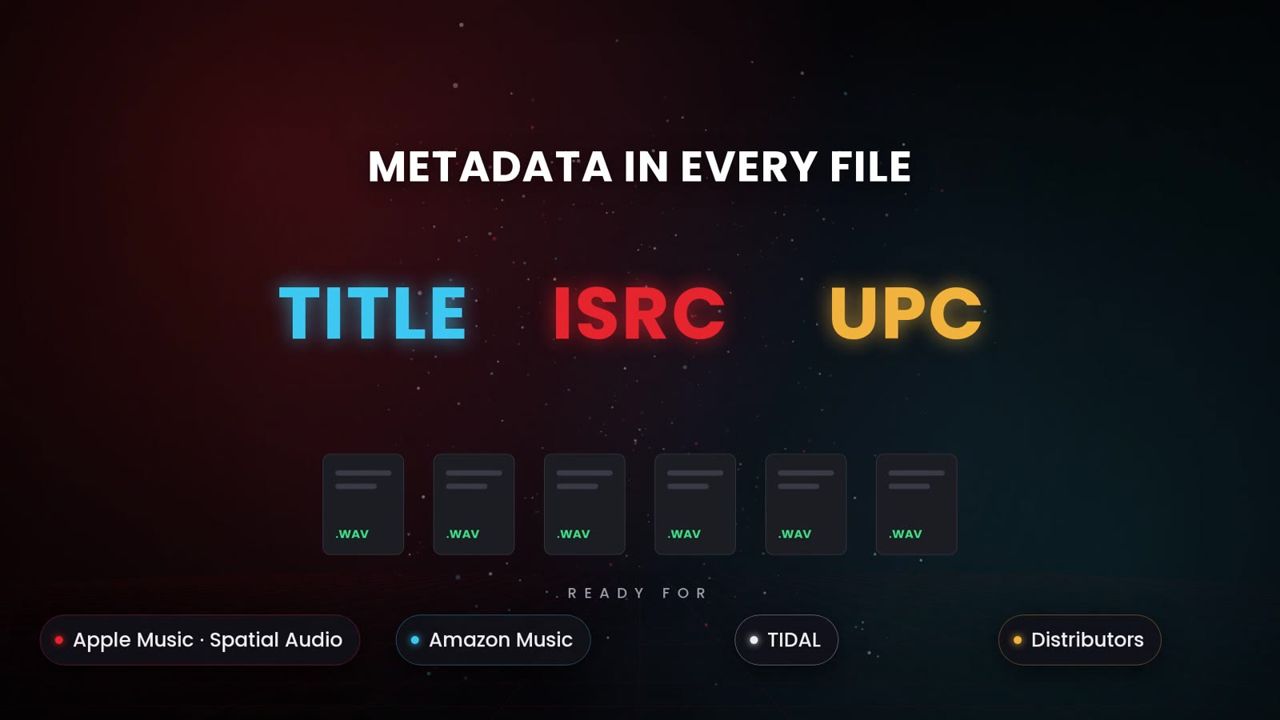
- Metadata manifest (ISRC / UPC / files, CSV + JSON)
- Embed title, artist, ISRC and UPC in the files (written to the bext, iXML and LIST chunks)
- File names: use the tokens
{nn}{n}{title}{artist}{isrc}{stereo_isrc}(default{nn} - {title}).
Client review videos
Under Client review, set these options:
- the audio: Binaural audio or Stereo audio
- the size: 720p, 1080p or 4K
- a Watermark (default "FOR CLIENT REVIEW"; leave it empty for none)
- ARTWORK…: a PNG or JPEG cover image
Each video is an H.264 / AAC MP4. It shows moving objects, loudness and immersion meters, the waveform, the artwork and the watermark.
Quality control
When Quality control report (PDF + CSV) is ticked, the suite re-reads every delivered file and checks it against the profile. Each check gets a result: pass, info, warning or fail. The checks cover loudness and true peak; sample rate, bit depth, track count (at most 10 bed channels and 118 objects), file size and clipping; LFE content, silent objects, leading silence (at most 1 s) and song start/end levels; stereo fold-down compatibility and immersion; headphone render modes; ISRC presence and uniqueness; upmixed sources; and duration and sync (within 50 ms) against the stereo master.
The report is saved as Quality Control Report.pdf with a CSV next to it. It has graphs of short-term loudness and true peak per song.
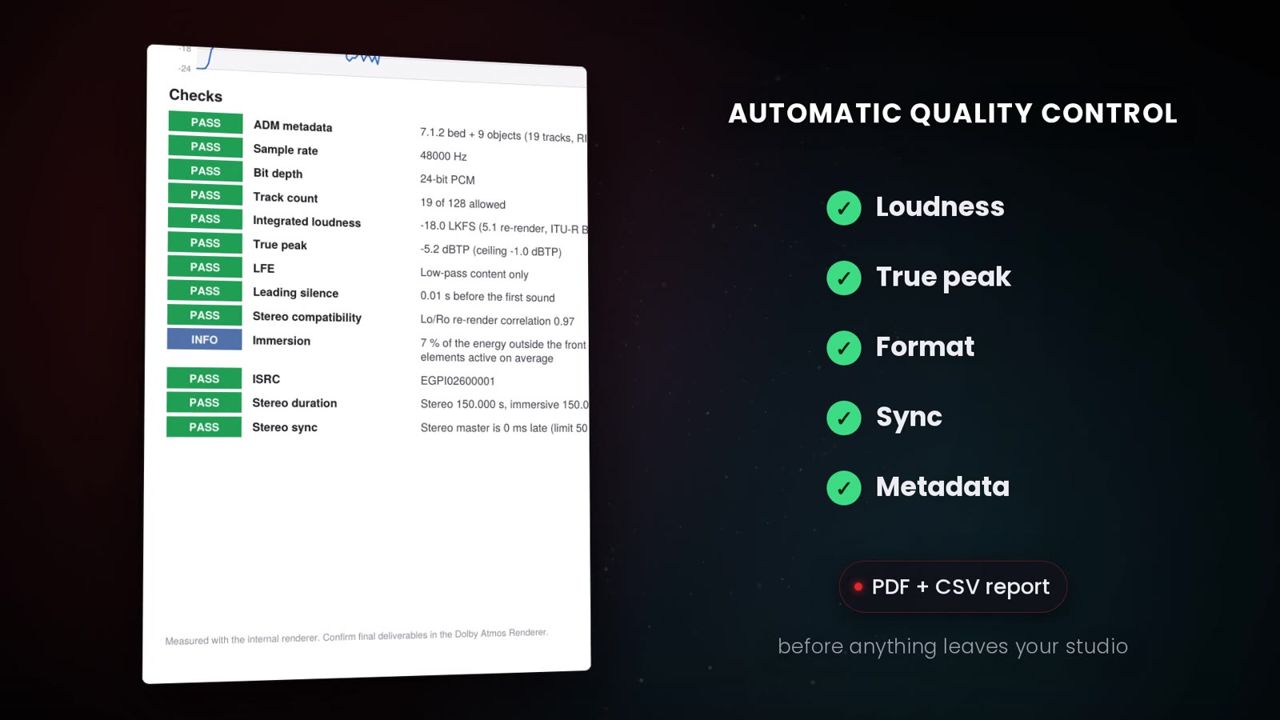
To check a package you delivered earlier, choose File › Check Delivered Files (Quality Control)… and select the delivery folder.
Album renders
File › Render Album (gapless, with crossfades)… renders the album with every song through its own mastering chain. Gaps, fades and crossfades come out exactly as they are on the timeline. You can choose:
- Formats: Stereo 2.0 (Lo/Ro), Binaural (headphones), 5.1, 7.1.4
- rate (Album rate, 44.1, 48 or 96 kHz) and bit depth (24-bit or 16-bit (dithered))
- Files: One continuous album file, Split tracks (gapless) and Cue sheet (with ISRCs and UPC). Split tracks are cut exactly at the song starts, so they play back gaplessly.
Click RENDER ALBUM to start.
Stereo to immersive upmix
File › Import Stereo and Upmix to Immersive… turns stereo files into a 7.1.2 bed with two rear height objects. Direct sound is spread across L / C / R, ambience goes to the sides, rears and heights, and the low end feeds the LFE. The controls are:
| Control | Range/default |
|---|---|
| Centre | 0–100 %, 80 |
| Surround | 0–100 %, 60 |
| Height | 0–100 %, 45 |
| LFE | −60 to 0 dB, −10 |
| Rate | Source sample rate or 48 kHz |
Click UPMIX AND IMPORT. The results are saved in an Upmixes folder and imported, with the stereo file attached as the reference.
Warning: Several platforms, including Apple Music, do not accept upmixed stereo as immersive releases. Use upmixes for demos, previews and catalogue work where the platform allows them. Quality control marks them.
Command line and watch folders
pimaster
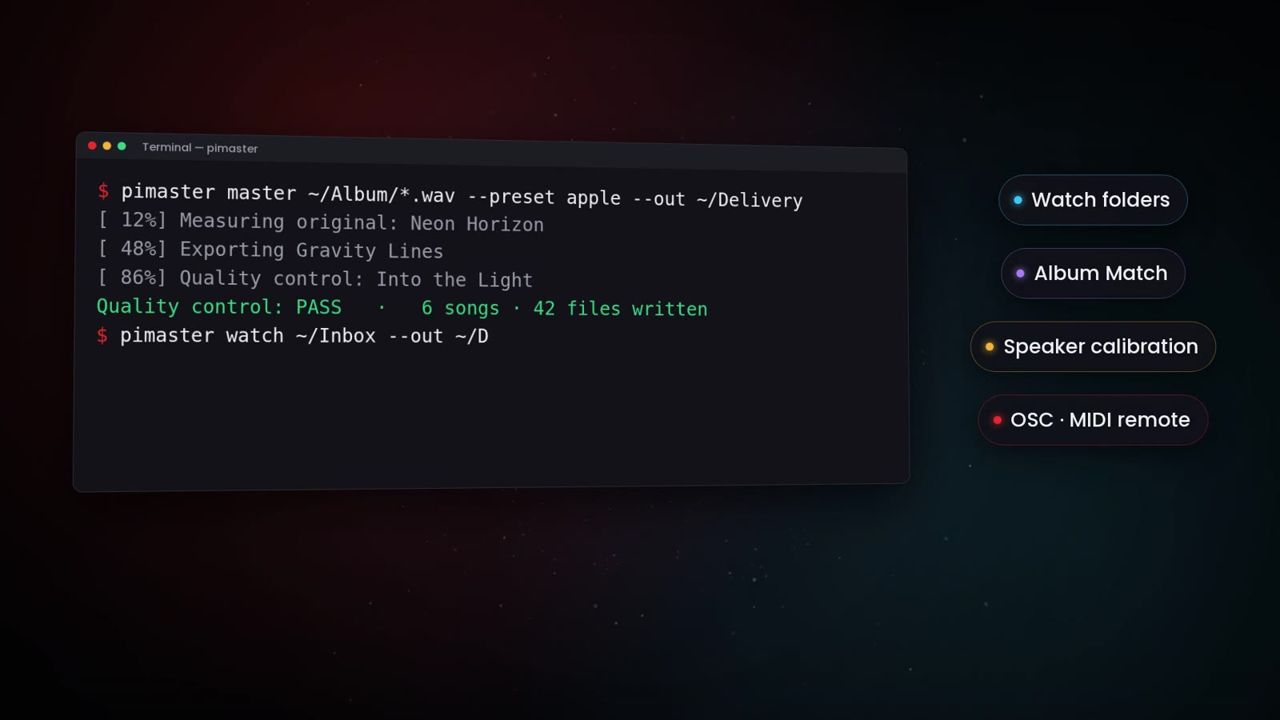
pimaster masters and delivers ADM BWF files without opening the application. It uses the same engine, delivery profiles and quality control as the app.
| Command | What it does |
|---|---|
pimaster master <files or folders…> --out <folder> |
Match masters to the targets and deliver them |
pimaster render <project.pims> --out <folder> |
Deliver a saved project with its own EQ, dynamics and plug-ins |
pimaster analyse <files…> |
Measure loudness (5.1 render) |
pimaster info <files…> |
Format, beds, objects and duration |
pimaster qc <folder> [--preset id] |
Check a delivered package again (PDF + CSV) |
pimaster upmix <stereo.wav> --out <file.wav> |
Stereo to 7.1.2 bed + height objects |
pimaster watch <inbox> --out <folder> |
Master every ADM file dropped into the inbox |
pimaster presets |
List the delivery profiles |
pimaster licence … |
Licence status, activate <key> [--move], trial, refresh, deactivate, request <key>, import <file.pilic> |
The options for master, render and watch are:
| Option | Meaning |
|---|---|
--preset <id> |
Delivery profile (default apple) |
--target <LKFS> / --ceiling <dBTP> |
Targets (default −18 / −1) |
--no-match |
Deliver without matching |
--no-limiter |
Match with gain only |
--strict-tp |
True peak on the 2.0, 5.1 and 7.1.4 renders |
--domain <objects\|714> |
Processing domain |
--album, --artist, --upc |
Release metadata |
--metadata <file.csv> |
Titles and ISRCs per file |
--stereo --binaural --51 --714 --iamf --video |
Add these deliverables to the profile |
--no-adm / --no-qc |
Leave out the ADM master / the QC report |
--rate <Hz> |
ADM master sample rate |
--separate |
master only: deliver every file as its own package |
--interval <s> |
watch only: seconds a file must stay unchanged before it is processed (default 5) |
--once |
watch only: process what is in the inbox now, then exit |
The metadata CSV uses the columns file,title,isrc,stereo_isrc,artist:
file,title,isrc,stereo_isrc,artist
01 Opening.wav,Opening,GBAAA2600001,GBAAA2600101,Artist
Some examples:
# Match a folder of masters and deliver them for Apple Music
pimaster master ~/Masters/Album --out ~/Deliveries --album "My Album" --artist "Artist" --upc 123456789012 \
         --metadata ~/Masters/Album/metadata.csv

# Watch folder
pimaster watch ~/Inbox --out ~/Deliveries --preset apple
The exit codes are useful in scripts:
| Code | Meaning |
|---|---|
| 0 | Success |
| 1 | Failure |
| 2 | Usage error |
| 3 | Not licensed |
| 4 | Quality control failed |
Without a licence, info, presets and analyse still work.
Watch folders in the application
Tools › Watch Folders… runs any number of inboxes in the background while the app is open.
- Click ADD and set the Inbox and Output folders (CHOOSE…).
- Pick the Profile, the target LKFS and Ceiling (dBTP), and an optional Artist.
- Tick Match to the target (auto match) and Enabled.
- Turn on Watch folders on (runs in the background while the app is open).
Every master you drop into the inbox is matched and delivered with its quality control report. It is then moved to Done or Failed. A log is written to Watch Folder Log.txt in the output folder, and the Activity list shows progress.
The app reads a metadata.csv placed in the inbox automatically. If the licence ends (after its 24-hour notice), new files wait in the inbox until you activate again.
Settings & preferences
Open Settings with the gear icon or Cmd/Ctrl+, (comma).
Audio Device tab: choose the device, output channels, sample rate and buffer size.
Monitoring & Measurement tab:
| Setting | What it does | Range/default |
|---|---|---|
| Monitor output | First device output used for the monitor feed | 1–64, default 1 |
| Strict true peak | Measure and limit true peak on the 2.0, 5.1 and 7.1.4 renders instead of the 5.1 render only | Off |
| Height Trim | Re-render trim used when a layout has no height speakers | −12 to 0 dB, 0 |
| Surround Trim | Re-render trim used when a layout has no rear speakers | −12 to 0 dB, 0 |
Changing strict mode or the trims marks every song's measurement as stale, so analyse again afterwards.
Speaker calibration (Monitor › Speaker Calibration…) only affects the monitor outputs, never the exports. Turn it on and off with Calibration on, or with Monitor › Speaker Calibration On. For each speaker you can set:
| Control | Range/default |
|---|---|
| TRIM | −20 to +20 dB, 0 |
| DELAY | 0–40 ms, 0 |
| POL (INV) | Polarity invert |
| BASS (SMALL) | Send this speaker's bass to the sub |
| ROOM EQ (EQ…) | Per-speaker EQ bands. IMPORT FILTER TEXT… loads room-measurement filter text (Filter 1: ON PK Fc … Gain … Q …) |
| TEST (NOISE) | Pink noise at −20 dBFS RMS on one speaker, for SPL calibration |
The global settings are the bass-management crossover (40–200 Hz, default 80 Hz, 4th-order Linkwitz-Riley) and the LFE gain (−20 to +20 dB). IMPORT CSV, EXPORT CSV and RESET load, save and clear the whole calibration.
Keyboard shortcuts / remote control
Keyboard shortcuts
On macOS, use Cmd where the table says Cmd/Ctrl. On Windows, use Ctrl. Help › Keyboard Shortcuts shows the list in the app.
| Key | Action |
|---|---|
| Space | Play / Pause |
| Home / End | Go to start / end |
| Left / Right | Previous / next song |
| Up / Down | Select song |
| A | Original (A/B) |
| R | Stereo reference |
| L | Loop selected song |
| Delete / Backspace | Remove selected song |
| Cmd/Ctrl+N / O / S | New / Open / Save project |
| Cmd/Ctrl+Shift+S | Save Project As |
| Cmd/Ctrl+I | Import masters |
| Cmd/Ctrl+E | Export & Deliver |
| Cmd/Ctrl+Z / Shift+Z (or Ctrl+Y) | Undo / Redo |
| Cmd/Ctrl+M / Shift+M | Auto Match song / album |
| Cmd/Ctrl+Shift+H | Head tracking on/off |
| Cmd/Ctrl+, | Settings |
| Cmd/Ctrl+mouse wheel | Zoom the timeline |
OSC remote control
Open Tools › Remote Control (OSC / MIDI)…. Tick Receive OSC on port (default UDP port 9000). You can also enter a feedback host and port. The suite then sends /pi/position (seconds), /pi/playing (0/1) and /pi/song (number) back to that address.
| Address | Arguments | Action |
|---|---|---|
/pi/play, /pi/stop, /pi/toggle, /pi/start |
— | Transport |
/pi/next, /pi/prev |
— | Next / previous song |
/pi/song |
n (1-based) | Play from song n |
/pi/locate |
seconds | Move the playhead |
/pi/monitor/gain |
dB (−60 to +12) | Monitor level |
/pi/monitor/dim, /pi/monitor/mute |
0 or 1 | Dim / mute |
/pi/monitor/format |
index | Monitoring format |
/pi/ab |
0 or 1 | Original (A/B) |
/pi/reference |
0 or 1 | Stereo reference |
/pi/solo/zone |
n | Zone solo |
/pi/head (also /ypr, /SceneRotator/ypr) |
yaw pitch roll | Head orientation (OSC head tracker) |
/pi/head/quaternion (also /quaternion, /SceneRotator/quaternions) |
w x y z | Head orientation |
/pi/head/recentre |
— | Recentre the head |
MIDI
Choose a MIDI input in the same dialog. To map a control:
- Click an action: Play / Pause, Play, Stop, Go to Start, Next Song, Previous Song, Monitor Level, Dim, Mute, Original (A/B), Stereo Reference or Recentre Head.
- Move a fader or knob, or press a key, on your MIDI device.
Monitor Level follows a CC from −60 to +12 dB. Buttons act when you press them. CLEAR MAPPINGS removes all mappings.
Some controls work without learning:
- MMC: play, stop, fast-forward (next song), rewind (previous song) and locate.
- Mackie Control transport buttons: play, stop, rewind and fast-forward.
The dialog shows the last OSC and MIDI message it received, which helps when you set up a controller.
Tips for live/studio use
- Keep LEVEL MATCH on when you compare. Louder almost always sounds better. With level matching, A/B tells you whether your processing really helps.
- Use EDIT ALL SONGS for album-wide moves, such as a gentle high shelf on every height zone. Then fine-tune single songs with it off.
- Turn on the sidechain HPF (SC HPF on the compressor, HPF on the insert sidechain). It stops the kick and bass from pumping the whole immersive image.
- Fix single objects on the Elements tab instead of EQing the whole mix. A loud object can be turned down, muted or moved, and the change goes into the exported ADM.
- Attach the stereo masters early. Sync and duration checks, the "2.0 direct" stereo deliverable and the stereo ISRC all depend on them.
- Enter ISRCs and the UPC before you deliver. Quality control fails a song with no immersive ISRC, or with an immersive ISRC that matches the stereo one.
- Audition every crossfade with Audition the transition from the previous song. Playback in the timeline is close; the audition is exact.
- Check on headphones too. Many listeners hear immersive music binaurally. Switch to Binaural and check the headphone render modes on the Elements tab.
Troubleshooting
| Symptom | Cause | Fix |
|---|---|---|
| Status bar reads "No audio device - open Settings" | No output device is selected | Open Settings › Audio Device and choose your interface |
| A song is refused when you import it | Its sample rate differs from the album rate | Convert it to the album rate, or start a new project at its rate |
| No sound from height or surround speakers | The monitor format or output offset is wrong | Pick the right Monitor format and check the first output in Settings › Monitoring & Measurement |
| Save, Export & Deliver or Render Album reads "Activate to save" | Limited mode: no licence, or the trial has ended | Activate in Help › Licence… |
| Banner shows a countdown | The licence was moved, deactivated or ended; 24-hour notice | Reactivate, or move the licence back with Move it here |
| The Spec column shows changed | You changed processing after analysing | Click ANALYSE ALBUM or run Auto Match again |
| The Spec column shows CHECK after Auto Match | LIMITER or RAISE is off, so the target could not be reached with gain alone | Turn on LIMITER and RAISE, then match again |
| Linked instances sound different | The plug-in's internal state was not shared | Click SYNC on the insert |
| A sidechain plug-in does not react to the programme | SC LINK is off, or the plug-in's external sidechain is off | Turn on SC LINK and enable the sidechain inside the plug-in |
| Dropouts counted in the status bar | CPU load is too high for the buffer size | Raise the buffer size, remove inserts, or use the 7.1.4 render domain |
| AirPods head tracking does nothing | Needs supported AirPods / Beats and macOS 14 or later | Update macOS, or use an OSC head tracker |
| Project opens with "Missing audio files" | Audio files were moved or renamed | Click Locate… and point to the files |
| QC fails "Stereo sync" or "Stereo duration" | The stereo master is offset or a different length | Set Ref Offset, or deliver the stereo as 2.0 direct |
| QC fails "Source" | The song was upmixed from stereo | Deliver a mix made from multitracks or stems |
pimaster exits with code 3 |
No licence on this computer | Run pimaster licence activate <key> or start the trial |
Specifications & system requirements
| Item | Specification |
|---|---|
| Version | 1.0.0 |
| Input | ADM BWF (.wav, RIFF / RF64 / BW64), beds + up to 128 objects; plain 5.1–9.1.6 WAV |
| Session rates | 44.1, 48 or 96 kHz |
| Loudness | ITU-R BS.1770-4 (integrated, short-term, momentary), true peak, EBU LRA on the 5.1 re-render |
| Targets | −18 LKFS / −1 dBTP default, adjustable |
| Processing | Zone EQ, linked compressor, true-peak limiter, zone multiband, 8 linked VST3 / AU inserts |
| Monitoring | 2.0 to 9.1.6 speakers, binaural with custom HRTF and head tracking |
| Delivery | ADM BWF, stereo, binaural, 5.1, 7.1.4, IAMF, review video (up to 4K), album renders |
System requirements
| macOS minimum | macOS recommended | Windows minimum | Windows recommended | |
|---|---|---|---|---|
| OS | macOS 14 Sonoma | Latest macOS | Windows 10 64-bit | Windows 11 64-bit |
| Processor | Apple silicon or Intel (Universal) | Apple M1 Pro or better | Intel Core i5 / AMD Ryzen 5, 4 cores | Intel Core i7 / AMD Ryzen 7, 8 cores |
| Memory | 8 GB | 16–32 GB (large ADM sessions) | 8 GB | 16–32 GB (large ADM sessions) |
| Disk | 200 MB + project space | 200 MB + project space, fast SSD for ADM files | 200 MB + project space | 200 MB + project space, fast SSD for ADM files |
| Monitoring | Headphones (binaural) | Immersive speaker system (12+ outputs for 7.1.4) | Headphones (binaural) | Immersive speaker system (12+ outputs for 7.1.4) |
Linux is not supported. You don't need any extra runtime, Python or other dependency.
Support
- Email: support@pi-ware.com
- Website, downloads and your account: www.pi-ware.com
- Video tutorials: youtube.com/@pibysaharty
When you contact support, please include:
- the version (Help › About Pi Immersive Mastering Suite)
- your operating system and audio interface
- a description of what happened
For delivery questions, attach the quality control report (Quality Control Report.pdf and its CSV).
Your licence includes free updates. Download new versions from your account at pi-ware.com.

Copyright © 2026 Pi by Saharty. All rights reserved.