Pi Immersive Live
Welcome
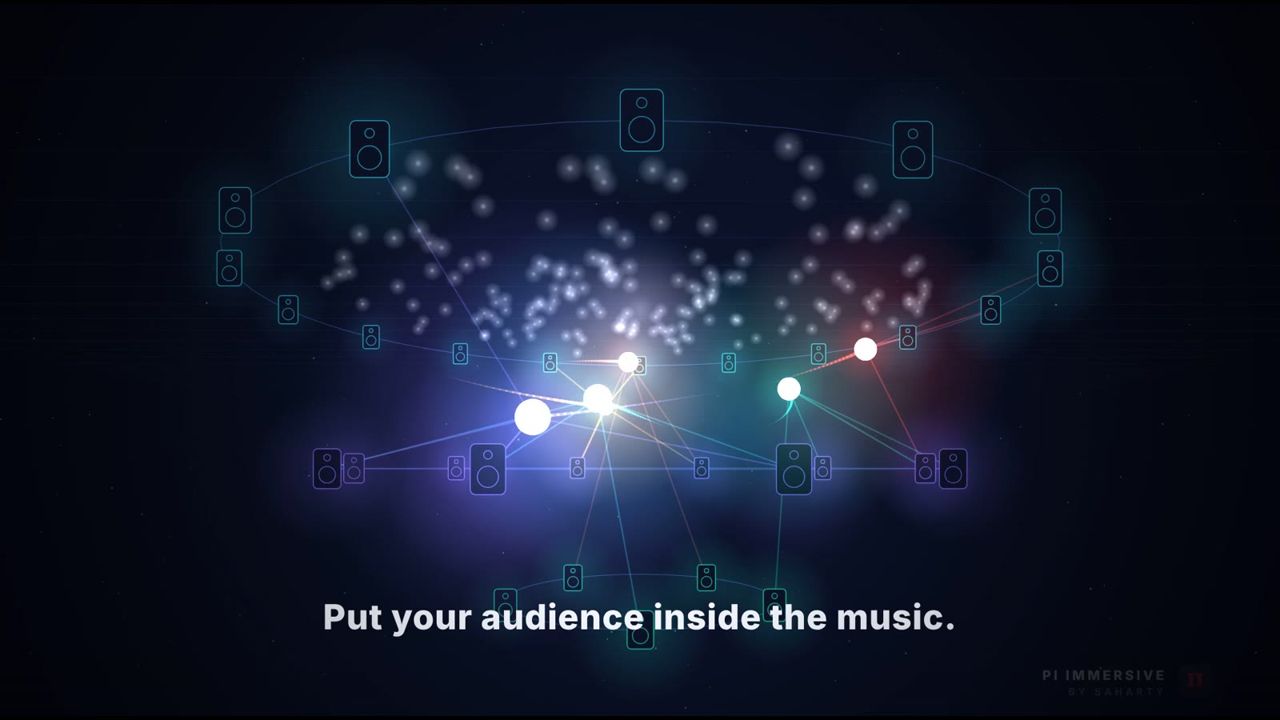
Pi Immersive Live is an object-based spatial audio engine for concerts, theatre, installations and studios. Every input becomes an object with a position, a size and a distance, and Pi Immersive renders it in real time to the loudspeaker system you actually have, from a 7.1.4 studio to a large venue with line arrays, delays, surrounds and overheads. You can also render to headphones (binaural) or to Higher-Order Ambisonics.
Pi Immersive Live is a standalone application for macOS and Windows. In the app's title bar and menus it is shown as Pi Immersive By Saharty.
Who it is for
- Live sound engineers who want to place and move sources over an immersive or source-oriented PA system.
- Theatre sound designers who need voices to localise to the performers (Stage delay matrix) and cues that recall with timed morphs.
- Installation and dome designers working with large speaker counts, Ambisonics or multichannel network audio.
- Studio engineers monitoring immersive mixes on a speaker bed or on headphones.
What you get in version 2.0.2
This manual describes version 2.0.2, which includes:
- An object engine with eight panning laws, plus spread, directivity, distance laws, Doppler and air absorption per source.
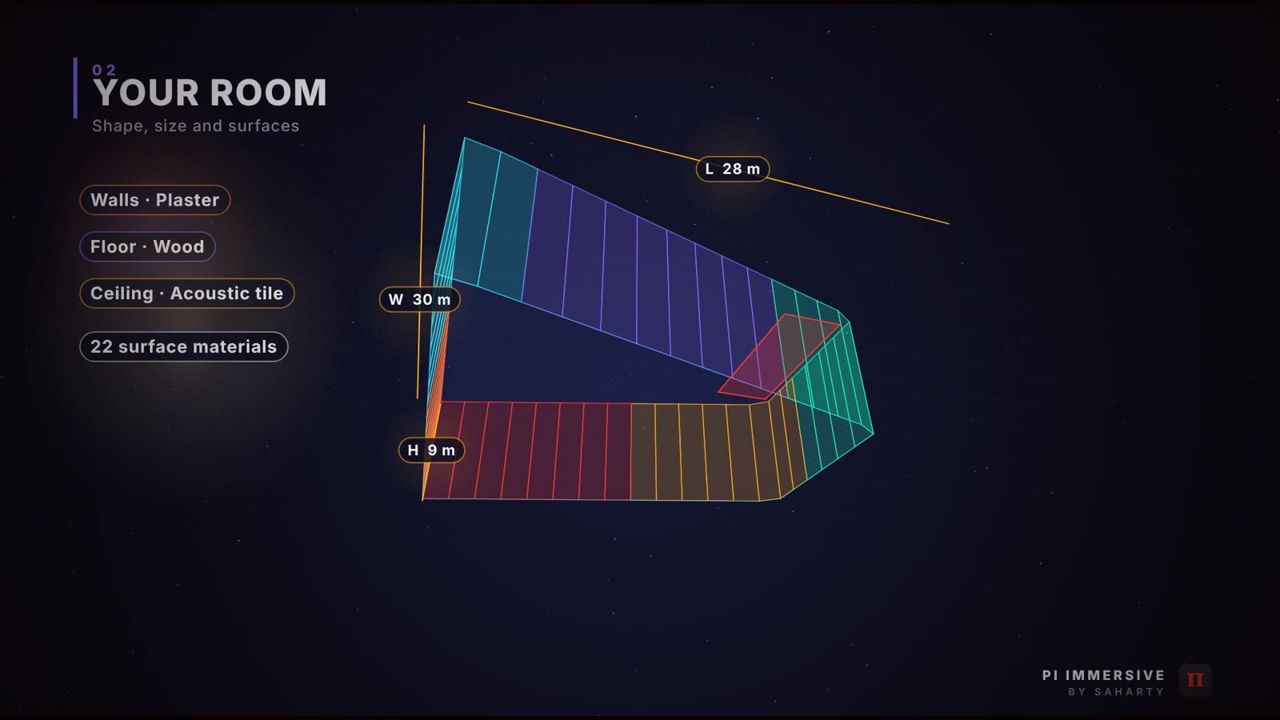
- A room model (shape, 22 surface materials, audience, RT60 per octave band) where each property can be switched off.
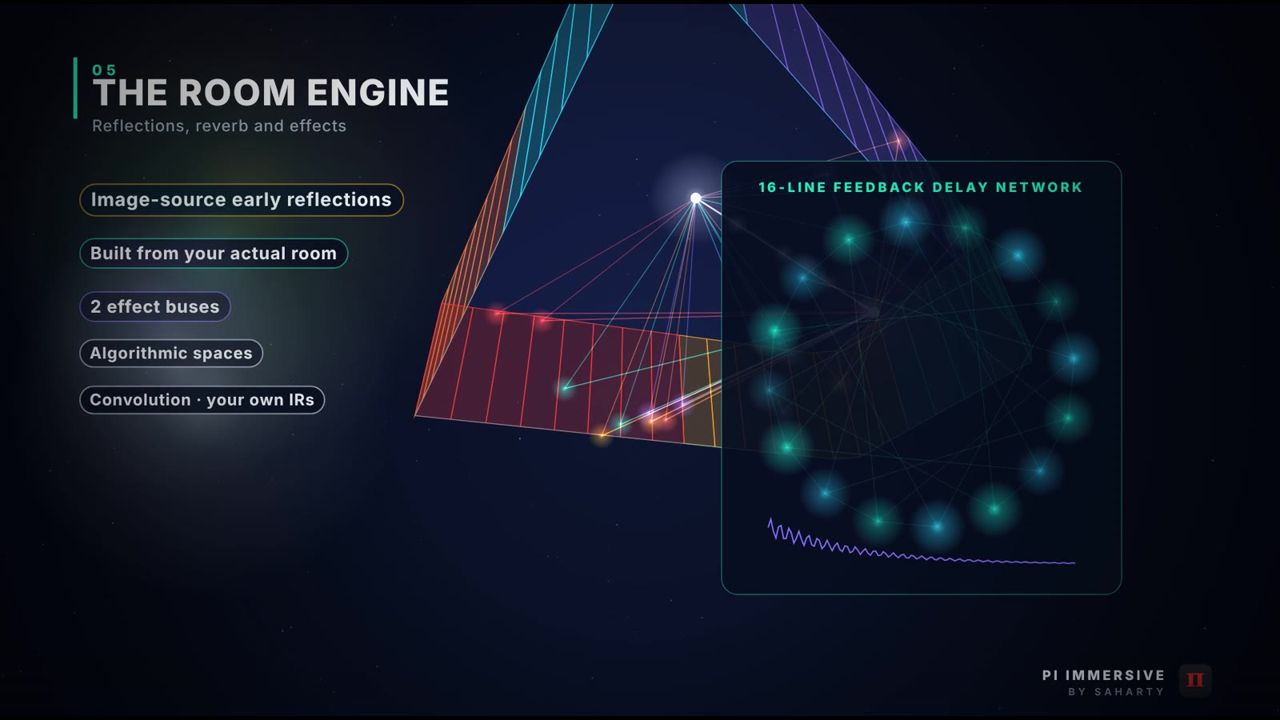
- A room engine with geometric early reflections, a 16-line late reverb and two send effect buses (algorithmic or convolution).
- A Stage delay matrix for source-oriented reinforcement, alone or in parallel with the object engine.
- Yamaha console control over RCP, with one aux per loudspeaker.
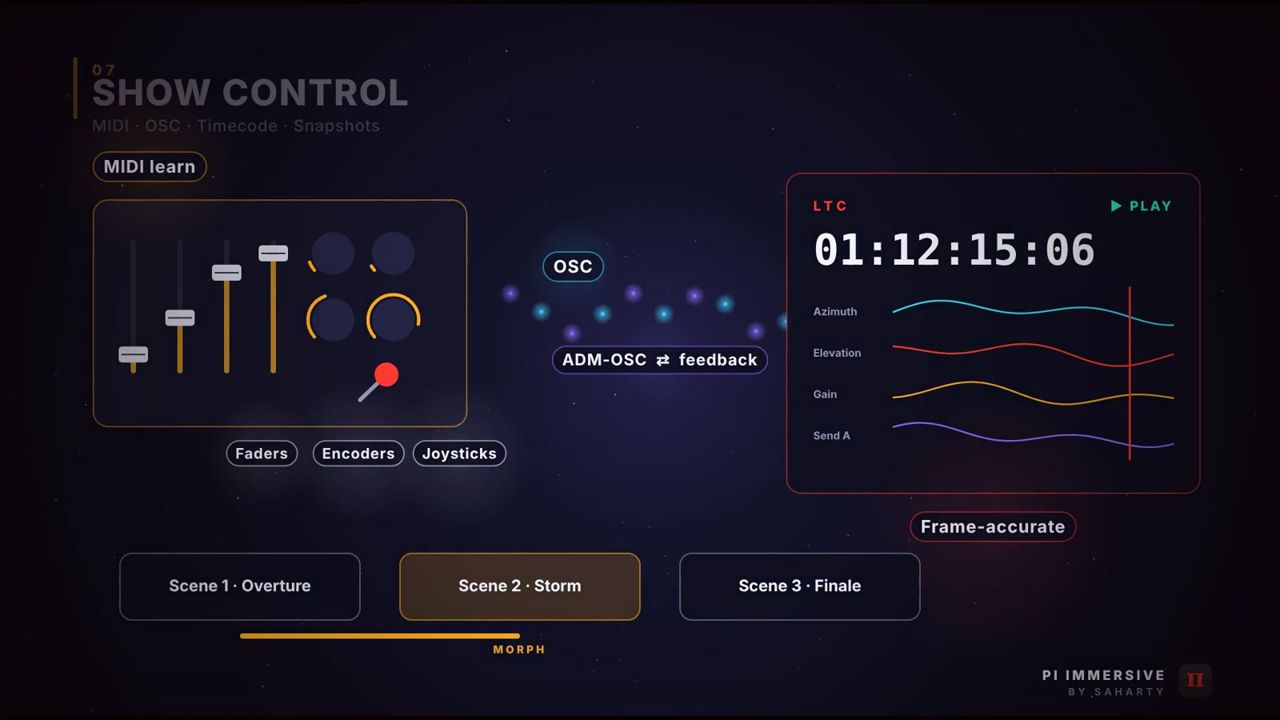
- Show control: MIDI learn, LTC automation, OSC / ADM-OSC and snapshots with timed morphing.
- Up to 256 x 256 audio channels, including Dante, AVB and MADI interfaces.
Quick start
- Install Pi Immersive Live from the
.dmg(macOS) or.exe(Windows) installer and open it. - Activate or start a trial. The licence window opens on the first launch. Enter your licence key and click Activate, or click Start 15-day free trial.
- Choose your audio device. Open the I/O Setup page (Cmd/Ctrl+1). Choose the driver type and device, then enable the input and output channels you need.
- Choose the output format. Under Output format, set RENDERING to Loudspeakers, Binaural (headphones) or Ambisonics (HOA, ACN/SN3D).
- Describe the room. On Room Setup (Cmd/Ctrl+2), in the Room tab, set ROOM SHAPE, WIDTH, LENGTH, HEIGHT and the mix position.
- Set up the loudspeakers. In the Loudspeakers tab, pick a format under START FROM A FORMAT, or use the Format advisor tab and click Apply this system. Check that the Out column matches your physical outputs.
- Check each speaker. Select a speaker and click Test selected, or click Cycle test to step through all of them with pink noise.
- Set up your sources. On Sources (Cmd/Ctrl+4), select a source, set its INPUT CHANNEL, then drag it around the plan.
- Make sure the engine is on. The ENGINE button in the header should read ON.
- Save your project with Cmd/Ctrl+S. Projects are saved as
.piimmfiles.
Tip: A new project already contains eight sources on inputs 1 to 8, spread in a circle at 3 m. You can hear something straight away once your device is set up.
Installation
macOS
- Open the downloaded
.dmgfile. - Drag Pi Immersive By Saharty to your Applications folder.
- Open it from Applications. The app is a universal build that runs natively on Apple silicon and Intel Macs, and needs macOS 11 Big Sur or later.
- On the first launch macOS asks whether Pi Immersive can use the microphone. Click Allow. The app needs this permission to receive audio inputs for spatialisation and for LTC timecode. If you click Don't Allow, you can change it later in System Settings > Privacy & Security > Microphone.
Windows
- Run the downloaded
.exeinstaller and follow the steps. - Open Pi Immersive By Saharty from the Start menu.
- For the lowest latency and the most channels, use your interface's ASIO driver. WASAPI and DirectSound are also available.
First launch
- If Pi Immersive has never been activated on this computer, the licence window opens automatically (see Activation & licensing).
- If the last-used audio device can't be opened, you are asked to choose one on the I/O page.
- Only one copy of the app runs at a time; double-clicking a
.piimmproject opens it in the running copy.
Note: Pi Immersive Live is a standalone application, not a plug-in. It doesn't need Python, extra runtimes or other dependencies.
Activation & licensing
Pi Immersive Live uses the Pi by Saharty licensing system. One licence covers one computer, and you can move it to another computer at any time.
Buying and receiving your key
Buy Pi Immersive Live at pi-ware.com/products/pi-immersive-live (or use Help > Buy Pi Immersive Live...). Your licence key arrives by email after purchase. It looks like XXXXX-XXXXX-XXXXX-XXXXX.
Online activation
- Open Help > Licence..., or click the licence banner at the top of the window.
- Type or paste your key into Licence key.
- Click Activate.
When activation succeeds, the window says Activated and shows the owner name. It also shows This computer: with the name of this computer.
If your key is already active on another computer, Pi Immersive asks whether you want to Move it here. If you agree, the other computer gets a 24-hour notice and then switches to limited features. The dialog also shows how many moves you have left this year.
Free trial
Click Start 15-day free trial in the licence window. You don't need to enter payment details. Every feature works during the trial.
Offline activation
Use offline activation when the show computer has no internet access:
- Enter your licence key in the licence window.
- Click Offline activation. A request code appears.
- Click Copy code and take the code to any device with internet access.
- Paste it at pi-ware.com/activate. You receive a licence file.
- Back on the show computer, click Load licence file... and choose that file (
.pilic).
Moving your licence to a new computer
- From the old computer: open the licence window and click Deactivate this computer. This frees the licence so you can activate it on the new computer.
- If the old computer isn't available: sign in to your account at pi-ware.com/account, where you can deactivate or reset your computers. Or simply activate on the new computer and confirm Move it here.
How licence checks work
- Pi Immersive checks the licence whenever it finds an internet connection: at launch, then every 60 minutes. While offline, it tries again every 2 minutes.
- It keeps working offline with no time limit.
- The 24-hour rule: features are never limited without at least 24 hours of notice on that computer, whatever the reason (licence moved, trial ended, deactivated from the account). During the notice every feature still works, and a banner at the top of the window shows the message and a countdown.
Limited mode
When Pi Immersive Live isn't activated, or the notice period is over:
- Projects still open, can be edited and can be saved.
- The engine can't be started. Spatial processing and all outputs are bypassed. Input meters and LTC still work.
- A show that is already running keeps running until you stop it with the ENGINE button. If you try to stop it, a dialog warns you that the engine can't be started again until the app is activated.
- Starting and stopping the engine always fades over about 50 ms. Nothing is ever cut hard.
Licence file location
| System | Path |
|---|---|
| macOS | ~/Library/Application Support/Pi by Saharty/Licences/pi-immersive-live.pilic |
| Windows | %APPDATA%\Pi by Saharty\Licences\pi-immersive-live.pilic |
Interface tour
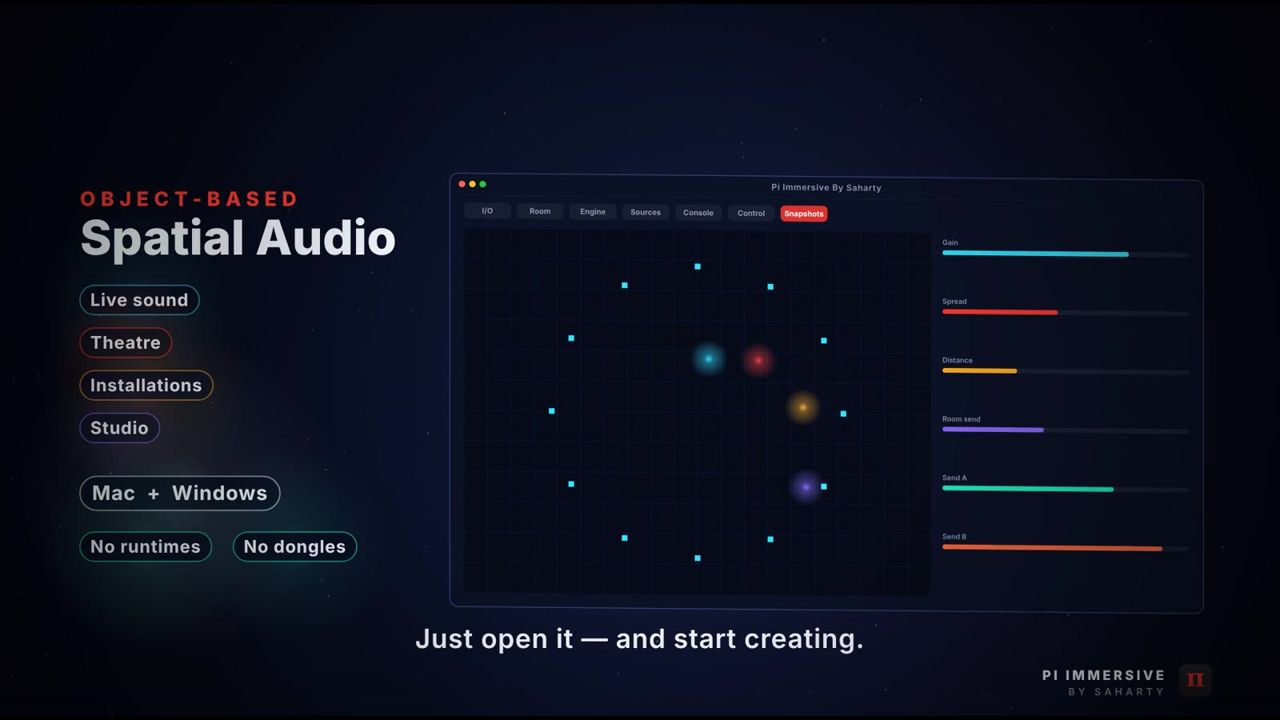
The main window has four areas: the header at the top, the navigation bar on the left, the page area in the centre and the status bar at the bottom. On Windows the menu bar is inside the window. On macOS it is in the system menu bar.
Header
| Control | What it does | Range / default |
|---|---|---|
| Project name | Shows the project name. A * means there are unsaved changes. |
"Untitled project" |
| ENGINE mode menu | Chooses the processing mode: Object-based spatialisation, Stage delay matrix or Both (parallel). | Object-based spatialisation |
| ENGINE ON / OFF button | Starts or stops all processing and outputs, with a ~50 ms fade. | ON when licensed |
| MASTER slider | Master output level. Double-click to reset to 0 dB. | -60 to +12 dB / 0 dB |
| Master mute | Mutes all outputs (smoothly). | Off |
| Add source button | Adds a new source at 3 m and selects it. | — |
| Clock | Timecode display (hh:mm:ss:ff). Below it: LTC or INTERNAL, plus REC or PLAY while automation runs. Red while recording. | — |
| CONSOLE LED | Lights when the Yamaha console is connected. | — |
| LTC LED | Lights when LTC is locked. | — |
| CPU readout | CPU load, sample rate and buffer size. | — |
| Output meters | One meter per output, labelled with the speaker names (or channel numbers for binaural / HOA). | — |
Navigation bar
The seven pages follow the order you work in. You can also jump to them with Cmd/Ctrl+1 to Cmd/Ctrl+7 or from the Pages menu.
| # | Page | Purpose |
|---|---|---|
| 1 | I/O Setup | Audio interface, network audio and output format |
| 2 | Room Setup | Room shape, surfaces, loudspeaker system and immersive format |
| 3 | Room Engine | Geometric reflections, late reverb, send effects and listener |
| 4 | Sources | Objects, input assignment, panning, levels and sends; Stage delay matrix |
| 5 | Console | Yamaha console control over RCP |
| 6 | Control | MIDI mapping, timecode automation and OSC |
| 7 | Snapshots | Cues with timed morphing |
The version number is shown at the bottom of the navigation bar.
Status bar
The status bar shows the device, latency, engine state, source and output counts, output format, room size, OSC port and open MIDI inputs.
Menus
| Menu | Items |
|---|---|
| File | New project, Open..., Save, Save As..., Audio settings..., Quit |
| Sources | Add source, Duplicate selected, Remove selected, Unmute all, Clear all solos, Arrange sources in a circle, Reset all positions to front |
| Pages | The seven pages, numbered 1 to 7 |
| Snapshots | Store snapshot, Recall next (space), Recall previous |
| Automation | Record, Play / chase timecode, Stop |
| Help | OSC / MIDI reference, Licence..., Buy Pi Immersive Live..., About Pi Immersive |
Note: Arrange sources in a circle and Reset all positions to front leave locked sources where they are.
The spatial view
The spatial view appears on the Room Setup, Room Engine and Sources pages. It shows the room, the loudspeakers, the mix position and the sources. Use the Top, Front, Side and 3D buttons above it to change the view.
Use the wheel over an empty area to zoom; in 3D, drag to orbit. The footer shows the selected source's position and panning law. All mouse and keyboard actions are listed in Keyboard shortcuts / remote control.
Setting up audio I/O
The I/O Setup page has four cards: Audio interface, Output format, Network audio devices and Signal.
How to choose your audio device
- Open I/O Setup (Cmd/Ctrl+1, or File > Audio settings...).
- In Audio interface, choose the driver type (Core Audio on macOS; ASIO, WASAPI or DirectSound on Windows) and the device.
- Enable the input and output channels you need, then set the sample rate and buffer size.
- Check the status line above the device list. It shows the driver, device, sample rate, buffer size, latency and the number of active inputs and outputs. It turns amber when no device is open.
- If the device stops responding, click the reset button at the top right of the card to restart it.
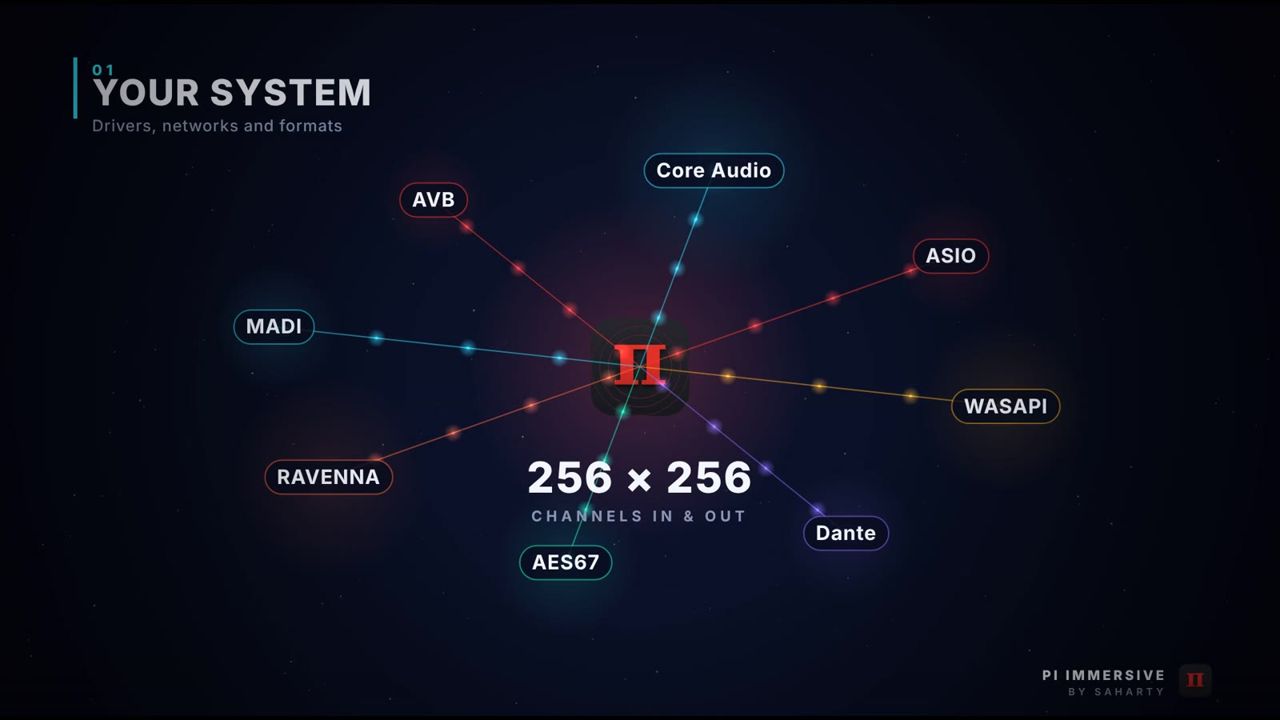
Pi Immersive supports up to 256 inputs and 256 outputs.
For Dante, select Dante Virtual Soundcard or Dante Via and route channels in Dante Controller. AVB is set up in macOS Audio MIDI Setup. For MADI, select your interface's driver.
Network audio devices
The Network audio devices card lists the Dante, AES67 and RAVENNA devices found on your network, with their IP addresses. Click Rescan to search again.
Note: The device list is for information only. Routing is still done in your network audio software, such as Dante Controller.
Signal meters
The Signal card meters the device's active INPUTS and OUTPUTS (up to 64 of each).
How to choose the output format
| Control | What it does | Range / default |
|---|---|---|
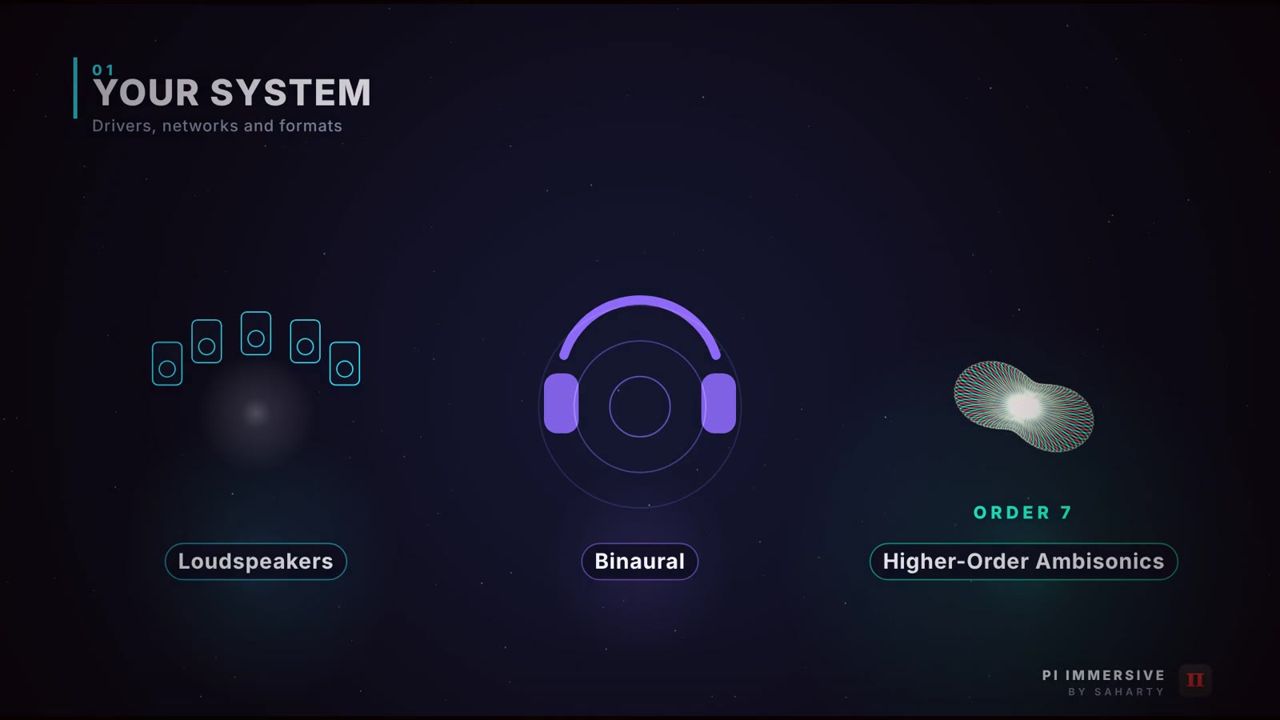
| RENDERING | Loudspeakers, Binaural (headphones) or Ambisonics (HOA, ACN/SN3D). | Loudspeakers |
| HEADPHONE OUTPUTS | Output pair for binaural rendering (enabled for binaural only). | Out 1 / 2 |
| AMBISONIC ORDER | 1st to 7th order. The channel count is shown (for example 3rd order = 16 ch, 7th order = 64 ch). Enabled for Ambisonics only. | 3rd order |
| HOA FIRST OUTPUT | The first output of the Ambisonic channel block. | Out 1 |
| LFE CROSSOVER | Crossover frequency for the LFE / subwoofer feed. | 40 to 300 Hz / 120 Hz |
| MOTION SMOOTHING | How smoothly positions glide when they change. Higher values give softer moves but more lag. | 1 to 1000 ms / 30 ms |
- Loudspeakers: the speakers, their types and their output patching are set on Room Setup.
- Binaural: an HRTF headphone render, with the room and the sends folded to stereo.
- Ambisonics: ACN channel order with SN3D normalisation, for an external decoder or recorder.
Modelling the room
Room Setup has the spatial view on the left and four tabs on the right: Room, Surfaces & acoustics, Loudspeakers and Format advisor. The view buttons Top, Front, Side and 3D and the toggles Coverage, Names and Sources are above the plan.
How to describe the room
- Open Room Setup and select the Room tab.
- Choose a ROOM SHAPE: Rectangle (shoebox), L-shape, Fan / trapezoid, Hexagon, Octagon, Oval / round or Custom polygon.
- Set the dimensions and the mix position with the controls below.
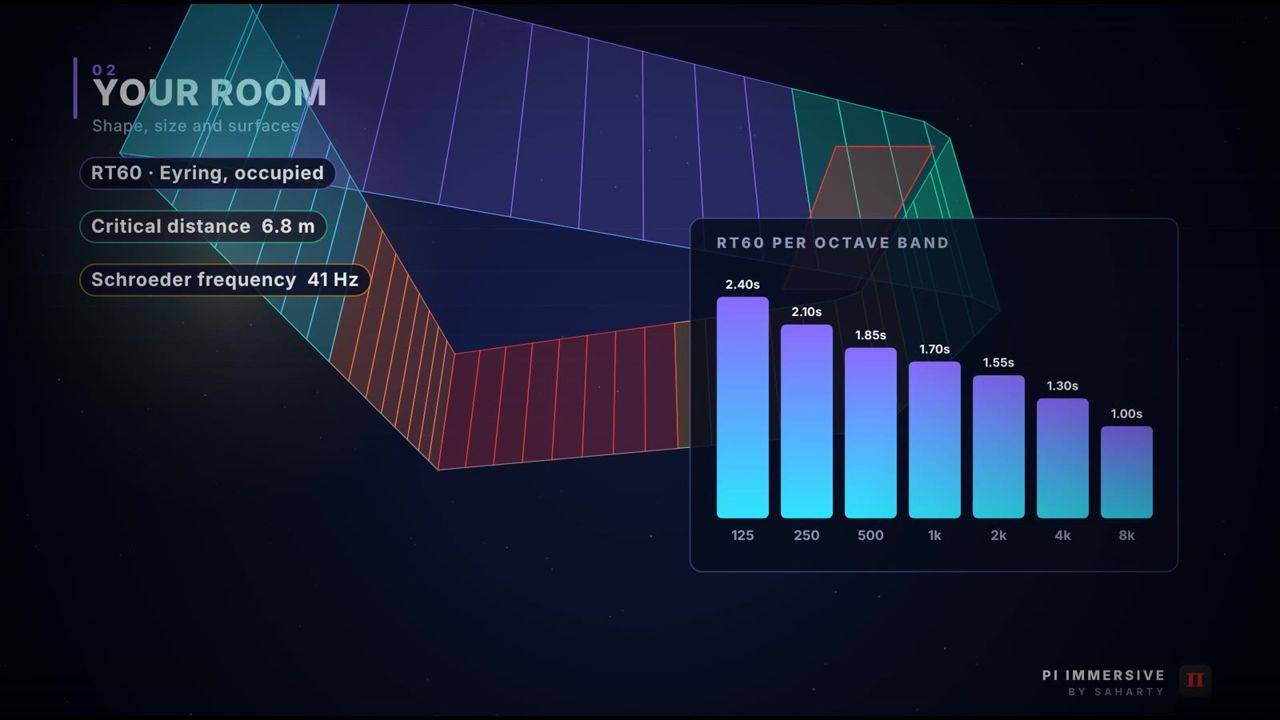
- Read the summary: volume, floor area, total surface, RT60 (mid), mean free path, critical distance, Schroeder frequency and a description of the room's character.
| Control | What it does | Range / default |
|---|---|---|
| WIDTH | Room width | 2 to 200 m / 16 m |
| LENGTH | Room length | 2 to 300 m / 24 m |
| HEIGHT | Ceiling height | 2 to 60 m / 8 m |
| SHAPE A, SHAPE B | Proportions of the non-rectangular shapes (for example the narrowing of a fan or the cut-out of an L) | 0.1 to 0.9 / 0.5 and 0.4 |
| STAGE DEPTH | Depth of the stage area at the front | 0 to 40 m / 5 m |
| MIX X, MIX Y | Position of the mix (reference) point in the room | X -100 to 100 m / 0; Y -150 to 150 m / -2 m |
| EAR HEIGHT | Listening height at the mix position | 0.5 to 20 m / 1.2 m |
| AUDIENCE | How full the room is. Adds audience absorption to the floor. | 0 to 100 % / 60 % |
| REFLECTION ORDER | 1st order (6 paths) or 2nd order (up to 20 paths) | 2nd order |
| Fit speakers to room | Moves the loudspeakers so they fit the room. | — |
The character text ranges from "very dry (studio / outdoor)" through "dry - good for amplified music and speech", "medium - theatre / multi-purpose" and "live - concert hall" to "very live - consider absorption or more direct sound coverage".
Switching room properties on and off
Under PROCESSING - EACH ROOM PROPERTY CAN BE SWITCHED OFF you'll find six switches. All are on by default.
| Switch | Effect when on |
|---|---|
| Room model active | The room model feeds the processing. When off, the engine uses the manual reverb settings and no geometric reflections. |
| Geometric early reflections | Early reflections are calculated per source from the walls, floor and ceiling. |
| Surface materials | The reflections and reverb time use each surface's material. |
| Reverb time from room | The late reverb's decay, size and pre-delay come from the room model. |
| Air absorption | High frequencies drop with distance, as they do in air. |
| Speaker time / level alignment | Each loudspeaker is automatically delayed and level-matched to the mix position. |
How to assign surface materials
- Select the Surfaces & acoustics tab.
- Each surface (Floor, Ceiling, Wall 1, Wall 2, ...) is listed with its area in m² and a material menu. Choose a material for each one.
- To set every wall at once, choose a material from ALL WALLS.
- Check the ESTIMATED REVERBERATION TIME (EYRING, OCCUPIED) chart on the Room tab. It shows RT60 at 125, 250, 500, 1k, 2k and 4k Hz.
The library has 22 materials, each with octave-band absorption from 125 Hz to 4 kHz: Concrete (painted), Concrete (rough block), Brick (unglazed), Plaster on masonry, Gypsum board on studs, Wood panelling, Wood floor, Stage (wood on air space), Glass (large pane), Marble / ceramic tile, Metal panel, Carpet on concrete, Heavy curtain (draped), Acoustic ceiling tile, Acoustic foam 50 mm, Mineral wool panel 100 mm, QRD diffuser, Upholstered seats (empty), Audience (seated), Audience (standing), Grass / soil (outdoor) and Open (no surface).
Tip: Outdoors, set the ceiling to Open (no surface) and the floor to Grass / soil (outdoor).
Setting up the loudspeaker system
How to build a layout
- Open Room Setup > Loudspeakers.
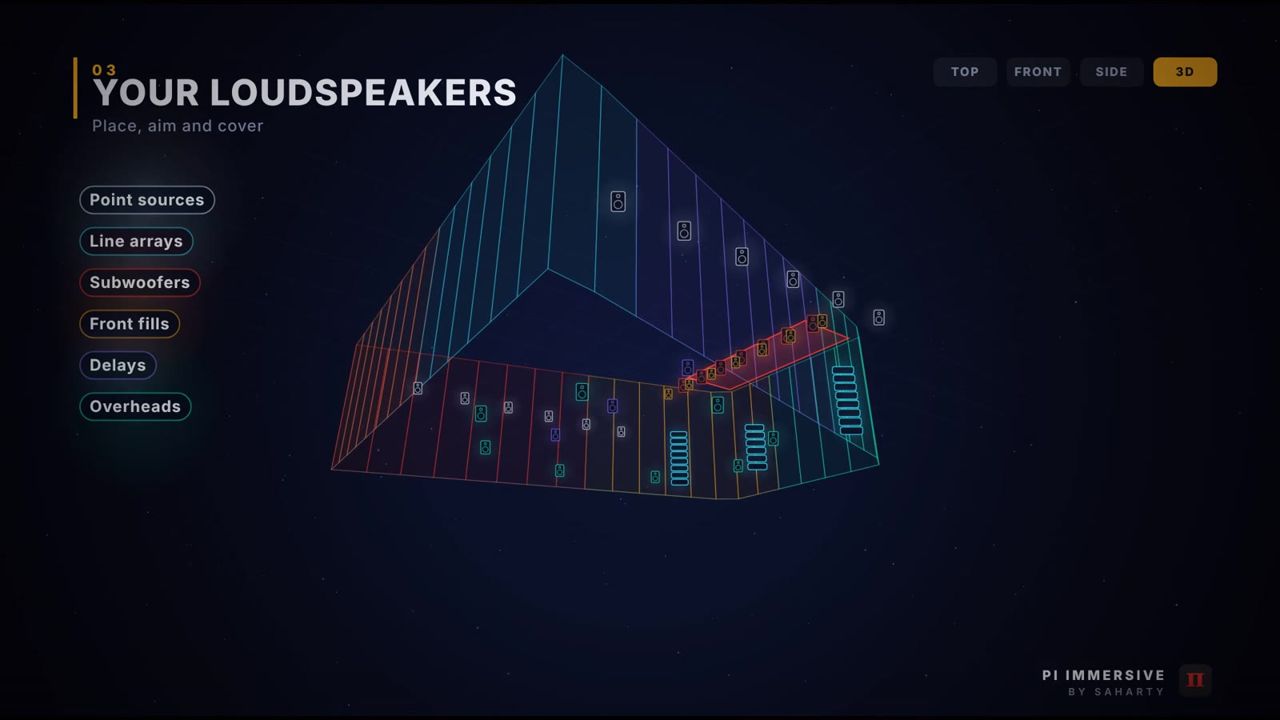
- Choose a starting point from START FROM A FORMAT: Mono, Stereo, LCR, Quad, 5.0, 5.1, 7.0, 7.1, 5.1.2, 7.1.4, 9.1.6, 9.1 (height layer), 11.1 (height + top), 13.1 (height + top), Hexagon, Octagon, Dome 16, Dome 24, Dome 32 or 22.2 (ITU-R System H).
- Edit the table to match your real system: name, type, model, number of elements, positions, trim and output.
- Drag the speakers on the plan to adjust their positions. In this page you can also drag the MIX marker to move the mix position; the speakers stay where they physically are.
- Click Number outputs to number the physical outputs 1 to n in layout order, or type each output in the Out column.
The line above the table summarises the system: the number of outputs, boxes, arrays, height speakers and sub outputs, and the layout name. If you edit a preset, the layout name changes to Custom.
Loudspeaker table columns
| Column | Meaning |
|---|---|
| # | Speaker number |
| Name | Speaker name (also used for the output meters) |
| Type | Point source, Line array, Column array, Subwoofer, Front fill, Delay, Overhead / ceiling or Surround |
| Model | Free text, for your reference |
| Elem | Number of boxes in a line array or column |
| Qty | Number of identical boxes fed from this output (for example a sub cluster) |
| X m, Y m, Height | Position in the room, in metres |
| Dist | Distance from the mix position |
| Trim | Your level trim (dB) |
| Delay | Your delay (ms), added to the automatic alignment |
| Align | The automatic alignment delay and level for this speaker, or "off" |
| Out | Physical output number |
| Aux | Console mix / aux that feeds this speaker (used on the Console page) |
| LFE | Marks the output as an LFE / subwoofer feed |
| Mute | Mutes this speaker |
Why the type matters: level alignment uses each type's loss over distance: about 3 dB per doubling for line arrays (4.5 dB under four elements), 4 dB for columns and 6 dB for the rest.
Table buttons
| Button | What it does |
|---|---|
| Add | Adds a loudspeaker. |
| Duplicate / mirror | Copies the selected speaker, mirrored left / right. |
| Remove | Removes the selected speaker. |
| Number outputs | Numbers the physical outputs 1 to n in layout order. |
| Assign console auxes | Assigns console mix / aux buses to every speaker in order, starting at the first mix set on the Console page. |
| Fit to room | Moves the speakers to fit the room. |
| Test selected | Plays pink noise at -20 dB through the selected speaker. Click again to stop. |
| Cycle test | Plays pink noise at -20 dB through each speaker in turn, about every 1.2 seconds. Click again to stop. |
| Import... / Export... | Loads or saves a speaker layout file (.pispk; import also accepts .xml). |
Warning: Turn your amplifiers down before you run Cycle test on a large system for the first time.
Speaker right-click menu
Right-click a speaker on the plan to set its Type, toggle Aim at mix position, Mute or LFE, Duplicate (mirror L/R) it or Delete it.
The Coverage, Names and Sources toggles above the plan show or hide speaker coverage, names and sources.
How to use the format advisor
The Format advisor suggests immersive loudspeaker systems for your room and explains why.
- Describe the room first on the Room tab. The advisor uses the size, shape, height, stage depth and mix position.
- Open the Format advisor tab.
- Choose VENUE / USE: Concert / arena, Theatre / opera, Club / small venue, Studio / control room or Installation / dome.
- Choose OUTPUTS AVAILABLE (8 to 128).
- Click Analyse room (it also updates when you change either menu).
- Select a suggestion. The best match is marked BEST FIT. The detail panel shows a summary, the reasons, the zones and every box with its position and coverage.
- Click Apply this system and confirm. This replaces your current speakers. Then fine-tune the positions on the plan.
Suggestions range from frontal hangs with surrounds and overheads, or a source-oriented theatre system, to 7.1.4 / 9.1.6 / 5.1.4 studio layouts and Ambisonic domes.
Working with sources
The Sources page has the spatial view on the left and the source panel on the right. Use Object sources and Stage matrix at the top to switch between the object engine and the Stage delay matrix editor.
How to add and organise sources
- Click + Add in the source panel, use the header's add button, or choose Sources > Add source. New sources start at 3 m.
- Double-click an empty spot on the plan (not in 3D view) to add a source exactly there.
- Double-click a source in the list to rename it, or type in the NAME field.
- Click Colour to choose the source's colour.
- Click Remove to delete the selected source.
- Right-click a source in the list for Mute, Solo, Unmute all and Clear all solos.
List tags: M muted, S solo, L locked, ST stereo pair. ### How to position a source
- Drag a source on the plan to move it.
- Alt-drag to change only its distance and keep its direction.
- Mouse wheel over a source: changes elevation in the Top view, or distance in the other views.
- Shift + mouse wheel over a source: changes its spread.
- Arrow keys and Page Up / Page Down move the selected source when the plan has keyboard focus (see Keyboard shortcuts).
- Or type values in the Position & panning tab.
If a source belongs to a group, dragging it moves the other unlocked sources of the same group with it.
Source right-click menu
Right-click a source on the plan for: Mute, Solo, Lock position, Stereo pair input, Panning law (submenu), Group (No group or Group 1 to Group 8), Send to front centre, Duplicate and Delete.
Position & panning tab
| Control | What it does | Range / default |
|---|---|---|
| INPUT CHANNEL | The physical input that feeds this source | In 1 to In 256 |
| PANNING LAW | How the source is spread over the speakers (see below) | VBAP |
| AZIMUTH | Direction around the listener (0° = front, positive = left) | -180° to 180° / 0° |
| ELEVATION | Height angle | -90° to 90° / 0° |
| DISTANCE | Distance from the listener | 0.05 to 100 m / 2 m |
| SPREAD | Size of the source: 0° is a point, 360° is fully diffuse | 0° to 360° / 0° |
| YAW | Which way the source faces | -180° to 180° / 0° |
| DIRECTIVITY | 0 is omnidirectional, 1 is close to cardioid | 0 to 1 / 0 |
| STEREO WIDTH | Width of a stereo pair (enabled when Stereo pair is on) | 0° to 180° / 60° |
| KNN K / DBAP ROLLOFF | Number of nearest speakers for KNN, or rolloff for DBAP | K 1 to 8 / 3; rolloff 0 to 12 dB / 6 dB |
| Stereo pair | Uses the input channel and the next one as a stereo source | Off |
| Lock position | Protects the position from mouse, MIDI, OSC and the arrange commands | Off |
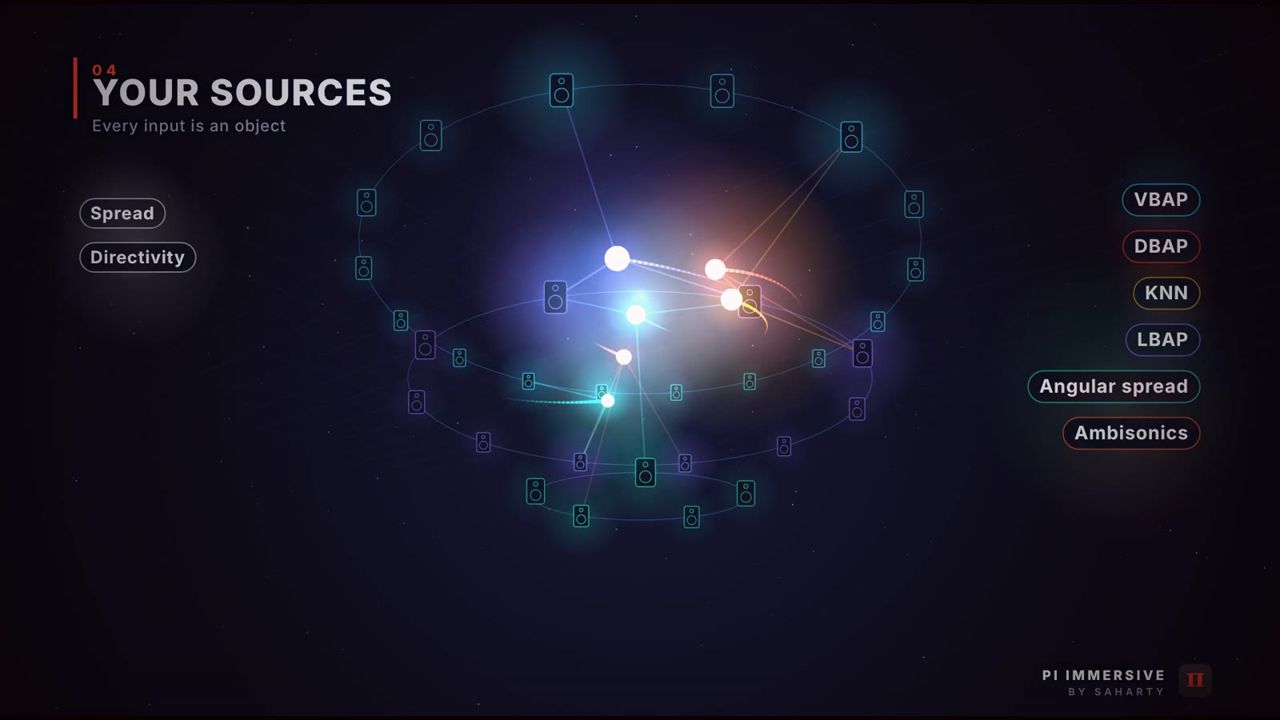
Panning laws
| Law | Best for |
|---|---|
| VBAP | Precise point sources on regular layouts, using the nearest pair or triangle of speakers. |
| DBAP | Irregular layouts and installations where there is no single sweet spot. Uses the DBAP rolloff. |
| KNN | Feeds the K nearest speakers. Smooth and even. |
| Nearest Speaker | Snaps the source to a single speaker. Useful for "real" point sources. |
| Ambisonics (HOA) | Encodes the source to Ambisonics and decodes it to the layout. Smooth movement on domes. |
| Angular Spread | Continuous spread panning for wide, enveloping sources. |
| LBAP | Layer-based panning: VBAP per ring with an elevation crossfade, for layouts with distinct height layers. |
| Stereo Pan | Classic constant-power pan for 2-channel output. |
Level & sends tab
| Control | What it does | Range / default |
|---|---|---|
| GAIN | Source level | -60 to +12 dB / 0 dB |
| LFE SEND | Level sent to the LFE / subwoofer outputs | off (-60) to +6 dB / off |
| ROOM SEND | Level into the room engine | off to +6 dB / -12 dB |
| SEND A, SEND B | Levels to effect buses A and B | off to +6 dB / off |
| Mute, Solo | Mute or solo the source | Off |
| Sends post fader | When on, the sends follow the source gain and mute | On |
Distance & room tab
| Control | What it does | Range / default |
|---|---|---|
| DISTANCE LAW | None, 1/d (-6 dB per doubling), 1/d^2 (-12 dB per doubling) or Custom | 1/d |
| REF. DISTANCE | Distance at which the source plays at 0 dB | 0.1 to 20 m / 1 m |
| ROLLOFF | Level drop per doubling of distance (Custom law only) | 0 to 12 dB/2x / 6 |
| EARLY, CLUSTER, TAIL | This source's level into early reflections, the reflection cluster and the reverb tail | -60 to +6 dB / 0 dB |
| Doppler | Pitch shift when the source moves towards or away from you | Off |
| Air absorption | High-frequency loss with distance | On |
| Room engine | Sends this source to the room engine | On |
How to check a source
Select the source and click Pink noise. Pink noise plays through that source at its current position. Click again to stop.
View options
The Speaker gains toggle shows how much each speaker receives from the selected source. Names shows the source and speaker names.
Using the Stage delay matrix
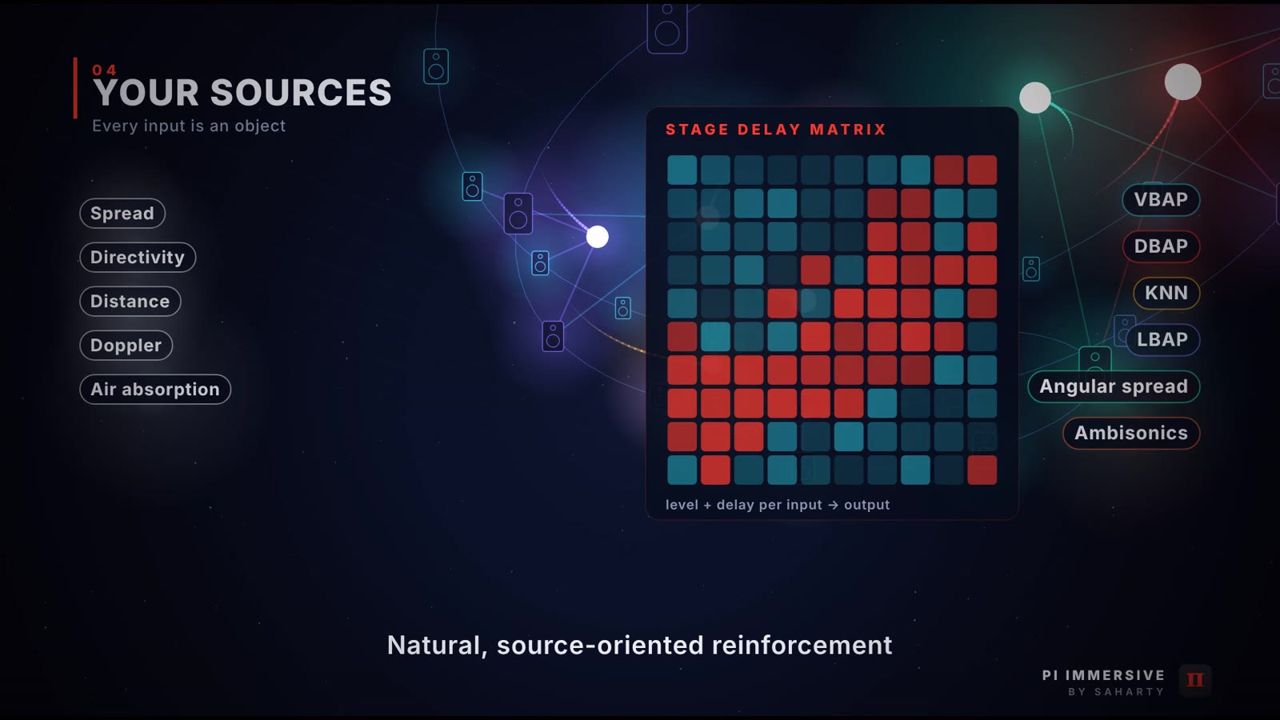
The Stage delay matrix is for source-oriented reinforcement, mainly in theatre. Each matrix input is a performer or instrument (input n is physical input n). Each input-to-output cell has a level and a delay. Pi Immersive can calculate these from a stage plan so that the real voice reaches every seat first, and the loudspeakers support it without pulling the image away from the stage.
To use it, set the header ENGINE menu to Stage delay matrix, or to Both (parallel) to run it alongside the object engine. Then click Stage matrix on the Sources page.
How to set up the stage plan
- Choose the number of Inputs and Outputs (up to 64 each).
- Set Layout radius and click Speakers from layout to take the speaker positions from your loudspeaker layout.
- Drag the performers on the stage plan. Shift-drag to move speakers. Use the wheel to zoom.
- Adjust the stage plan rules (table below), then click Recompute all from stage plan.
| Control | What it does | Range / default |
|---|---|---|
| Crossfade | Time to move between positions or images | 0.01 to 10 s / 0.5 s |
| Precedence offset | Extra delay so the real source arrives first | 0 to 40 ms / 8 ms |
| Level rolloff | Level drop per doubling of distance | 0 to 12 dB/2x / 6 |
| Max level, Min level | Limits for the calculated cell levels | -20 to +10 dB / 0 dB; -60 to 0 dB / -40 dB |
| Reference dist. | Distance for 0 dB | 0.5 to 20 m / 3 m |
| Layout radius | Radius used by Speakers from layout | 2 to 40 m / 8 m |
| Distance attenuation | Reduces the level of distant speakers | On |
| Glide delay (pitch) instead of crossfade | Moves delays smoothly (with a pitch glide) instead of crossfading | Off |
Subwoofer and LFE outputs are never fed by the localisation matrix.
How to edit cells by hand
Click a cell, then:
- Drag to change its level.
- Shift-drag to change its delay (up to 500 ms).
- Double-click to switch it on or off.
Each cell shows its level in dB and its delay in ms. For the selected input you can set Input gain, Mute input, or Clear input.
How to store and recall images
An image definition stores the full set of cells for one input, such as "actor at the left door".
- Select an input and set up its position or cells.
- Click Store image.
- Later, select the image in the list and click Recall. The matrix crossfades to it over the Crossfade time.
- Use Update to overwrite the selected image with the current cells, or Delete to remove it.
Room engine: reflections, reverb and effects
The Room Engine page creates a realistic sense of space. It has three tabs: Room reverb, Send effects and Listener. The spatial view on the left can show the Reflection paths from each source.
Room reverb tab
At the top are three switches:
- Room engine on: switches the whole room engine on or off.
- Derive from room: when on, reverb time, size and pre-delay follow the room model (volume, materials and audience). Switch it off to set them by hand.
- Geometric reflections: early reflections are calculated per source from the walls, floor and ceiling, and filtered by each surface's material.
Choose a SPACE PRESET to start from a typical space: Small room, Studio live room, Chamber, Concert hall, Cathedral, Arena, Plate, Ambience or Outdoor slap.
LATE REVERBERATION
| Control | What it does | Range / default |
|---|---|---|
| SIZE | Size of the virtual space | 1 to 100 m / 12 m |
| RT60 | Mid-frequency decay time | 0.1 to 20 s / 1.6 s |
| LOW RT | Low-frequency decay as a multiple of RT60 | 0.2 to 3x / 1.2x |
| HIGH RT | High-frequency decay as a multiple of RT60 | 0.1 to 1.5x / 0.6x |
| PRE-DELAY | Gap before the reverb starts | 0 to 200 ms / 10 ms |
| LOW X-OVER | Crossover between the low and mid bands | 50 to 1000 Hz / 250 Hz |
| HIGH X-OVER | Crossover between the mid and high bands | 1000 to 12000 Hz / 4000 Hz |
| DIFFUSION | Density of the reverb | 0 to 1 / 0.7 |
| MODULATION | Slow movement in the tail, which reduces ringing | 0 to 1 / 0.3 |
| WIDTH | Spread of the reverb over the speakers | 0 to 1 / 1 |
| HIGH CUT | Low-pass filter on the reverb | 1000 to 20000 Hz / 12000 Hz |
| LOW CUT | High-pass filter on the reverb | 10 to 500 Hz / 60 Hz |
LEVELS AND EARLY REFLECTIONS
| Control | What it does | Range / default |
|---|---|---|
| EARLY | Level of the early reflections | -60 to +6 dB / -6 dB |
| CLUSTER | Level of the dense reflection cluster | -60 to +6 dB / -8 dB |
| TAIL | Level of the late reverb tail | -60 to +6 dB / -6 dB |
| EARLY SPREAD | Angular spread of the early reflections | 5° to 120° / 40° |
Note: When Derive from room is on, the size, RT60 and pre-delay you see come from the room model. Change the room or its materials to change them.
Send effects tab
There are two effect buses, SEND A and SEND B. Each source sends to them with its SEND A and SEND B levels on the Sources page (pre or post fader). The returns are spread with decorrelation over the speaker zone you choose.
| Control | What it does | Range / default |
|---|---|---|
| Active, Mute | Switch the bus on, or mute its return | Active on |
| TYPE | Algorithmic space or Convolution (impulse response) | Algorithmic space |
| SPACE | Algorithmic preset (same list as the room reverb) | Concert hall |
| Load impulse response... | Loads a WAV or AIFF impulse response (mono or stereo) for convolution | — |
| RETURN TO | All speakers, Frontal, Surround, Height / overhead or Ear level (no heights) | All speakers |
| RETURN | Return level | -60 to +12 dB / -6 dB |
| PRE-DELAY | Delay before the effect | 0 to 250 ms / 15 ms |
| LOW CUT, HIGH CUT | Filters on the send | 20 to 1000 Hz / 120 Hz; 1000 to 20000 Hz / 12000 Hz |
| WIDTH | Spread of the return | 0 to 1 / 1 |
| DECAY, SIZE, DIFFUSION | Algorithmic space settings | 0.1 to 20 s / 2 s; 1 to 100 m / 20 m; 0 to 1 / 0.8 |
A RETURN meter shows each bus's output level. The name of the loaded impulse response is shown, or "No impulse response loaded".
Listener tab
The LISTENER / PERSPECTIVE (RELATIVE TO THE MIX POSITION) controls move or turn the virtual listener. This changes every source's direction and distance, the early reflections and the binaural rendering.
| Control | Range / default |
|---|---|
| YAW | -180° to 180° / 0° |
| PITCH | -90° to 90° / 0° |
| ROLL | -90° to 90° / 0° |
| OFFSET X, OFFSET Y | -50 to 50 m / 0 m |
| OFFSET Z | -20 to 20 m / 0 m |
| HEAD RADIUS | 0.06 to 0.11 m / 0.0875 m (used for binaural) |
| MASTER | -60 to +12 dB / 0 dB |
Tip: For headphone monitoring, send listener yaw from a head tracker over OSC (
/listener/ypr).
Controlling a Yamaha console
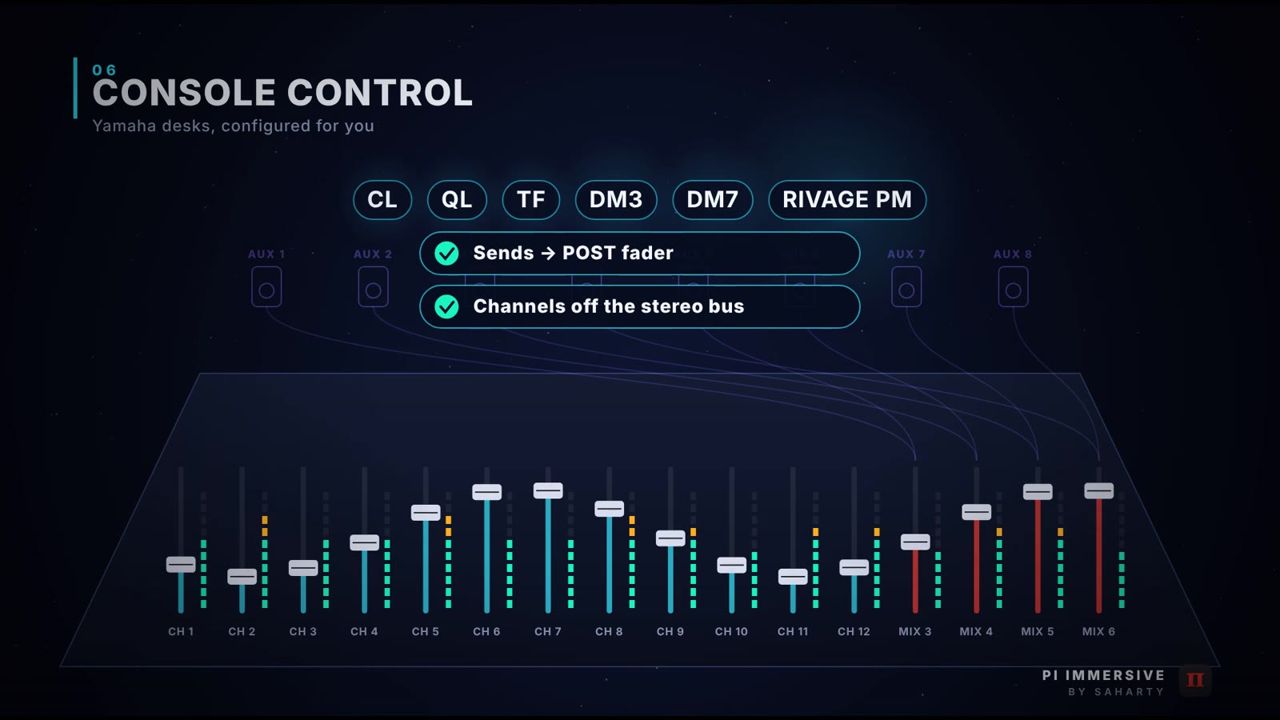
The Console page connects Pi Immersive to a Yamaha CL, QL, TF, DM3, DM7 or RIVAGE PM console over RCP (TCP port 49280). In this mode the console does the mixing: each loudspeaker is fed by one console mix (aux) bus, and Pi Immersive writes each source channel's send levels to those auxes from the panning law. This is updated 20 times a second.
How to connect
- Connect the computer to the console's network and give it a fixed IP address in the console's range.
- Open the Console page and turn on Control the console.
- Enter the CONSOLE IP (default
192.168.0.128) and PORT (default49280). - Under NETWORK ADAPTER, choose the wired adapter, or Automatic (let the system choose). Click Refresh to update the list.
- Click Apply / reconnect. The status shows Connected to ... with the console model and the local address, and the header CONSOLE LED lights.
If several adapters (for example Wi-Fi and Ethernet) are on the console's subnet, or none is, the page shows a warning and tells you what to do.
How to assign auxes to loudspeakers
- In the Loudspeaker -> console aux table, choose a Console aux (Mix 1 to Mix 72, or None) for each loudspeaker. You can also use the Aux column on Room Setup.
- Or click Assign auxes in order to assign consecutive mixes.
- The Status column shows live or offline for each assigned speaker, or "not fed".
If no speaker has an aux assigned, Pi Immersive falls back to consecutive mixes starting at FIRST AUX (FALLBACK), for AUX COUNT (FALLBACK) mixes.
Settings
| Control | What it does | Range / default |
|---|---|---|
| CHANNEL OFFSET | Console channel = source input channel + offset | 0 |
| FIRST AUX (FALLBACK) | First mix used when no aux is assigned | Mix 1 to Mix 72 / Mix 1 |
| AUX COUNT (FALLBACK) | Number of mixes in the fallback | 1 to 72 / 8 |
| MAX SEND LEVEL | Highest send level written | -40 to +10 dB / 0 dB |
| MIN SEND (BELOW = -INF) | Sends below this are set to -inf | -90 to -10 dB / -60 dB |
| Follow source gain on channel faders | Writes source gain to the channel faders | Off |
| Follow source mutes | Writes source mutes to the channel on/off | Off |
| Stereo pan follows azimuth | Sets each channel's stereo pan from its azimuth | Off |
| Auto-configure the console | Configures the console on connect and whenever sources or aux assignments change | On |
Auto-configuration
When Auto-configure the console is on, Pi Immersive:
- sets every source channel's sends to the speaker auxes to POST fader and switches them on,
- removes the source channels from the stereo and mono buses,
- removes the speaker auxes from the stereo bus.
Click Configure console now to do this immediately. On connect, Pi Immersive first checks which commands your console supports and lists the result for each step: OK, no reply (template used as is), or NOT available over RCP on this console with what to do by hand.
Command templates
If your console firmware uses different parameter paths, edit the templates under Command templates: SOURCE SENDS -> POST FADER (PrePost 0 = POST), SOURCE SENDS ON, SOURCE CHANNELS OFF STEREO BUS, SOURCE CHANNELS OFF MONO BUS and SPEAKER AUXES OFF STEREO BUS. Use {ch} and {mix} for 0-based numbers, or {ch1} and {mix1} for 1-based numbers. Leave a template empty to skip that step. Click Defaults to restore them.
Other tools
- Send channel names writes the source names (up to 8 characters) to the console.
- RAW RCP COMMAND sends any RCP line when you click Send.
- The Log shows connections, checks, errors and replies. Clear empties it.
Warning: Auto-configure changes your console's routing. Save a console scene before you connect for the first time.
Show control: MIDI, timecode and OSC
The Control page has three tabs: MIDI mapping, Timecode & automation and OSC.
MIDI mapping
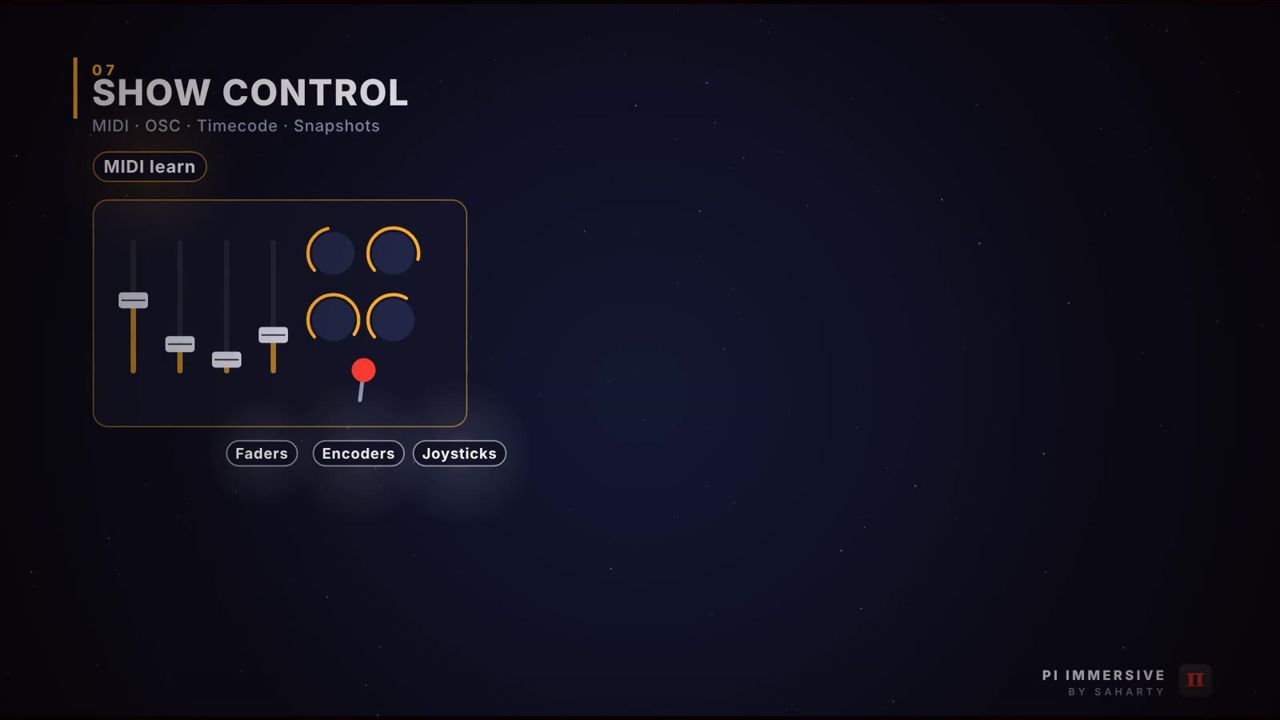
Turn on MIDI input to open all MIDI inputs. The inputs found are listed, and the last received message is shown. Click Rescan after connecting a new controller.
How to map a control with learn
- Click Add + learn, or click Learn on an existing row.
- Move the control on your MIDI controller. The page shows "LEARNING - move a control..." until a message arrives. The device, channel, message type and number are filled in.
- Choose the Function, Target, Min, Max and Mode.
How to map a joystick: click Add joystick X/Y. Pi Immersive adds an X / Y pair and learns both axes in turn.
| Column | Meaning |
|---|---|
| On | Enables the mapping |
| Name | Your name for it |
| Device | A specific MIDI input, or Any device |
| Ch | MIDI channel 1 to 16, or Any |
| Message | CC, CC 14-bit, Note, Pitch bend or Program change |
| No. | CC or note number |
| Function | What it controls (see below) |
| Target | sel (0) = the selected source or Stage Matrix input; n = source, Stage Matrix input or snapshot n |
| Min, Max | Range in the function's units (degrees, metres, dB...) |
| Mode | Absolute, Relative (encoder), Toggle, Momentary or Trigger |
| Inv | Inverts the direction |
Functions: Source X (joystick), Source Y (joystick), Source Z / height, Azimuth, Elevation, Distance, Spread, Gain, Room send, Send A, Send B, Mute, Solo, Select source #, Select next source, Select previous source, Master gain, Recall snapshot #, Next snapshot, Previous snapshot, Automation: record, Automation: play, Automation: stop, Listener yaw, Stage Matrix performer X and Stage Matrix performer Y.
Defaults restores the default mappings: CC 16 azimuth, CC 17 elevation, CC 18 distance, CC 19 spread and CC 7 gain, all on the selected source, plus Program change to recall a snapshot.
Tip: Use Relative (encoder) for endless encoders so the value never jumps.
Timecode & automation
Pi Immersive can record source movements and levels against LTC timecode and play them back, chasing the code.
How to set up timecode
- Set CLOCK SOURCE to LTC timecode from audio input or Internal clock.
- For LTC, choose the LTC AUDIO INPUT (Input 1 to 256). The frame rate (24, 25, 29.97 or 30 fps) is detected automatically.
- Check the display: "LTC locked" with the frame rate, and the LTC level in dBFS.
- Set SHOW START (TIMECODE OFFSET) by typing a timecode, or click Set to current LTC. Show time is the incoming LTC minus this offset.
How to record automation
- In ARMED FOR RECORDING (CLICK TO ARM), click the sources (and Stage Matrix inputs) you want to record. Use Arm all or Disarm for all sources.
- Turn on Global to also record master gain, listener yaw and snapshot recalls.
- Click Record, then roll timecode and move the armed sources.
- Click Stop.
Recording writes the armed sources' position, gain, mute and sends. Re-recording replaces only the time range you pass over; everything else keeps playing back.
How to play back: click Play. Playback follows the timecode, including jumps. With the internal clock, Rewind returns to zero.
The lane display shows azimuth, elevation, distance and gain for the selected source (±8 seconds around the current time). Clear sel. deletes the selected source's moves. Clear all moves deletes everything, after you confirm.
OSC
| Control | What it does | Default |
|---|---|---|
| OSC input | Listens for OSC messages | On |
| RECEIVE PORT | UDP port Pi Immersive listens on | 8000 |
| FEEDBACK HOST, FEEDBACK PORT | Where feedback is sent | 127.0.0.1, 9000 |
| Send feedback to controller | Sends source changes back | On |
| Accept ADM-OSC (/adm/obj/...) | Accepts ADM-OSC object messages | On |
Click Apply after changing ports. Click Send full state to send every source's state to your controller. The status line shows "Listening on UDP ...", the message count and the last message.
Snapshots and cues
Snapshots store the sources, the room and the listener, plus the master level. When you recall one, positions, gains, spreads, room and effect sends, source yaw, room size, RT60, early, cluster and tail levels and the master level all morph smoothly over the snapshot's recall time.
How to build a cue list
- Open Snapshots (Cmd/Ctrl+7).
- Set Recall time for new snapshots (0 to 60 s, default 0.5 s).
- Set up the scene, then click Store new (or Snapshots > Store snapshot). It is named Cue 1, Cue 2 and so on.
- Click Rename to name it, and Up / Down to reorder.
- Click Update to save the current scene into the selected snapshot, or Delete to remove it.
How to run cues
- Double-click a snapshot, or select it and click Recall.
- Press Space, or click Next >, to recall the next cue. Click < Prev for the previous one.
- Recall from MIDI (Program change by default), or from OSC with
/snapshot/recall n.
Each row shows its morph time.
Settings & preferences
Pi Immersive saves most settings inside the project, so each show keeps its own setup.
Saved in the project (.piimm): everything about the show: sources, speakers, room, room engine, output format, Stage Matrix, MIDI mappings, timecode and automation, console and OSC settings, and snapshots.
Saved on the computer: the audio device setup, in the settings file (macOS: ~/Library/Application Support/Saharty/Pi Immersive/; Windows: the Saharty\Pi Immersive folder inside %APPDATA%).
Project commands:
- New project starts with a default room, eight sources and the default MIDI mappings.
- Open... and Save As... use your Documents folder by default.
- If you have unsaved changes, Pi Immersive asks you to Save, Don't save or Cancel before closing or opening another project.
Keyboard shortcuts / remote control
Global keyboard shortcuts
| Keys | Action |
|---|---|
| Cmd/Ctrl+N | New project |
| Cmd/Ctrl+O | Open project |
| Cmd/Ctrl+S | Save |
| Shift+Cmd/Ctrl+S | Save As |
| Cmd/Ctrl+1 to Cmd/Ctrl+7 | Go to page 1 to 7 |
| Space | Recall the next snapshot |
Spatial view (click the view first to give it focus)
| Keys / mouse | Action |
|---|---|
| 1 / 2 / 3 / 4 | Top / Front / Side / 3D view |
| 0 | Reset the view |
| Left / Right arrow | Azimuth of the selected source, 1° (Shift: 10°) |
| Up / Down arrow | Elevation of the selected source, 1° (Shift: 10°) |
| Page Up / Page Down | Distance of the selected source, 0.1 m (Shift: 1 m) |
| M / S / L | Mute / Solo / Lock the selected source |
| Delete or Backspace | Remove the selected source |
| Drag | Move a source (on Room Setup: move a speaker or the mix position) |
| Alt+drag | Change distance only |
| Shift+drag on a speaker | Move a speaker (Sources page) |
| Wheel over a source | Elevation (Top view) or distance (other views) |
| Shift+wheel over a source | Spread |
| Wheel elsewhere | Zoom |
| Double-click empty space | Add a source there |
| Drag / double-click in 3D | Orbit / reset the view |
| Right-click | Source or speaker menu |
OSC address reference
The same list is shown on the OSC tab (Help > OSC / MIDI reference). n is the 1-based source index.
| Group | Addresses |
|---|---|
| Source position | /source/n/aed az el dist, /source/n/xyz x y z (m), or one value with /az, /el, /dist, /x, /y, /z |
| Source level and shape | /gain dB, /mute 0/1, /solo 0/1, /spread deg, /yaw deg, /directivity 0..1, /lfe dB |
| Source room | /source/n/room/send, /early, /cluster, /tail dB, /room/on 0/1 |
| Source other | /law 0..7 (menu order), /doppler 0/1, /name string |
| ADM-OSC | /adm/obj/n/azim, elev, dist, aed, xyz, x, y, z (normalised: 1.0 = 10 m), gain (linear), w (spread), mute |
| Room | /room/size m, /room/rt60 s, /room/early, /cluster, /tail dB, /room/predelay ms, /room/on 0/1 |
| Listener | /listener/ypr yaw pitch roll, /listener/xyz x y z |
| Master | /master/gain dB, /master/mute 0/1 |
| Snapshots | /snapshot/recall n |
| Stage Matrix (input n) | /matrix/n/xyz x y z, /matrix/n/image i, /matrix/n/cell out dB ms, /matrix/n/gain dB, /matrix/n/mute 0/1 |
Feedback: when a source moves, Pi Immersive sends /source/n/aed, /xyz, /gain, /mute and /spread to the feedback host. With ADM-OSC on, it also sends /adm/obj/n/aed and /xyz with normalised values. Locked sources ignore position messages.
Tips for live/studio use
- Start from the room. Describe the room and materials before you place speakers. The format advisor, the alignment and the room engine all depend on it.
- Leave alignment on. Speaker time / level alignment delays nearer speakers to arrive with the farthest one and matches levels at the mix position, taking line-array behaviour into account. Use the Trim and Delay columns only for fine adjustments on top.
- Keep motion smoothing reasonable. About 30 ms avoids zipper noise on fast moves. Raise it if a MIDI controller or OSC sender produces stepped movement; lower it if moves feel late.
- Use Lock position for fixed sources. Locked sources ignore the mouse, MIDI, OSC and the arrange commands, so a stray move can't shift the lead vocal.
- Theatre: use Stage delay matrix so voices localise to the performers, with a few milliseconds of Precedence offset.
- Console mode: use a wired network adapter. If Wi-Fi and Ethernet are both on the console's subnet, traffic may leave through Wi-Fi. Select the wired adapter or turn Wi-Fi off.
- Pre-show check: run Cycle test on the loudspeakers, then Pink noise on a source, before doors open.
Troubleshooting
| Symptom | Cause | Fix |
|---|---|---|
| No sound, and the status bar says "ENGINE STOPPED - activate Pi Immersive Live to start it" | The app isn't activated, or the notice period is over | Open Help > Licence... and activate, or start the free trial. The engine then starts by itself. |
| No sound, and the ENGINE button reads OFF | The engine was stopped | Click ENGINE to start it. |
| "The audio device could not be opened" at launch | The last device is disconnected or in use | Choose a device on I/O Setup. |
| Input meters don't move | Wrong channels enabled, or (macOS) microphone permission refused | Enable the inputs on I/O Setup. On macOS, allow Pi Immersive in Privacy & Security > Microphone. |
| A source is silent | Wrong INPUT CHANNEL, source muted, another source soloed, or gain at -60 dB | Check the input, Mute / Solo, and Sources > Clear all solos. |
| Moves sound stepped | Motion smoothing too short for the controller rate | Raise MOTION SMOOTHING on I/O Setup. |
| Convolution bus is silent | No impulse response loaded, or bus muted / inactive | Click Load impulse response...; check Active and Mute. |
| Console: "no answer within ... (wrong IP, cable, or adapter?)" | Wrong IP, cable or adapter | Check the IP, cabling and NETWORK ADAPTER. Give the computer a fixed IP in the console's range. |
| Console: "Several adapters ... are on the console's subnet" | Wi-Fi and Ethernet on the same subnet | Pick the wired adapter or turn Wi-Fi off. |
| OSC messages are ignored | OSC input off, wrong port, or a firewall | Turn on OSC input, check RECEIVE PORT, click Apply, allow the app through the firewall. |
| MIDI controller does nothing | MIDI off, device not found, or mapping disabled | Turn on MIDI input, click Rescan, check the On column. |
| Licence "active on another computer" | The key is used elsewhere | Choose Move it here, or deactivate the other computer from your account. |
Specifications & system requirements
Specifications
| Item | Value |
|---|---|
| Version | 2.0.2 |
| Type | Standalone application (macOS and Windows) |
| Engine | Object-based spatialisation, Stage delay matrix, or both in parallel |
| Audio I/O | Up to 256 x 256 channels |
| Sources | Up to 64 |
| Loudspeaker outputs | Up to 64 |
| Panning laws | 8 |
| Output formats | Loudspeakers, binaural (HRTF), Ambisonics 1st to 7th order (ACN / SN3D) |
| Room model | 7 shapes, 22 materials, early reflections up to 2nd order, RT60 estimate |
| Reverb and effects | 16-line late reverb, 2 effect buses |
| Stage delay matrix | Up to 64 x 64, delays up to 500 ms |
| Control | Yamaha RCP, MIDI, LTC (24 / 25 / 29.97 / 30 fps), OSC, ADM-OSC, snapshots |
| Project file | .piimm |
System requirements
| macOS minimum | macOS recommended | Windows minimum | Windows recommended | |
|---|---|---|---|---|
| OS | macOS 11 Big Sur | Latest macOS | Windows 10 64-bit | Windows 11 64-bit |
| Processor | Apple silicon or Intel (Universal) | Apple M1 Pro or better | Intel Core i5 / AMD Ryzen 5, 4 cores | Intel Core i7 / AMD Ryzen 7, 8 cores |
| Memory | 8 GB | 16 GB | 8 GB | 16 GB |
| Disk | 100 MB | 100 MB | 100 MB | 100 MB |
| Audio | Core Audio interface | Multichannel MADI / network audio interface | ASIO driver | Multichannel MADI / network audio interface |
| Control | — | OSC / MIDI controller, LTC source | — | OSC / MIDI controller, LTC source |
Support
- Email: support@pi-ware.com
- Website: www.pi-ware.com
- Video tutorials: youtube.com/@pibysaharty
- Your account and licences: pi-ware.com/account
Please include your version (Help > About Pi Immersive), operating system and audio interface.
Pi Immersive Live is made by Pi by Saharty.